Use this page to grant people access through a Raily-hosted sign-in. You add each person by email and choose which endpoints they can reach. If an endpoint uses your own identity provider, manage admission there. Raily lists people after their first successful sign-in, but it does not add another per-user grant. For scripts and backend services, create an API key instead. Endpoint users are not Raily team members. Team members sign in to the Raily app to manage sources and endpoints. Endpoint users only need access to the endpoint.

Choose where to manage access

The steps for adding, changing, and removing access below apply to Raily-hosted sign-in.

Open the user list

  1. In the sidebar, go to Security and select Access.
  2. On the Sign-in providers tab, find the provider the person should use.
  3. Open the row menu. Select Manage users for Raily-hosted sign-in or View synchronized users for your own identity provider.
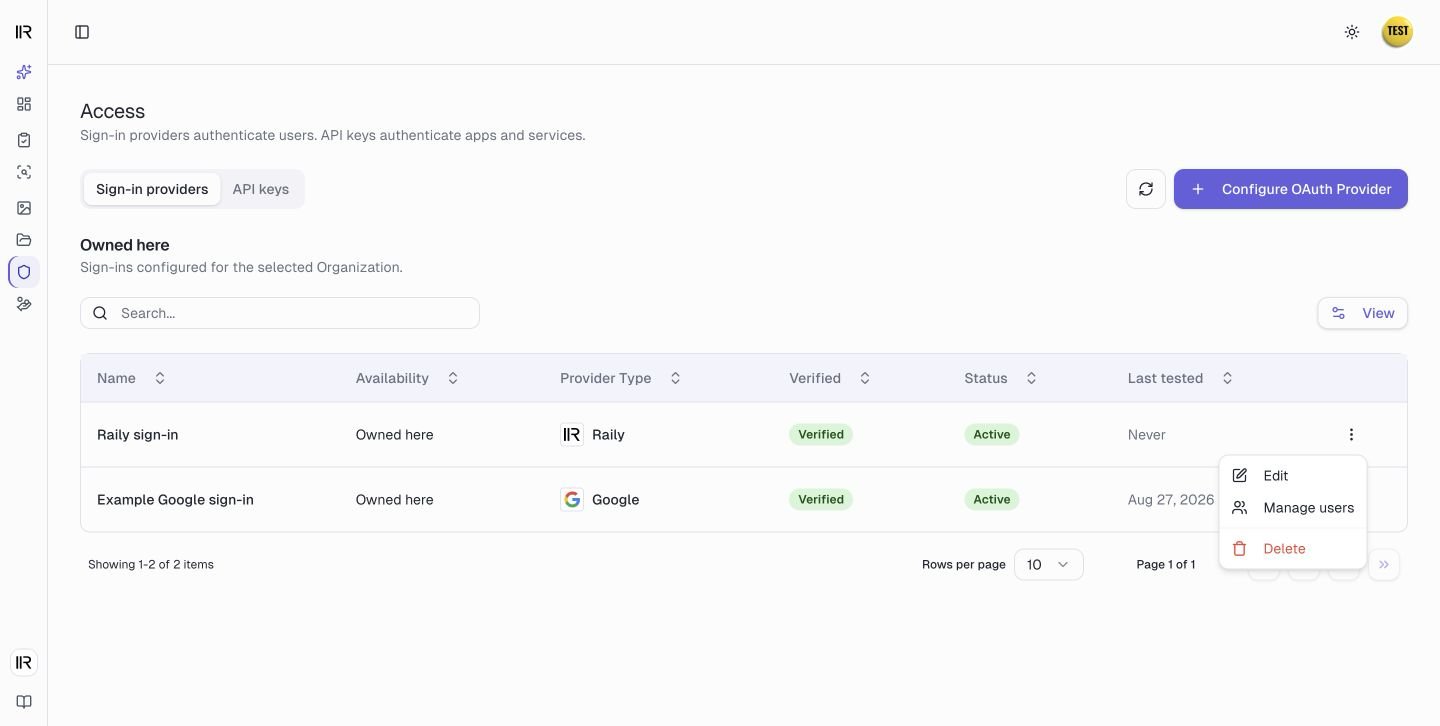
A provider row with its menu open, showing Manage users
Each sign-in provider has its own list of users. Adding someone under one provider does not give them access to endpoints that use a different provider.

Read the user list

The three cards at the top count Direct users (managed in the Organization you have selected), Effective users (active access, direct and inherited), and Endpoints covered.
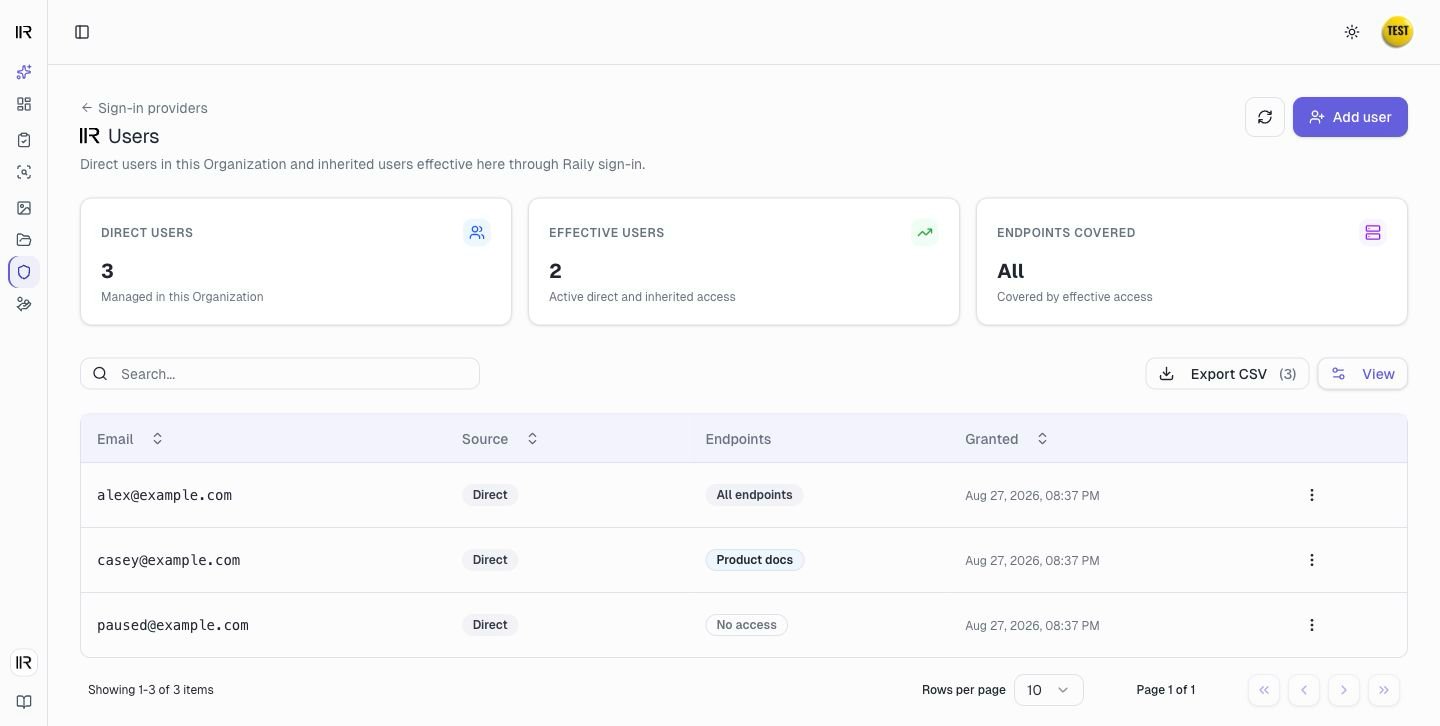
The Users list for a sign-in provider, showing direct users, effective users, and endpoints covered
In the table, the Source column tells you where a person’s access comes from:
  • Direct means the access was granted in the Organization you are viewing. You can change or remove it here.
  • An Organization name means the access was granted higher up and is inherited. Open that Organization to change it.
  • Synchronized here means the person came from your own identity provider.
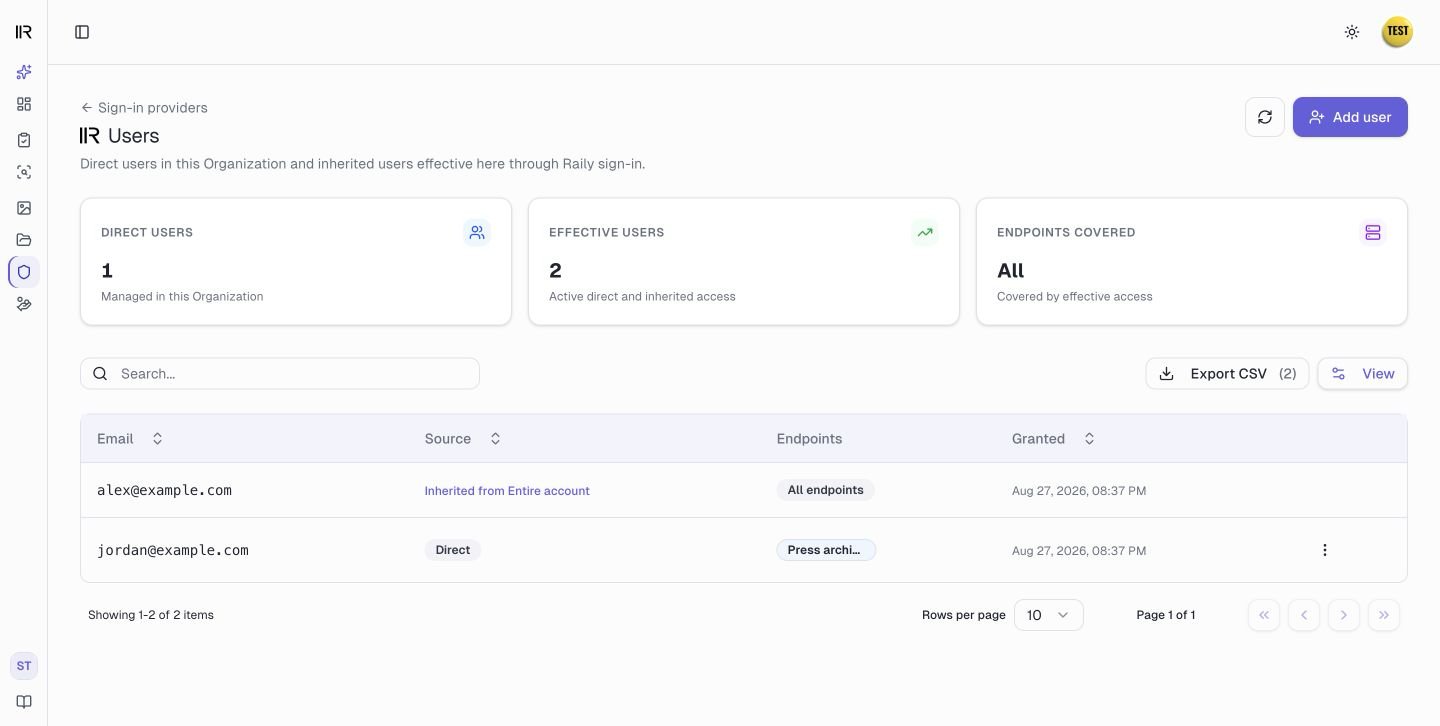
Only Direct rows have a row menu. Inherited access is managed where it was granted.
A child Organization's Users list with one user inherited from Entire account and one direct user

Before you add a user

To add someone to a Raily-hosted sign-in, you need:
  • A paid plan and permission to manage users in the selected Organization. Account Owners, Administrators, and Editors have this permission, including through an inherited role.
  • A Raily-hosted sign-in.
  • At least one endpoint in the selected Organization that uses that sign-in.
  • The email address the person will use.

Add a user

The Add user dialog takes you through Add user, Review access, and Access granted without opening another page.
1

Enter the user and endpoint scope

Select Add user at the top right of the Users list. Enter the address the person will sign in with. If they use a different address later, they get no access.Pick All endpoints to cover current and future endpoints that use this sign-in in the selected Organization and its descendants, or select named endpoints from the list.
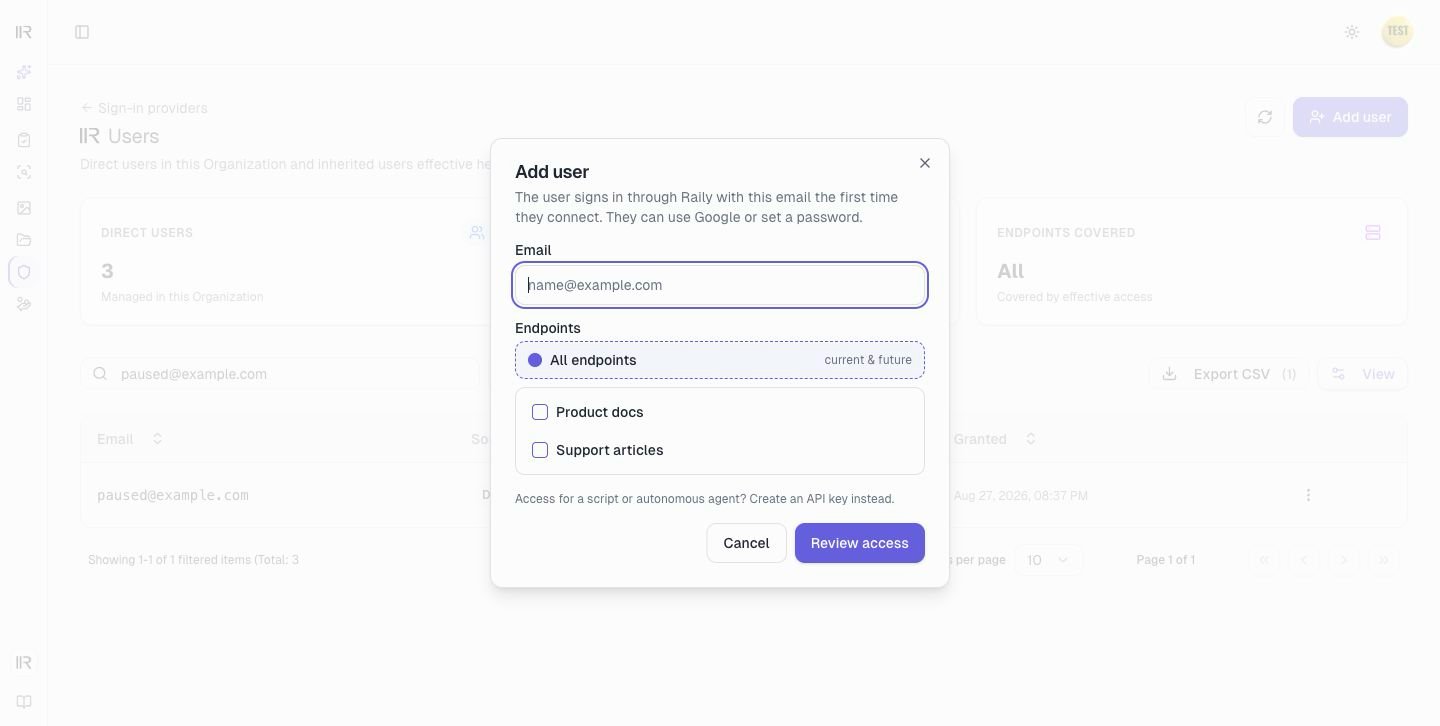
The Add user step of the dialog, with the email field and the endpoint scope picker
Choosing All endpoints also covers future matching endpoints in the selected Organization and its descendants. Each endpoint still has its own connect link.Select Review access. Nothing is granted yet.
2

Review and grant access

Check the Email, Organization, Sign-in, and Endpoints rows. If the person already has access through this sign-in in this Organization or one above it, the dialog marks them as an existing subscriber and says access will be added for the selected Organization.
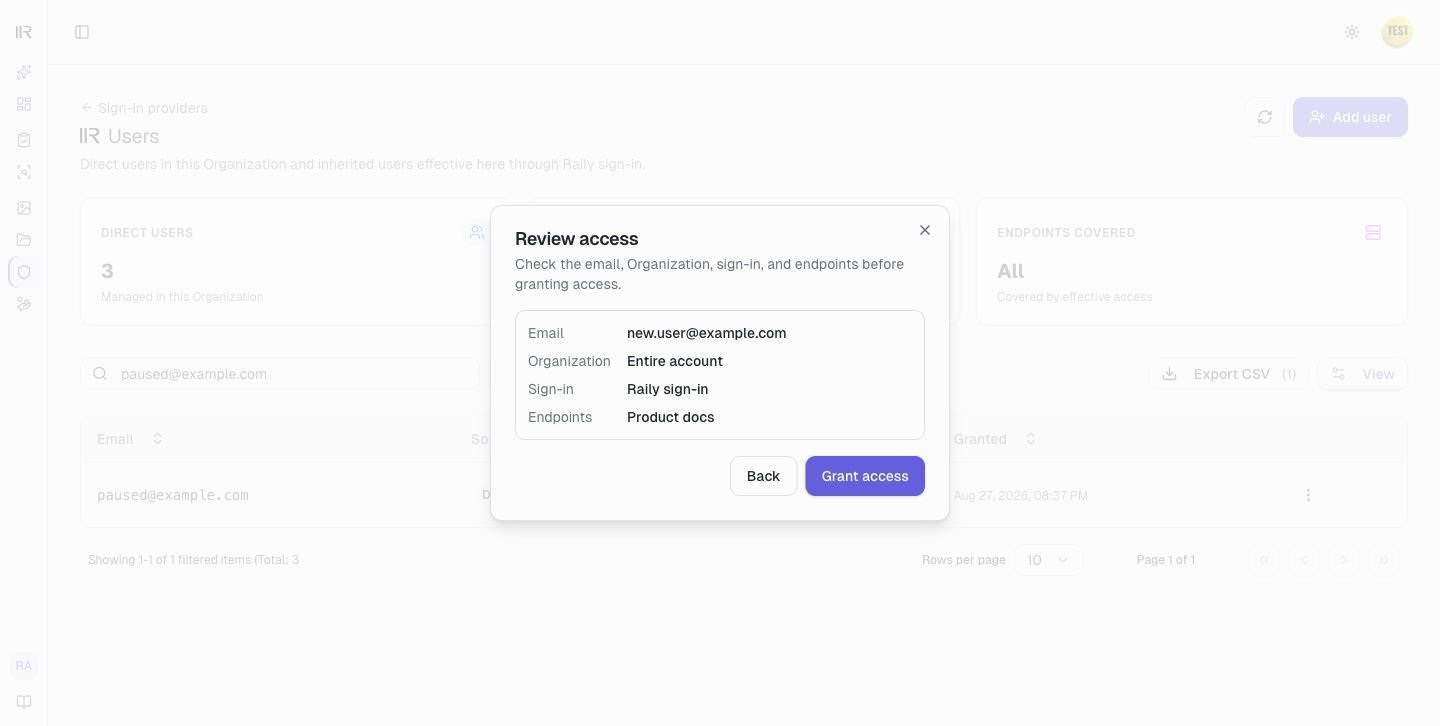
The Review access step, summarizing email, Organization, sign-in, and the granted endpoint
Check the Organization carefully. An All endpoints grant covers matching endpoints in that Organization and its descendants. A named-endpoint grant stays limited to those endpoints. Neither reaches a parent Organization or a sibling.Select Grant access. Use Back if you need to change the email or endpoint scope.
3

Copy and send the connect link

After the grant succeeds, the dialog shows a Connect link for each current endpoint in the selected Organization that the direct grant covers.
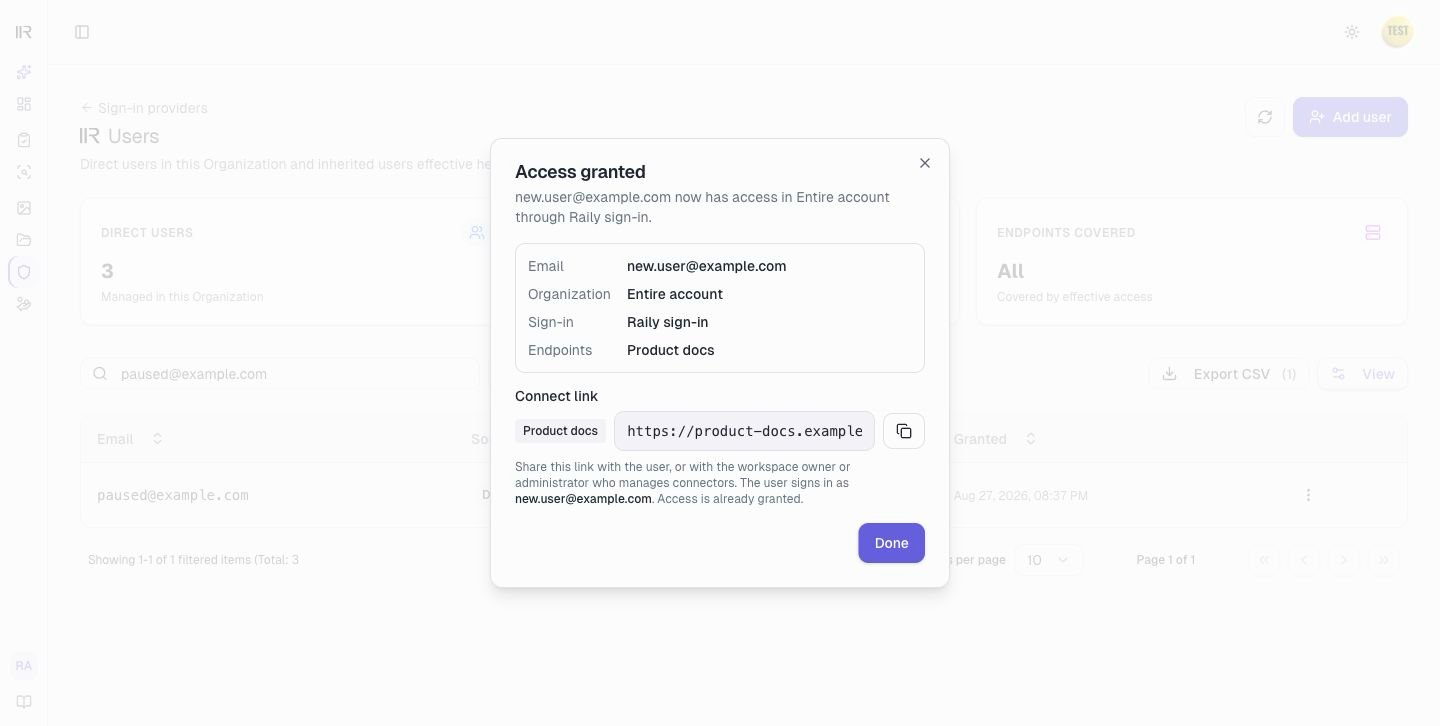
The Access granted step, showing the connect link for the granted endpoint
Send the link to the person, or to the workspace owner or administrator who configures connectors. The link is the MCP server URL added to Claude or ChatGPT. The person signs in with the email you granted.An All endpoints grant can also cover matching endpoints in descendant Organizations. Copy those links from the descendant endpoint pages. Future matching endpoints are covered automatically, but each endpoint still has its own connect link that must be added to the AI client or workspace.

Connect to Claude

Send this to someone connecting from Claude.

Connect to ChatGPT

Send this to someone connecting from ChatGPT.

Change someone’s access

1

Open Manage access

Open the row menu on a Direct user, then select Manage access.
2

Change the endpoint selection

Choose the endpoints the person should be able to reach.
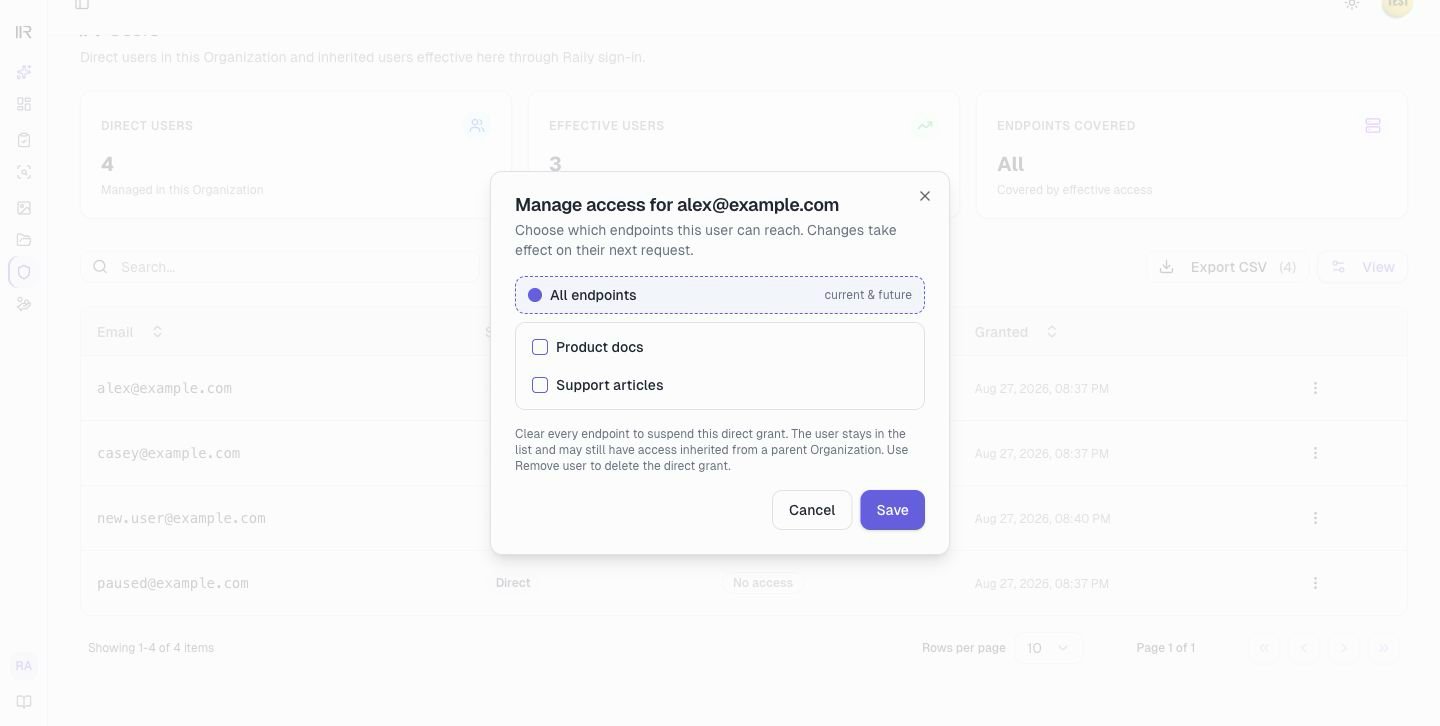
The Manage access dialog, with the endpoint scope picker for an existing user
3

Save the change

Select Save. The change takes effect on the person’s next request.
To suspend someone without removing them, clear every endpoint checkbox and save. They stay in your list with No access and you can grant endpoints again later. This suspends the direct grant here; it does not override access they inherit from a parent Organization.

Remove a user

1

Open the confirmation

Open the row menu on a Direct user, then select Remove user.
2

Confirm the removal

Check that the dialog names the correct person.
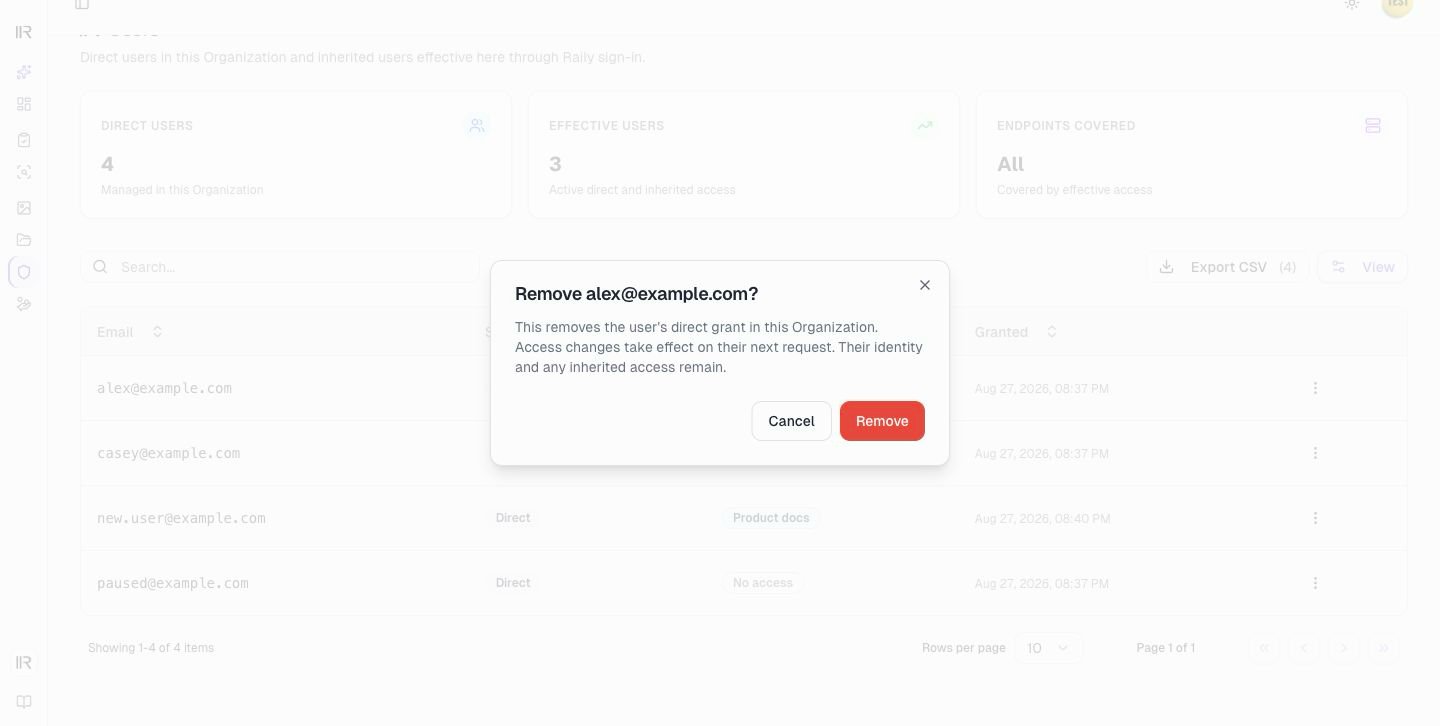
The remove confirmation dialog, warning that access ends on the next request
Select Remove. The person loses the direct grant on this sign-in on their next request. Their identity and any access inherited from a parent Organization are not affected.

Troubleshooting

Add user is locked. Your plan does not include user management. Upgrade to add users. Add user opens a dialog with no form in it. No endpoint in the selected Organization uses this sign-in provider, so there is nothing to grant there. The dialog says so and offers only Close. Create an endpoint on this sign-in first, then come back. The list says users are synchronized and there is no Add user button. This provider is your own identity provider. Add the person there. They appear in Raily after their first successful sign-in. Authorization fails after the person signs in. Confirm that they used the email address you granted and that their grant covers this endpoint. The person connects successfully, but every search is empty. Ask a question you know the endpoint’s source can answer. If the result is still empty, check the source data, indexing status, saved search configuration, and query. The person reaches one endpoint but not another. First confirm that the other endpoint uses this sign-in. If it is in the selected Organization, open Manage access and add it. If it is in a descendant Organization, choose All endpoints here or grant access in the Organization that owns the endpoint. Access was granted but the endpoint is still out of reach. Check the Organization and scope separately. If the grant is in the wrong branch, grant access in the Organization that owns the endpoint or in one of its ancestors. Then include the endpoint by naming it in its owning Organization, or choose All endpoints on a grant in that Organization or an ancestor. The row has no menu. The access is inherited from a parent Organization. Open the Organization named in the Source column and change it there.