

What you need
Before you start, get two things from your Raily administrator:- Your connect link. This is the MCP server address for the endpoint you should reach. For Raily-hosted sign-in, the administrator can copy it after granting access. An external provider does not use a Raily user grant.
- Confirmation of how you sign in. For a Raily-hosted sign-in, use the email address your administrator granted. For a bring-your-own sign-in, use your normal account with that identity provider. A different account may be refused.
Turn on developer mode
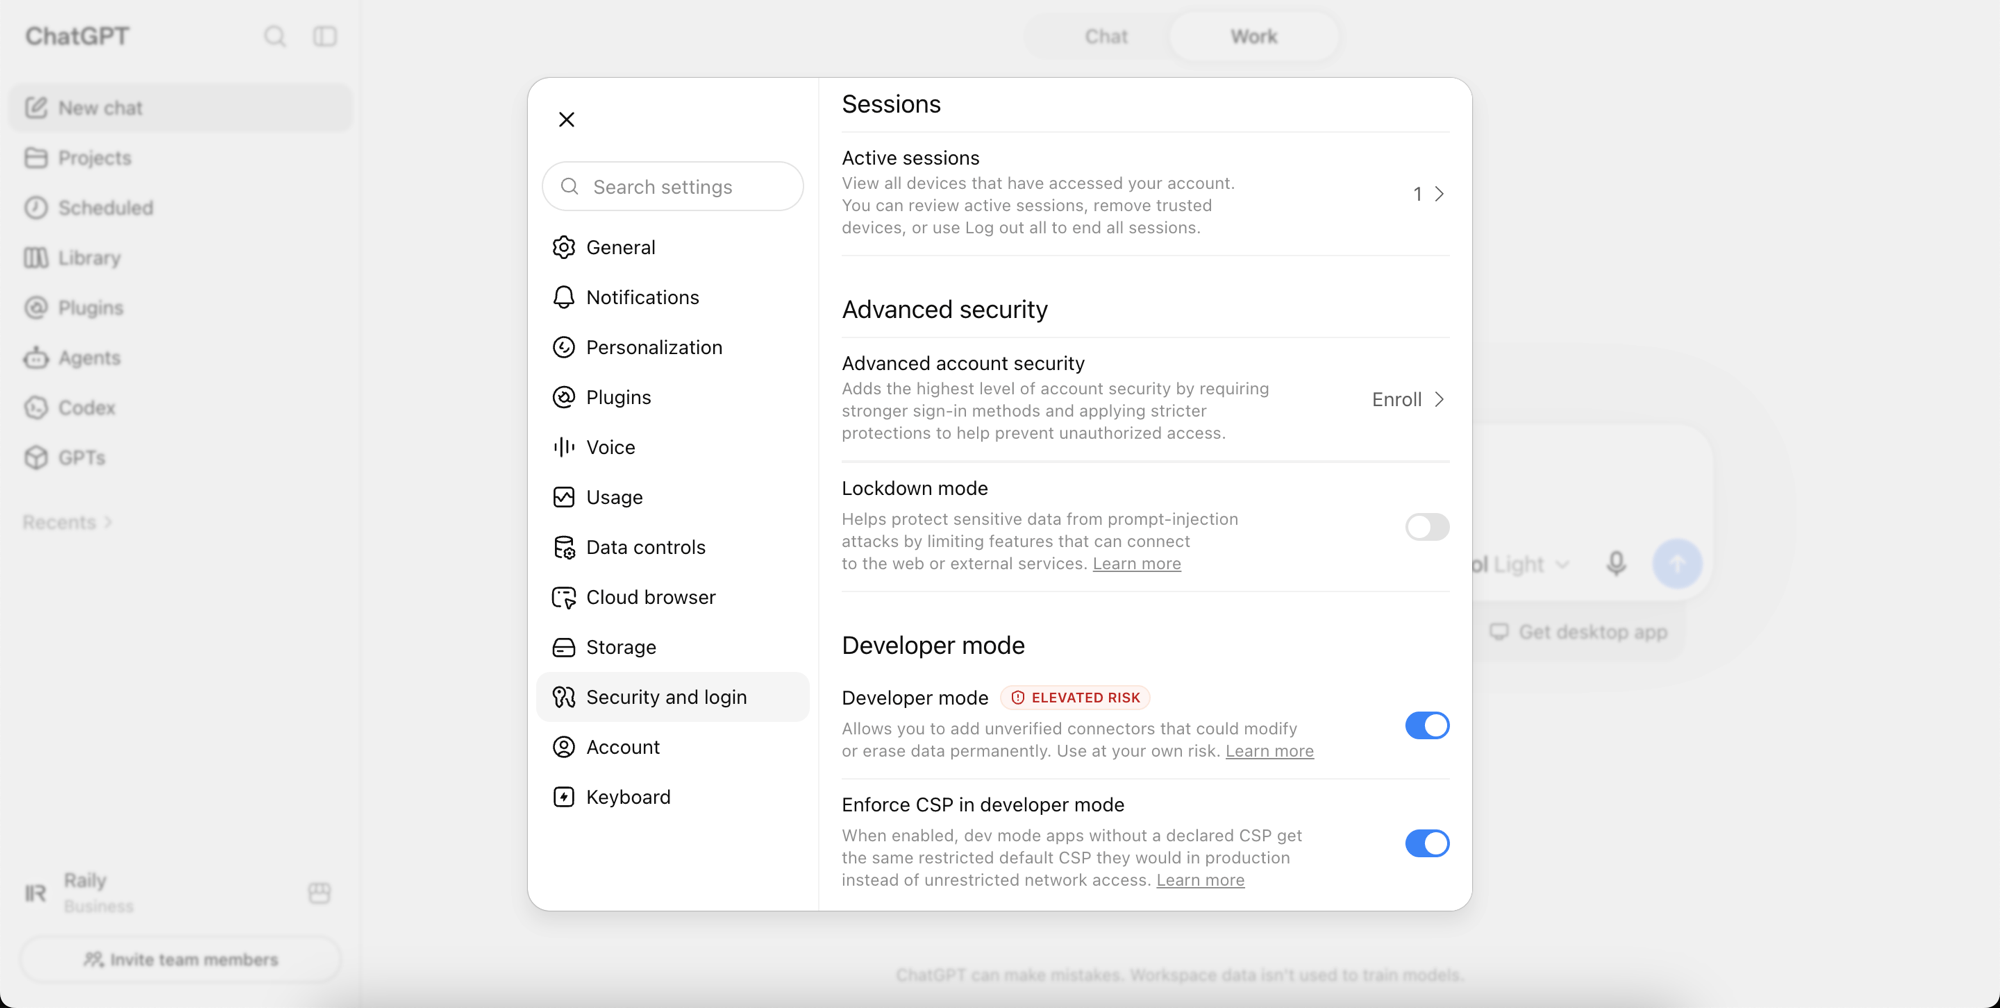
- Open Settings, then Security and login.
- Switch Developer mode on.
- Leave Enforce CSP in developer mode on.
Add the plugin
1
Open Plugins
Select Plugins in the sidebar, then the + at the top right of the page.
2
Name it
Enter a Name and a short Description you will recognize later. The icon is optional.
3
Paste your connect link
Leave Connection on Server URL, and paste your connect link into the field below it.
4
Keep Authentication set to OAuth
Raily identifies you through your sign-in. OAuth is already selected, so do not change it.
5
Confirm the warning
ChatGPT warns that custom MCP servers introduce risk. Read it, then tick I understand and want to continue. Create stays greyed out until you do.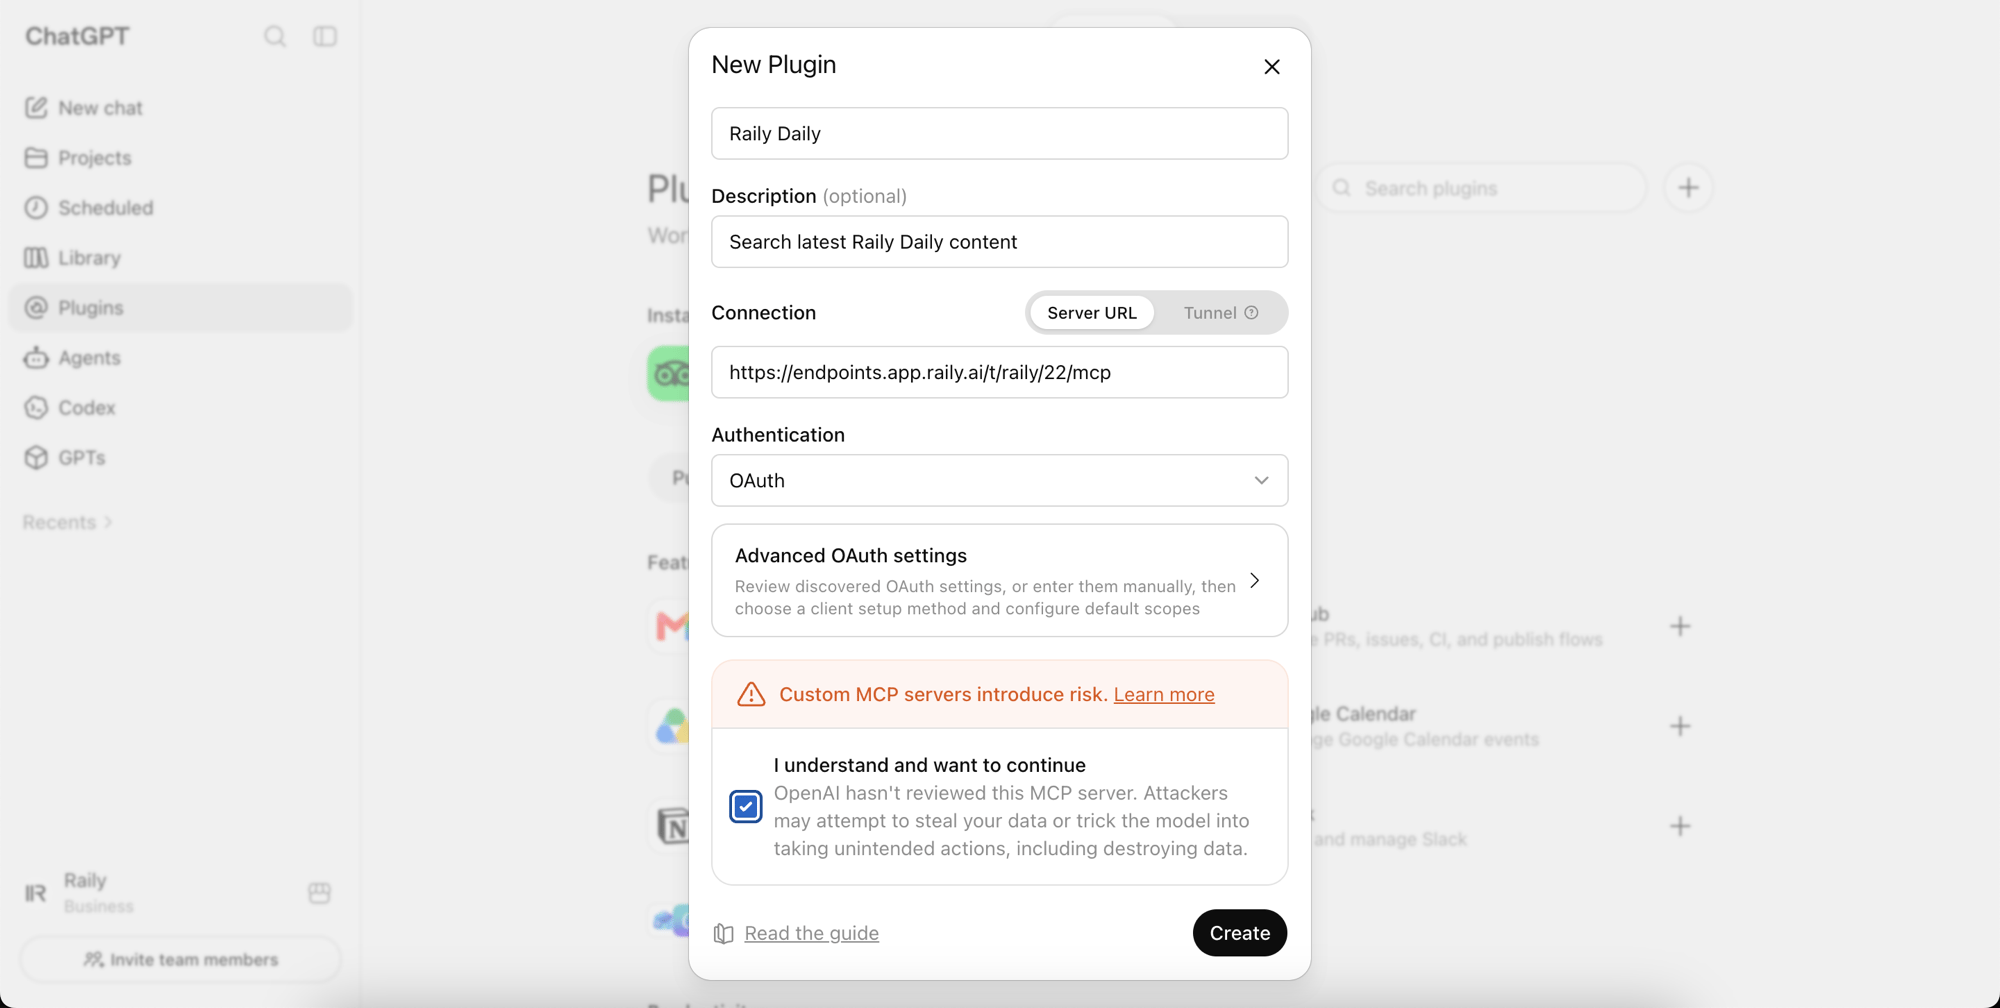
6
Select Create
ChatGPT connects to the server and hands you over to Raily to sign in.
You can check the link before you create anything. Once you paste a working address, the text under Advanced OAuth settings stops asking for a valid MCP server URL and offers to review the settings it found. If it does not change, the link is wrong or the server cannot be reached.
Sign in to Raily
After you select Create, ChatGPT starts the connection. What appears after the first Raily screen depends on the endpoint’s sign-in provider.1
Start the sign-in
ChatGPT shows Add your plugin name to ChatGPT, with its own notes on permissions and data. Select Sign in with your plugin name.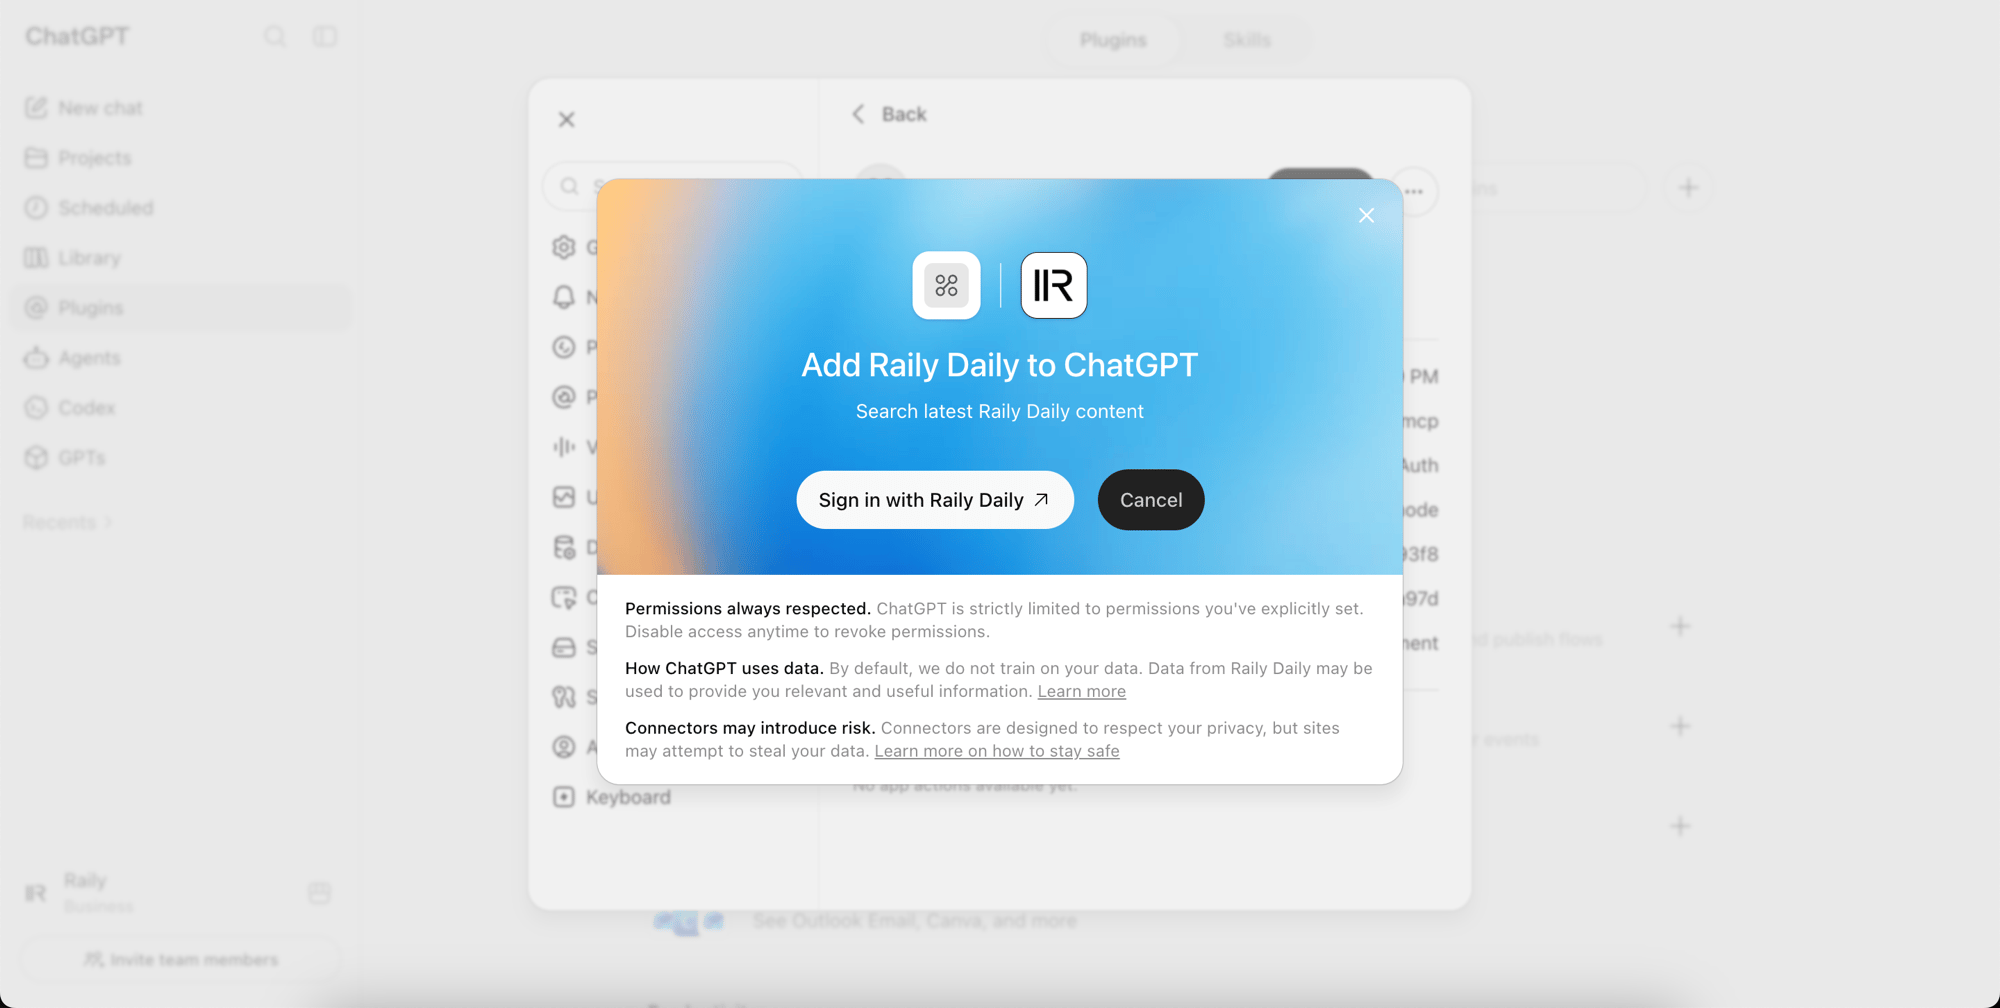
2
Confirm the connection
The first Raily screen is headed Connect ChatGPT to the Organization name shown to users. It lists what ChatGPT will be able to do: view your email address, view your basic profile, and remember the connection. Check the client and Organization, then select Continue. Cancel stops the connection.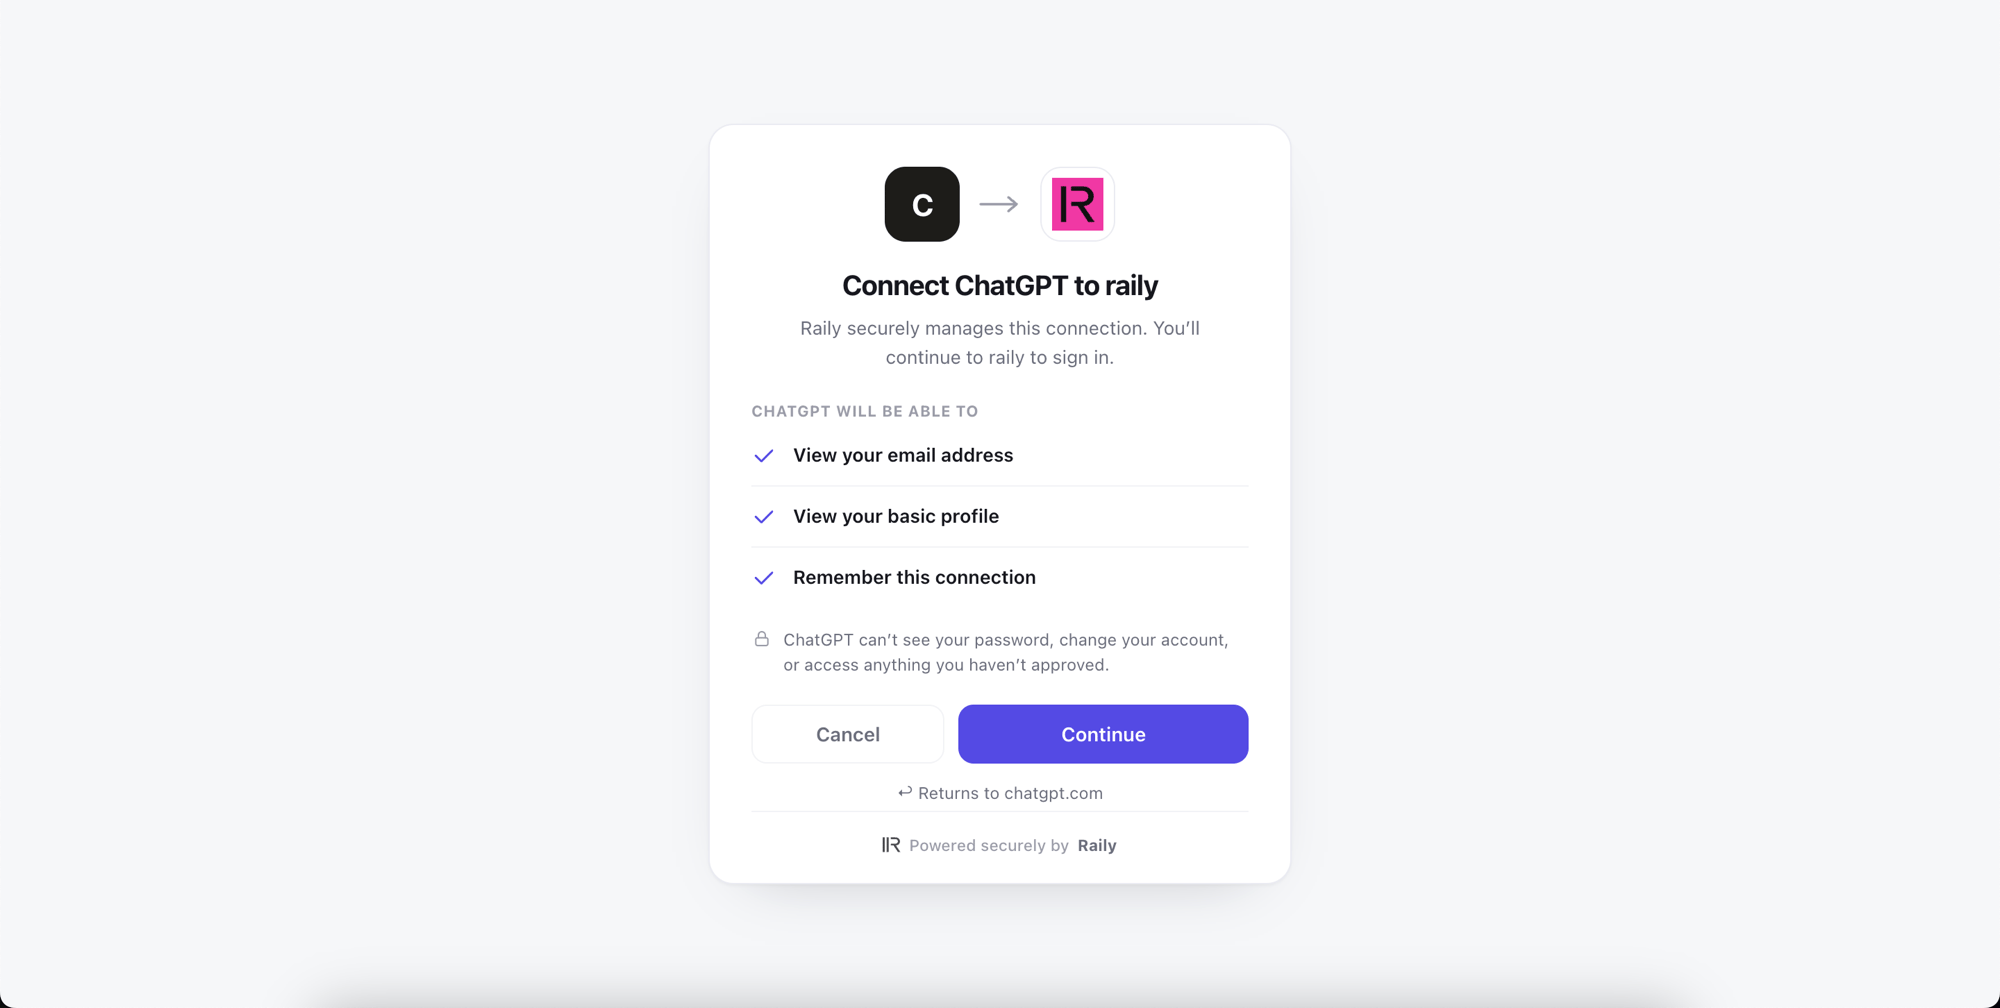
3
Continue with the sign-in provider
For a Raily-hosted sign-in, use the granted email address. A different account may be refused.For a bring-your-own sign-in, Raily sends you to the identity provider configured for the endpoint. Use your normal account there and complete any prompt that provider shows. Your provider controls who may continue.
4
Finish a Raily-hosted sign-in
This step appears only for a Raily-hosted sign-in. The second Raily screen shows Signed in as your address and what the plugin will be able to do, including searching your endpoint. If the address is wrong, use Not you? Switch account rather than continuing. Otherwise select Allow access.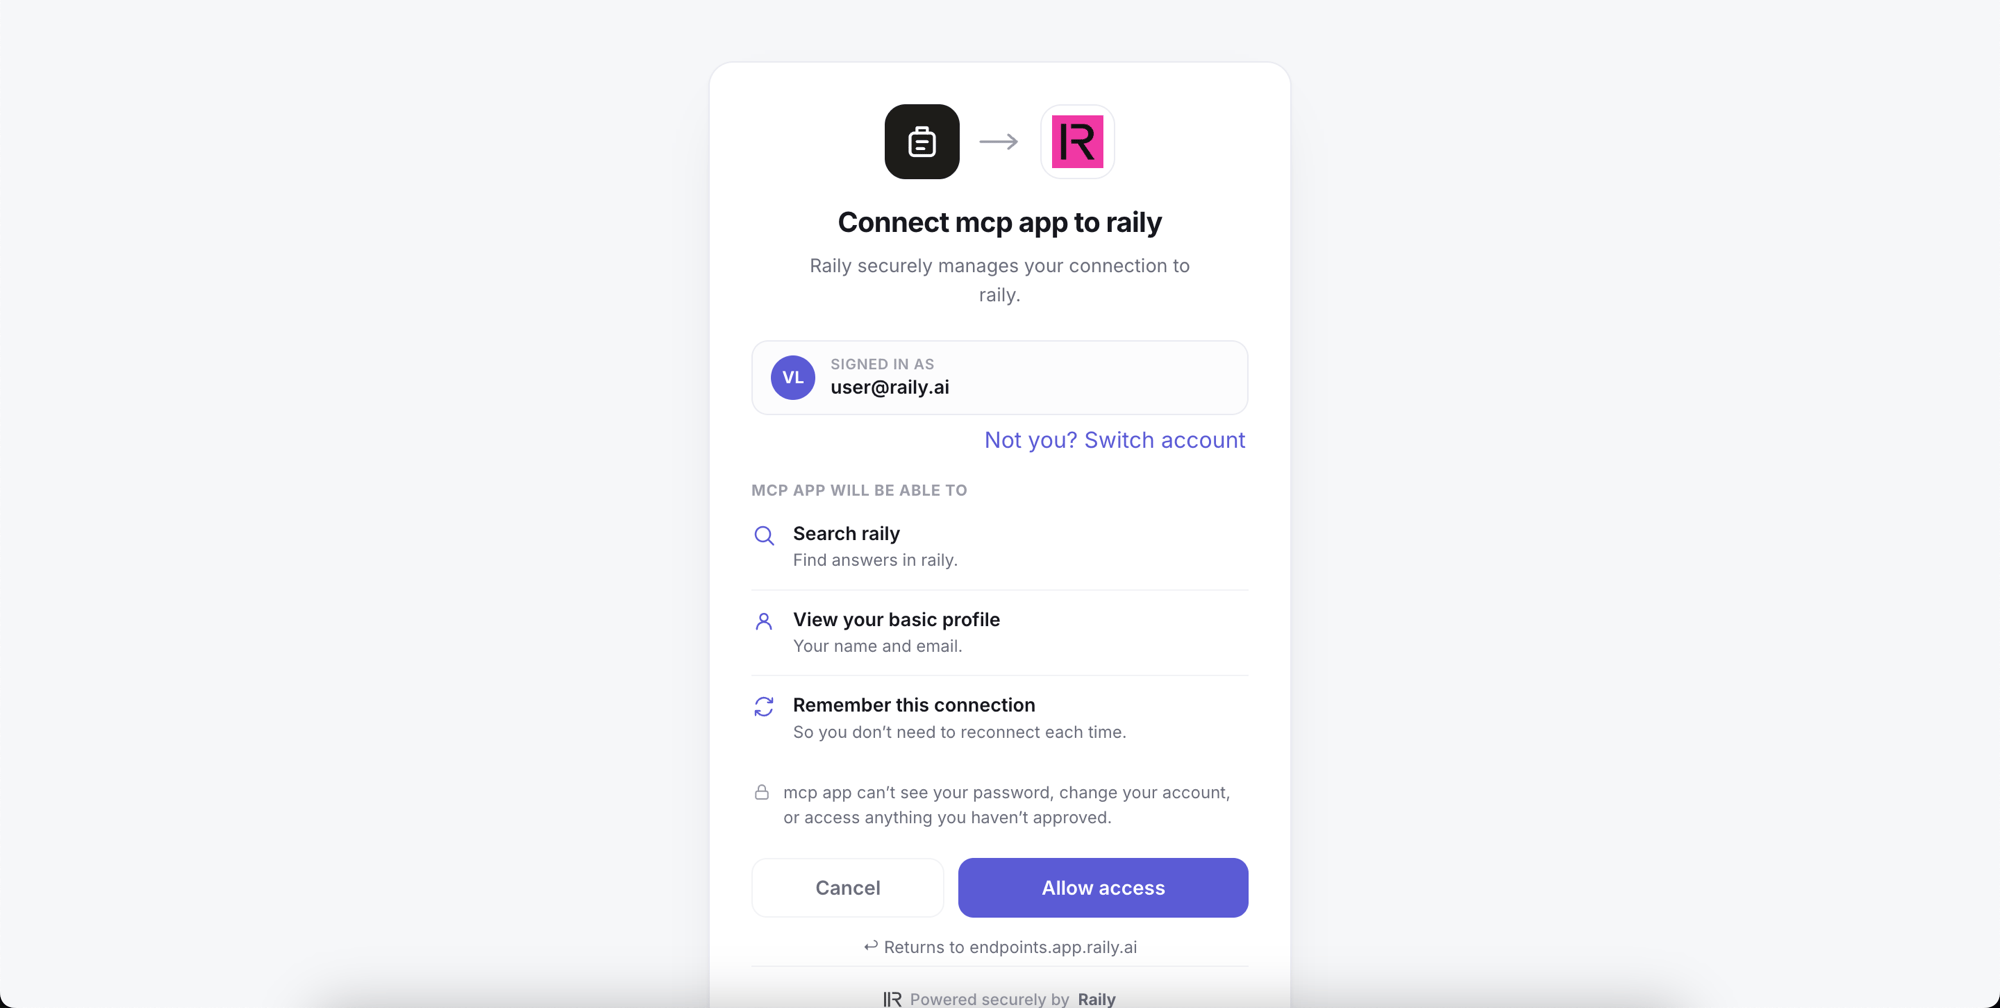
The consent flow lets ChatGPT use the endpoint as your signed-in identity. It does not create or widen a Raily-hosted endpoint grant. Check the Organization name and signed-in account before you continue.
Check the connector
ChatGPT confirms that the plugin is installed and opens its card.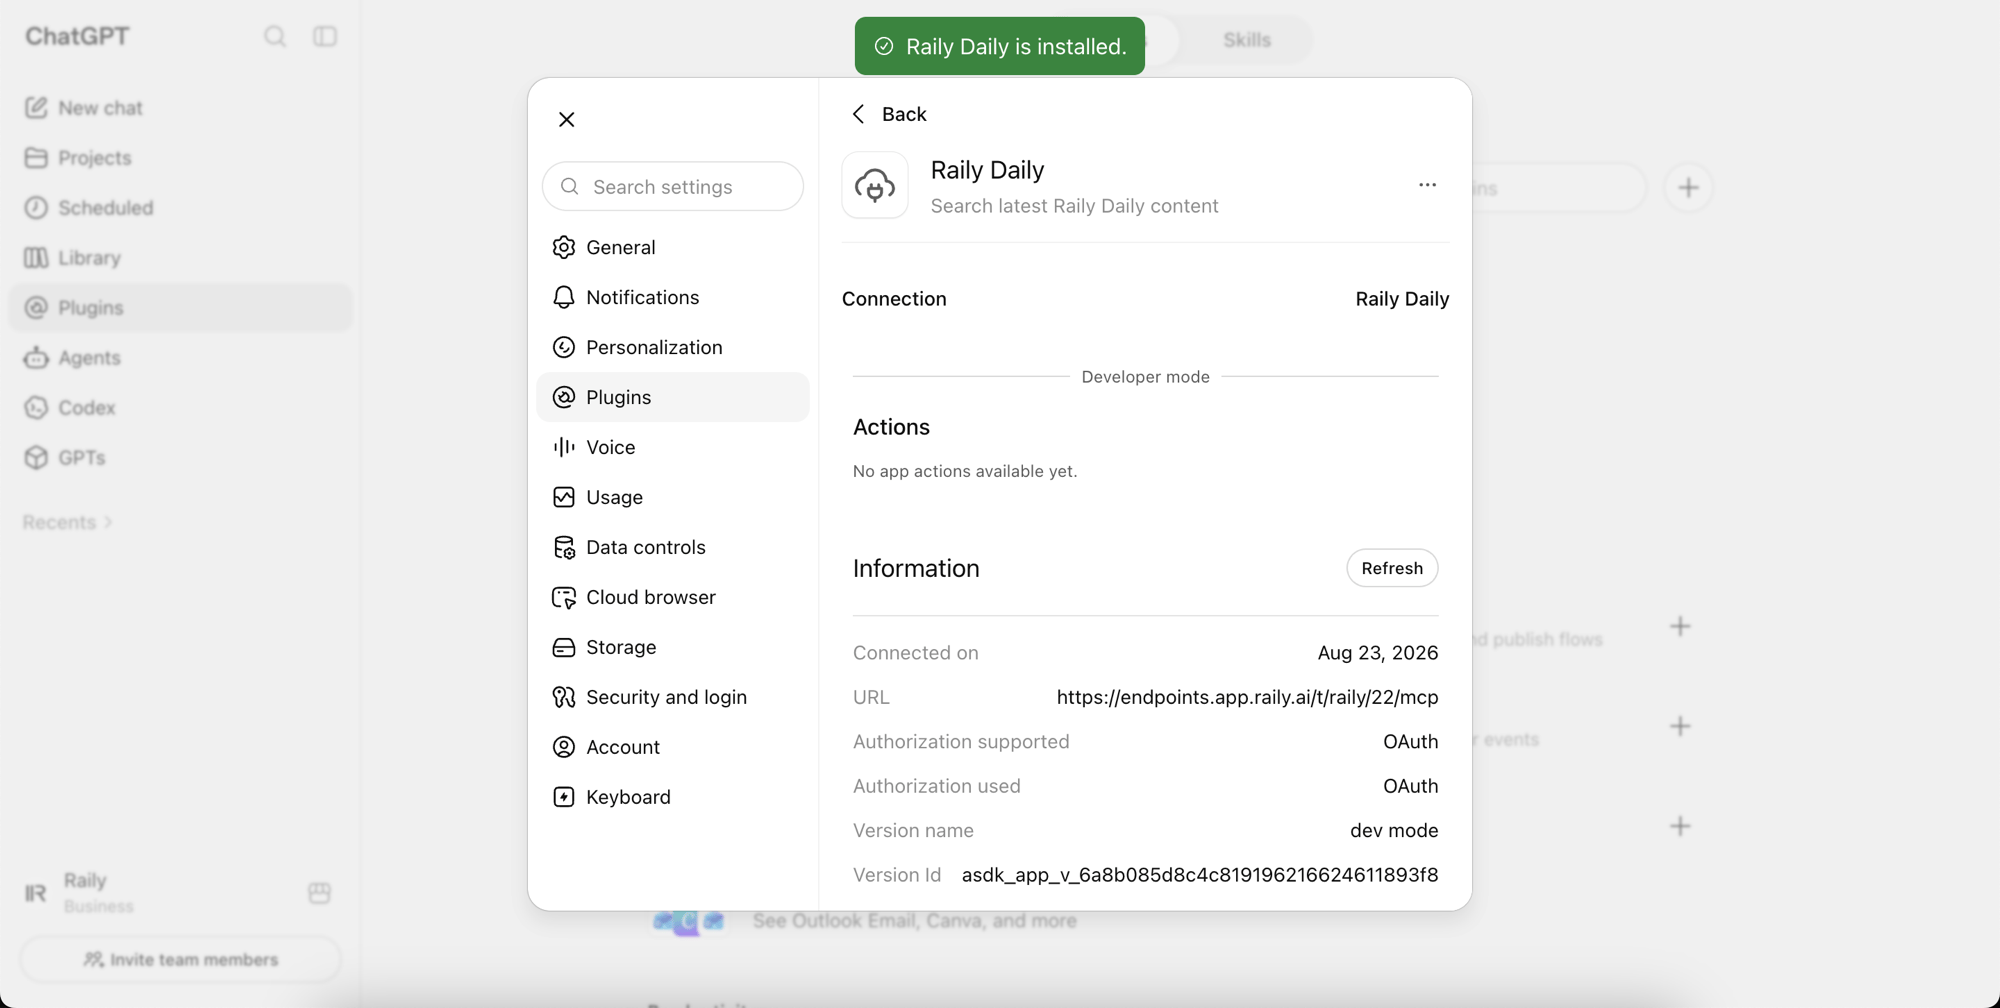
Use Raily in a chat
A connected plugin is not automatically active. You choose it for the message you are sending. In the composer, select Plugins in the row under the box, then your Raily plugin. Its name appears in front of your message. Type your question and send it.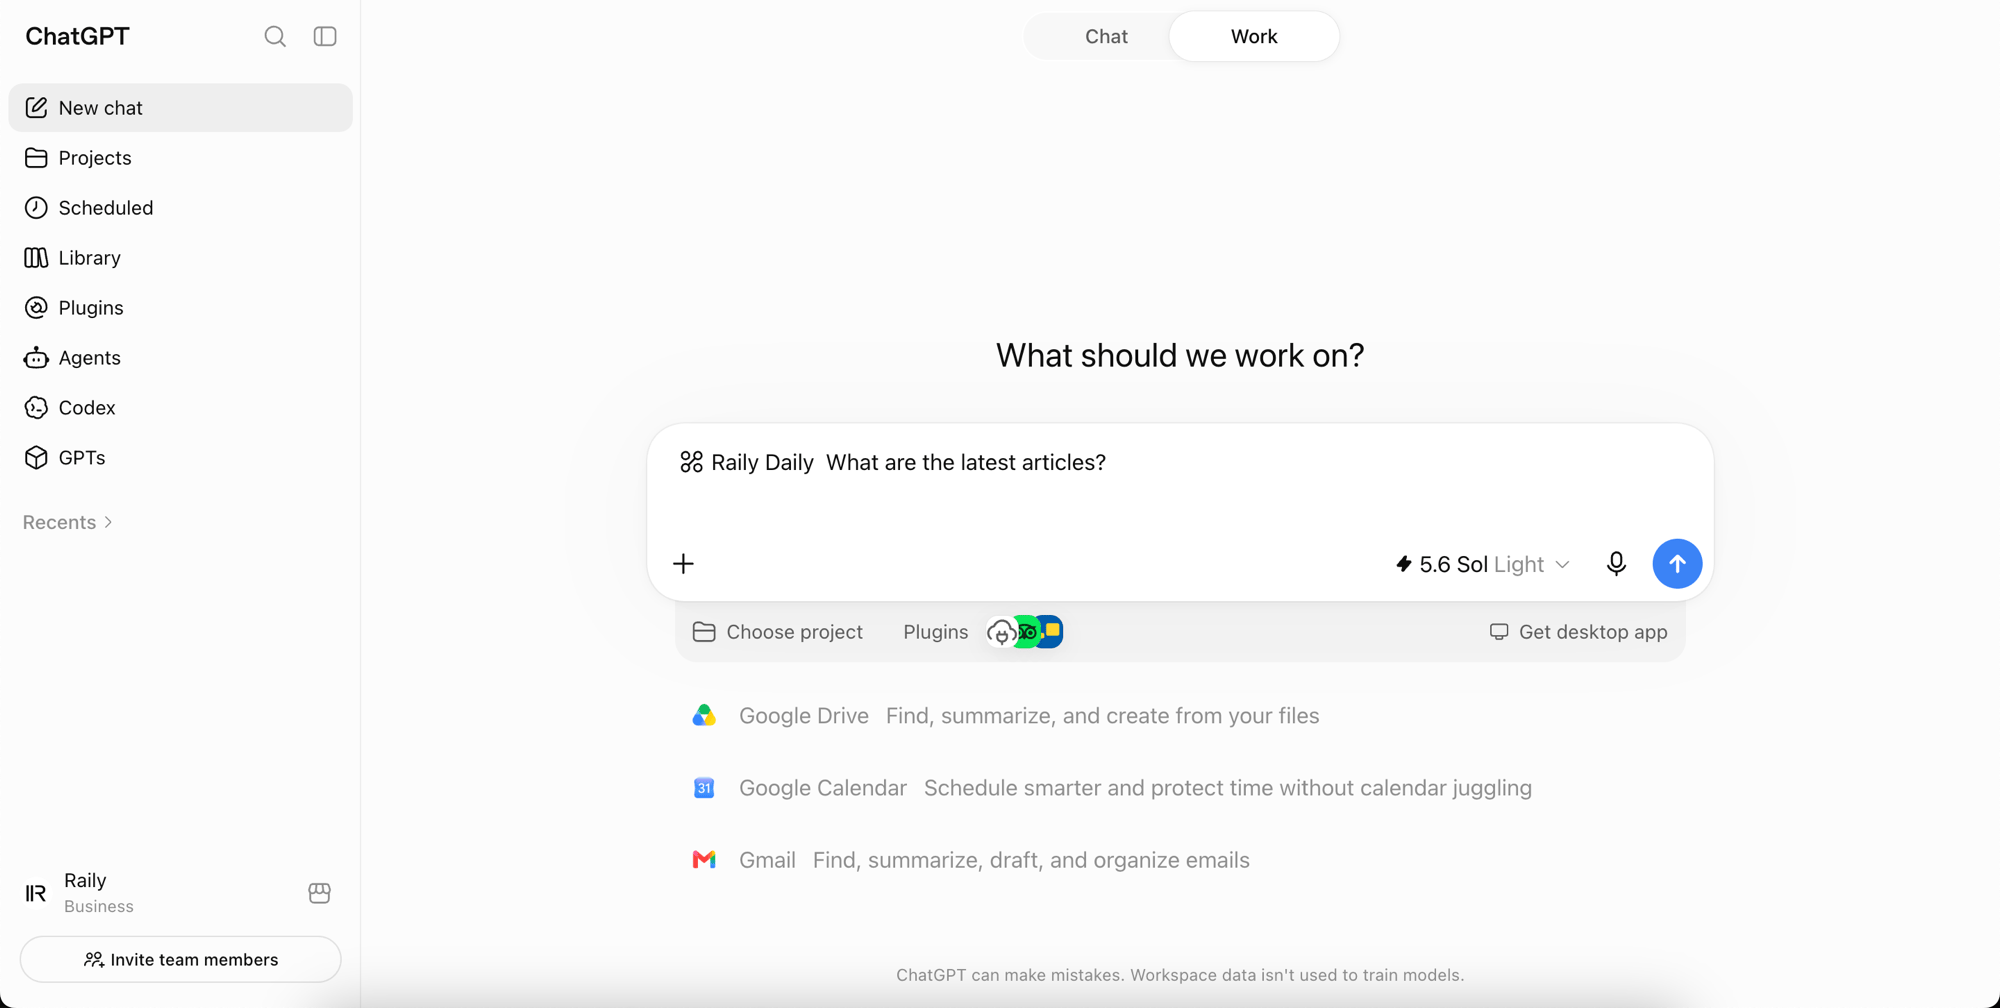
Check that it works
An installed status confirms that ChatGPT completed setup. It does not confirm that search returns results. Ask a question that your source content answers. Confirm that ChatGPT uses your content rather than general knowledge.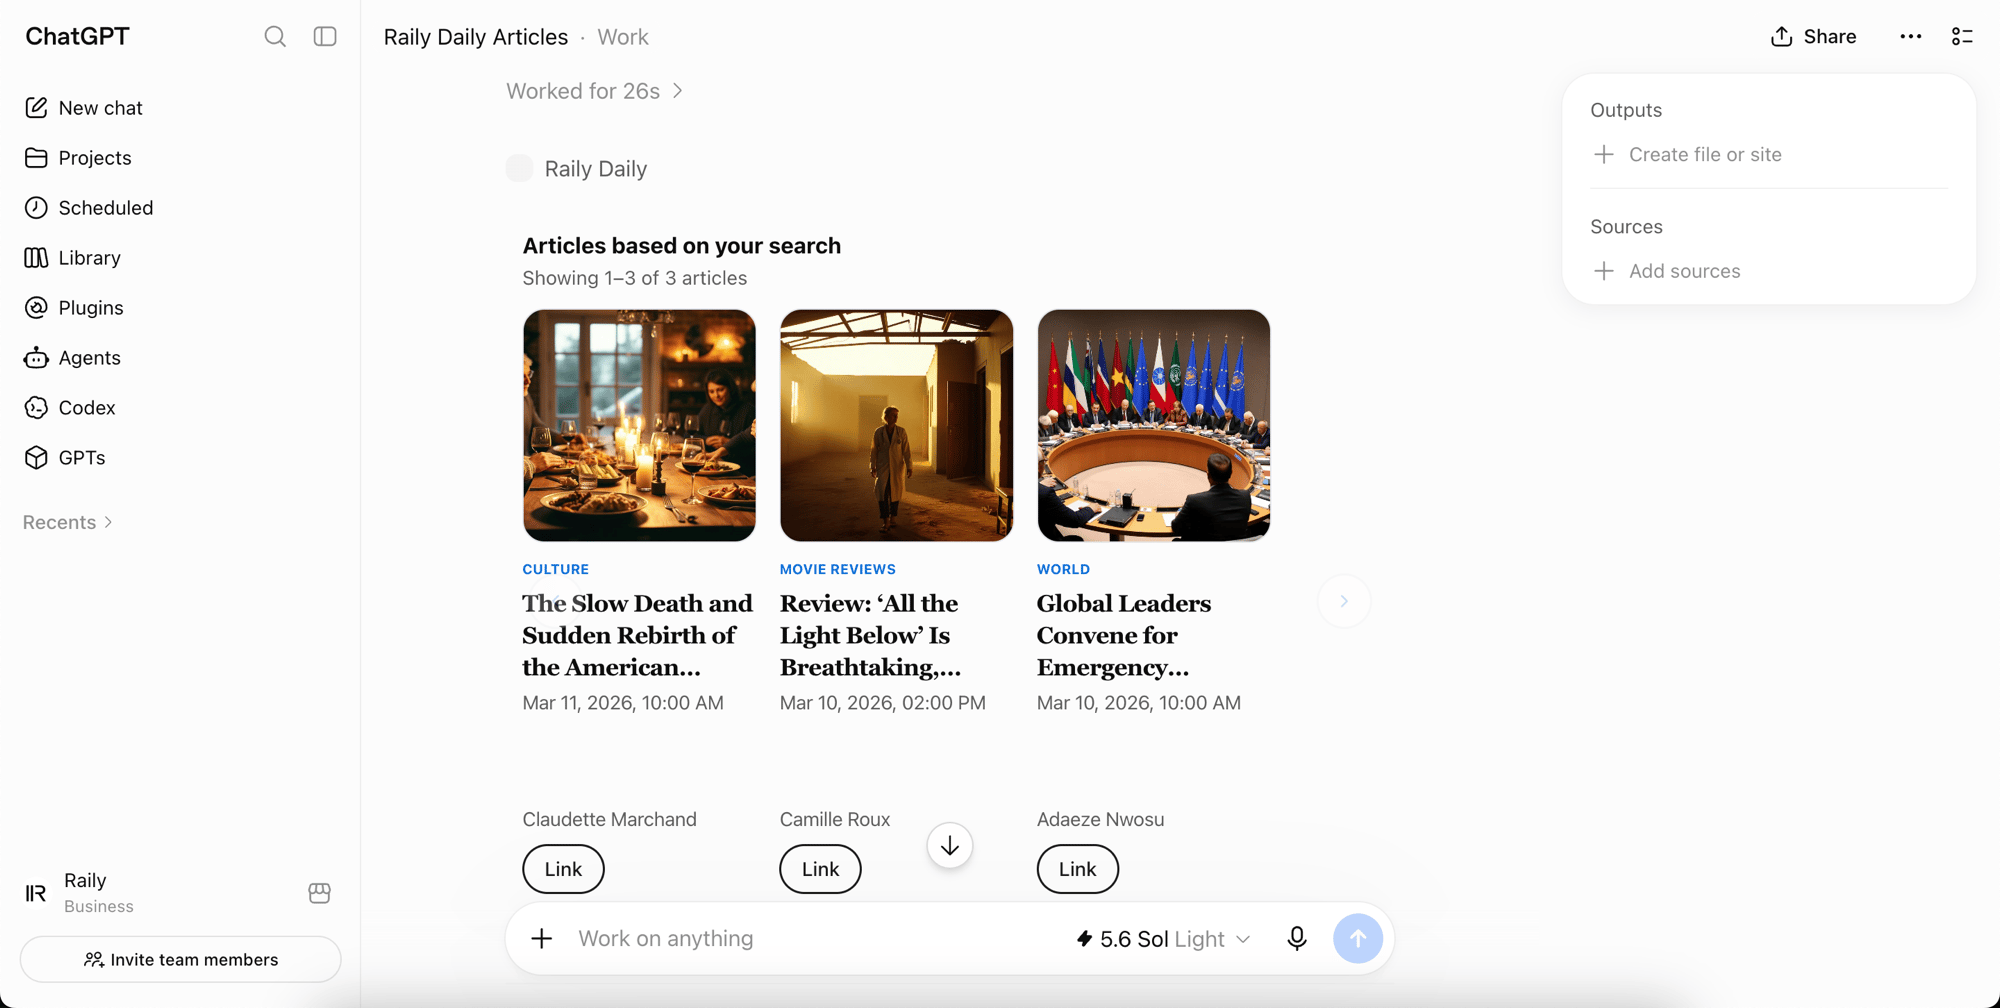
Troubleshooting
There is no Developer mode setting. Self-service custom plugins may be unavailable for your plan, role, workspace settings, or rollout. On a managed workspace, ask an administrator whether they can enable developer mode or add the endpoint through Apps. The + on the Plugins page does not appear. Confirm that developer mode is still on, then reopen the page. If the + still does not appear, self-service custom plugins are not enabled for your plan, role, workspace, or rollout. Create stays greyed out. The risk checkbox is not ticked. Tick I understand and want to continue. The text under Advanced OAuth settings never changes. The address is wrong or the server cannot be reached. Check that you pasted the whole link, including the ending, and that nothing was cut off. Authorization fails. For a Raily-hosted sign-in, confirm that the account matches the granted email and that the grant covers this endpoint. For a bring-your-own sign-in, check that your identity provider admits the account and that its provider configuration is valid in Raily. You connect successfully, but every search is empty. Ask a question you know the endpoint’s source can answer. If the result is still empty, check the source data, indexing status, saved search configuration, and query. Actions is empty on the connector card. Select Refresh to scan the server and load its tools. You reach one endpoint but not another. Each endpoint has its own connect link. With a Raily-hosted sign-in, confirm that the grant scope includes the other endpoint, then ask for that endpoint’s link. With a bring-your-own sign-in, confirm that the endpoint uses your provider and that the provider admits your account, then ask for its link. You had access and lost it. With a Raily-hosted sign-in, an administrator may have changed or removed your endpoint grant; that change applies on your next request. With a bring-your-own sign-in, check your account in your identity provider, then ask the administrator to check the provider’s status and configuration in Raily. The plugin is connected, but ChatGPT answers from general knowledge. It was not selected for that message. You pick the plugin per message, so it does not stay on for the rest of the chat.Next steps
Connect to Claude
Follow the Claude setup
Add and manage users
Grant Raily-hosted user access