Before you start
- Admin access to the tenant.
- The connection details for your vector store (URL, API key, or connection string).
- At least one collection (or index/table) that already holds embeddings.
Steps
Go to Inventory → Integrations and open the Add integration tab.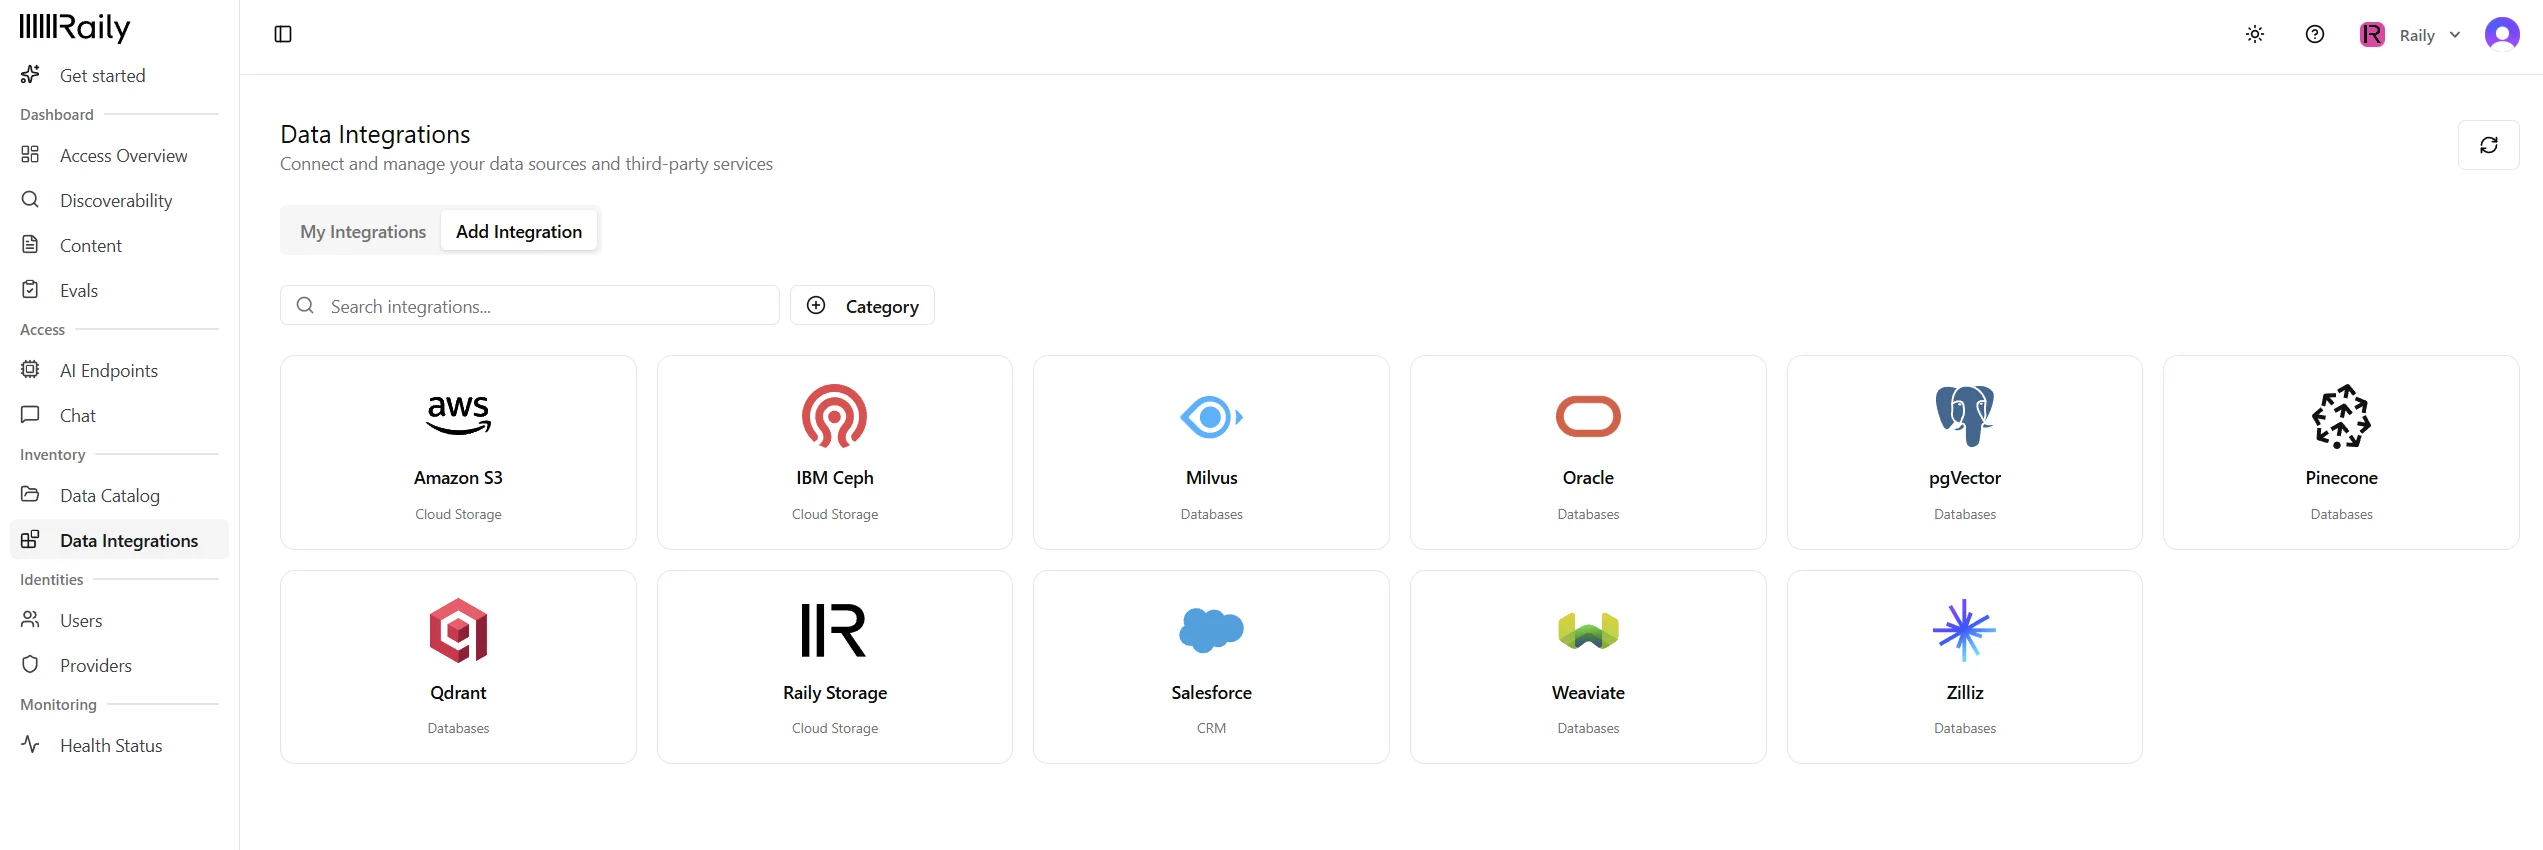
- Qdrant
- Pinecone
- Zilliz
- Milvus
- Weaviate
- pgvector
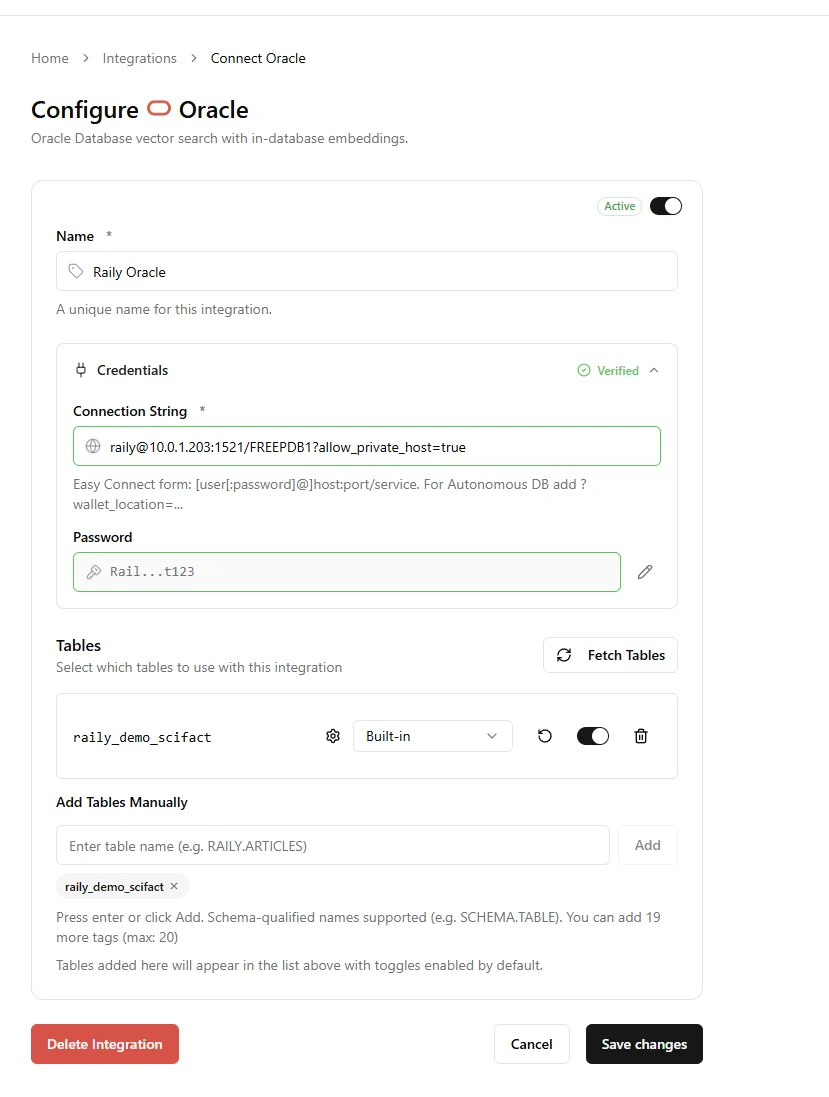
- Oracle
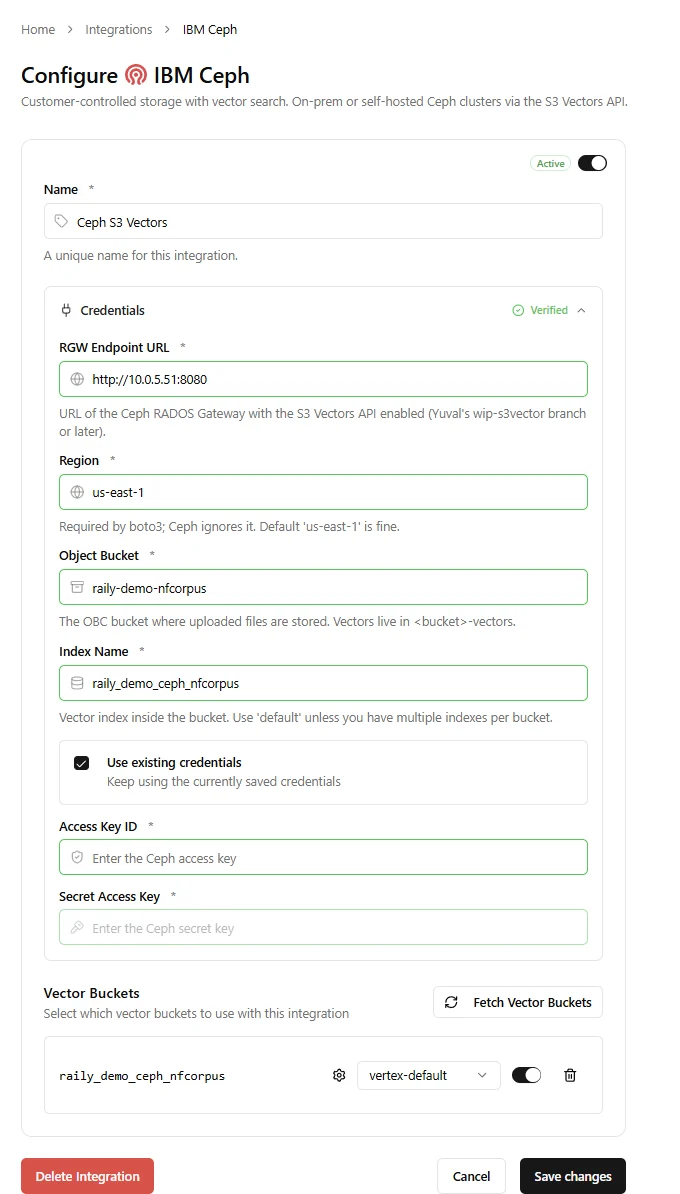
- IBM Ceph
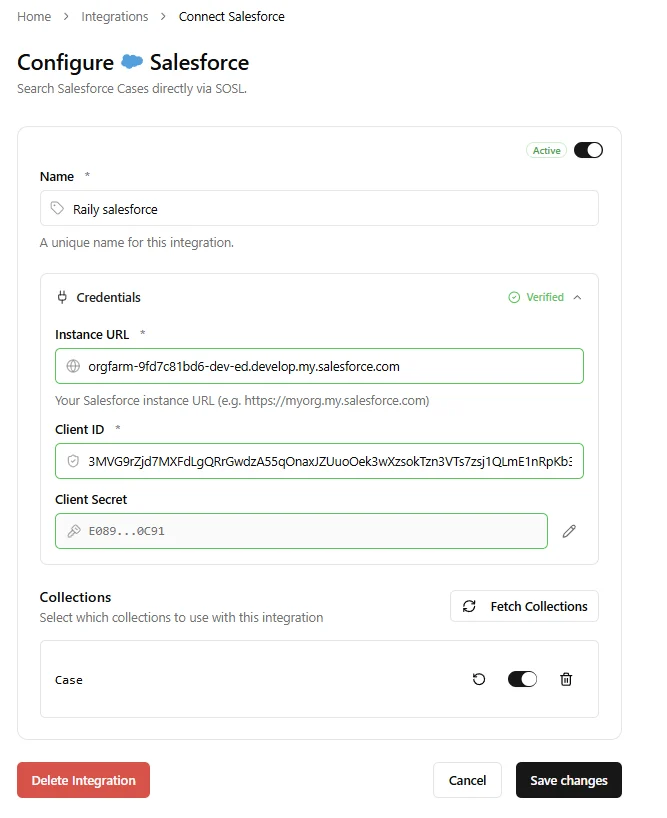
- Salesforce
- Raily Vector Store
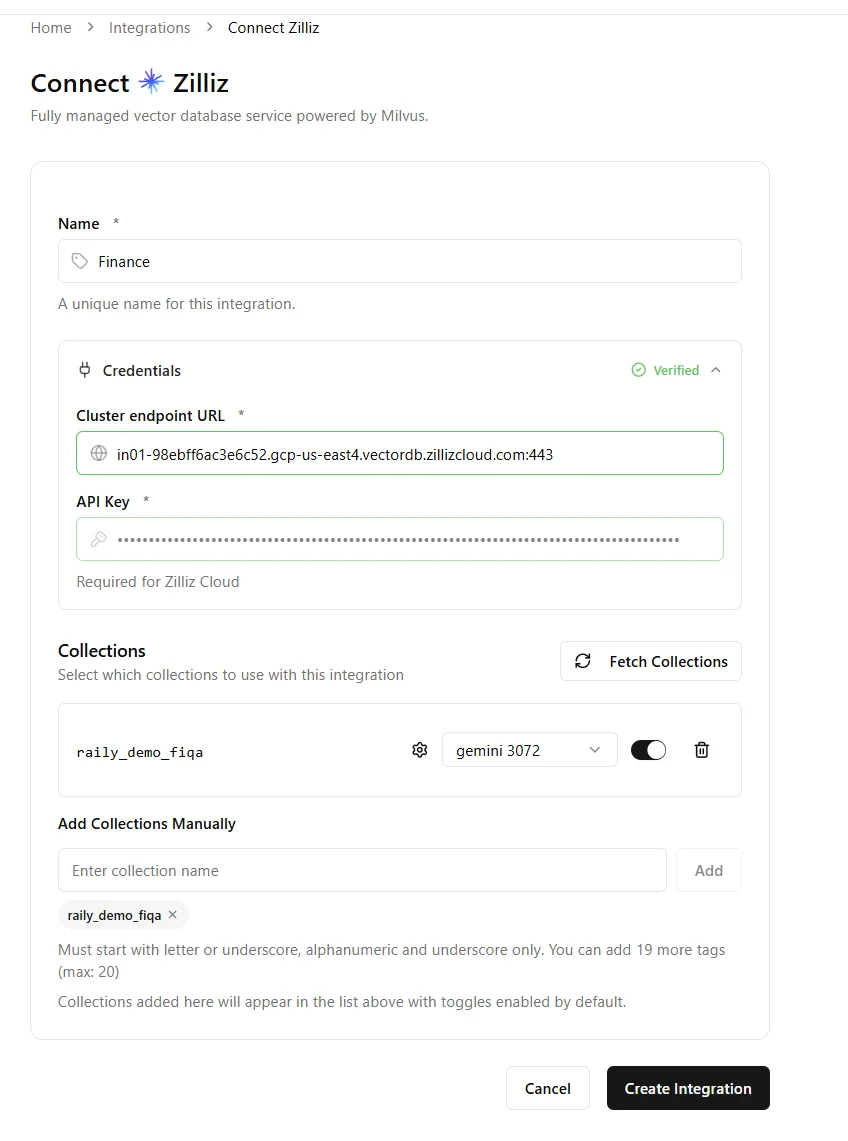
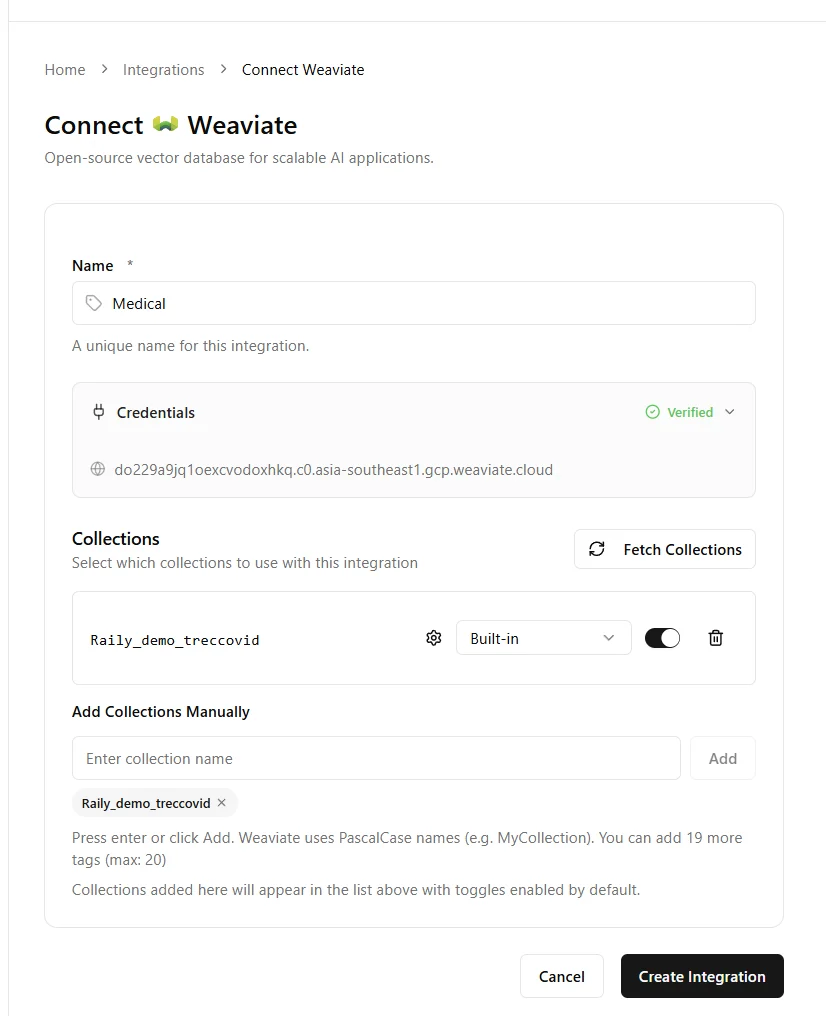
Enter the connection details
- Name for the integration.
- Qdrant URL, for example
your-project.europe-west3-0.gcp.cloud.qdrant.io:6333. - API Key. Required for Qdrant Cloud, optional for local Qdrant.
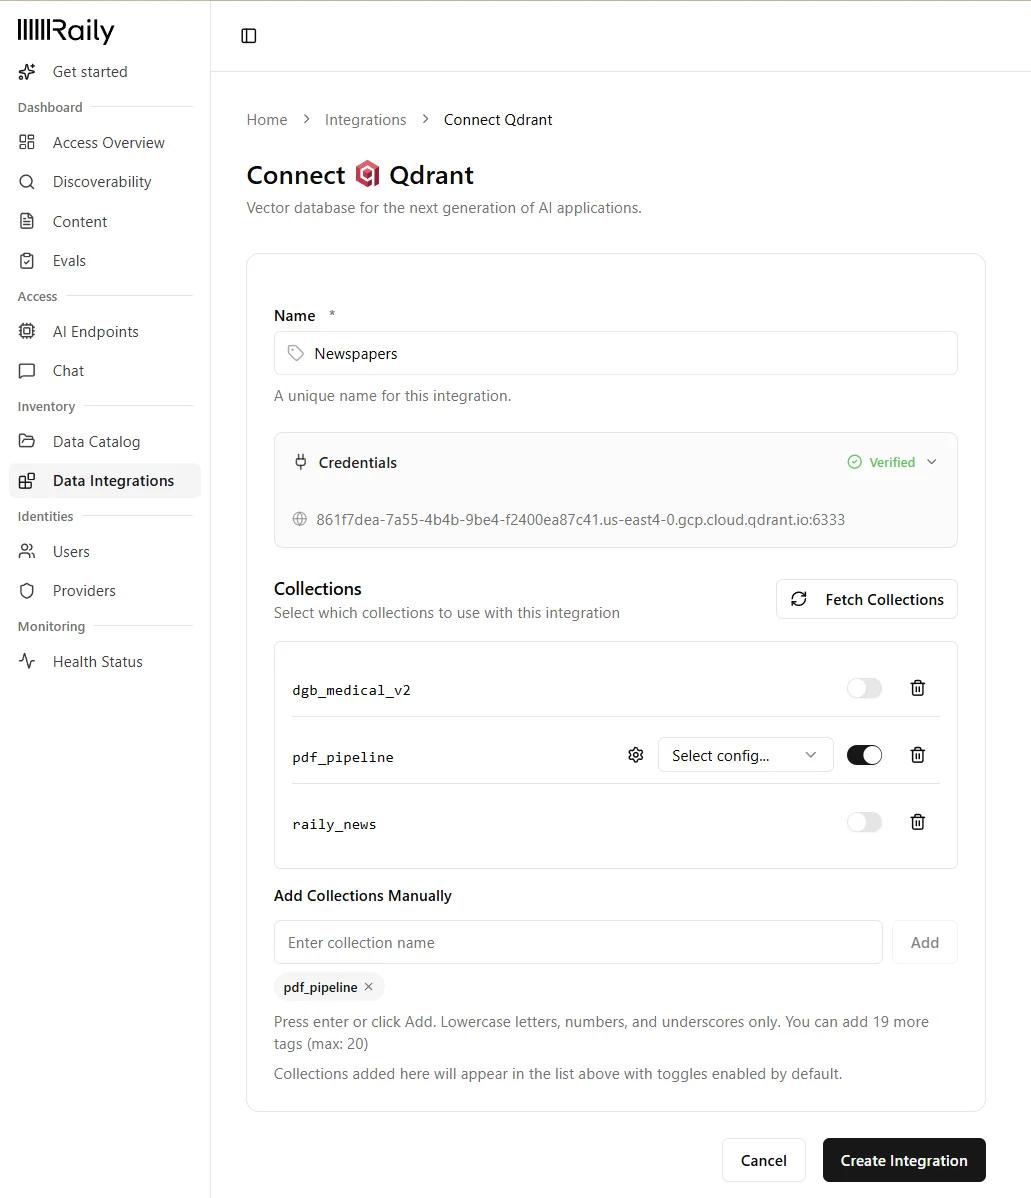
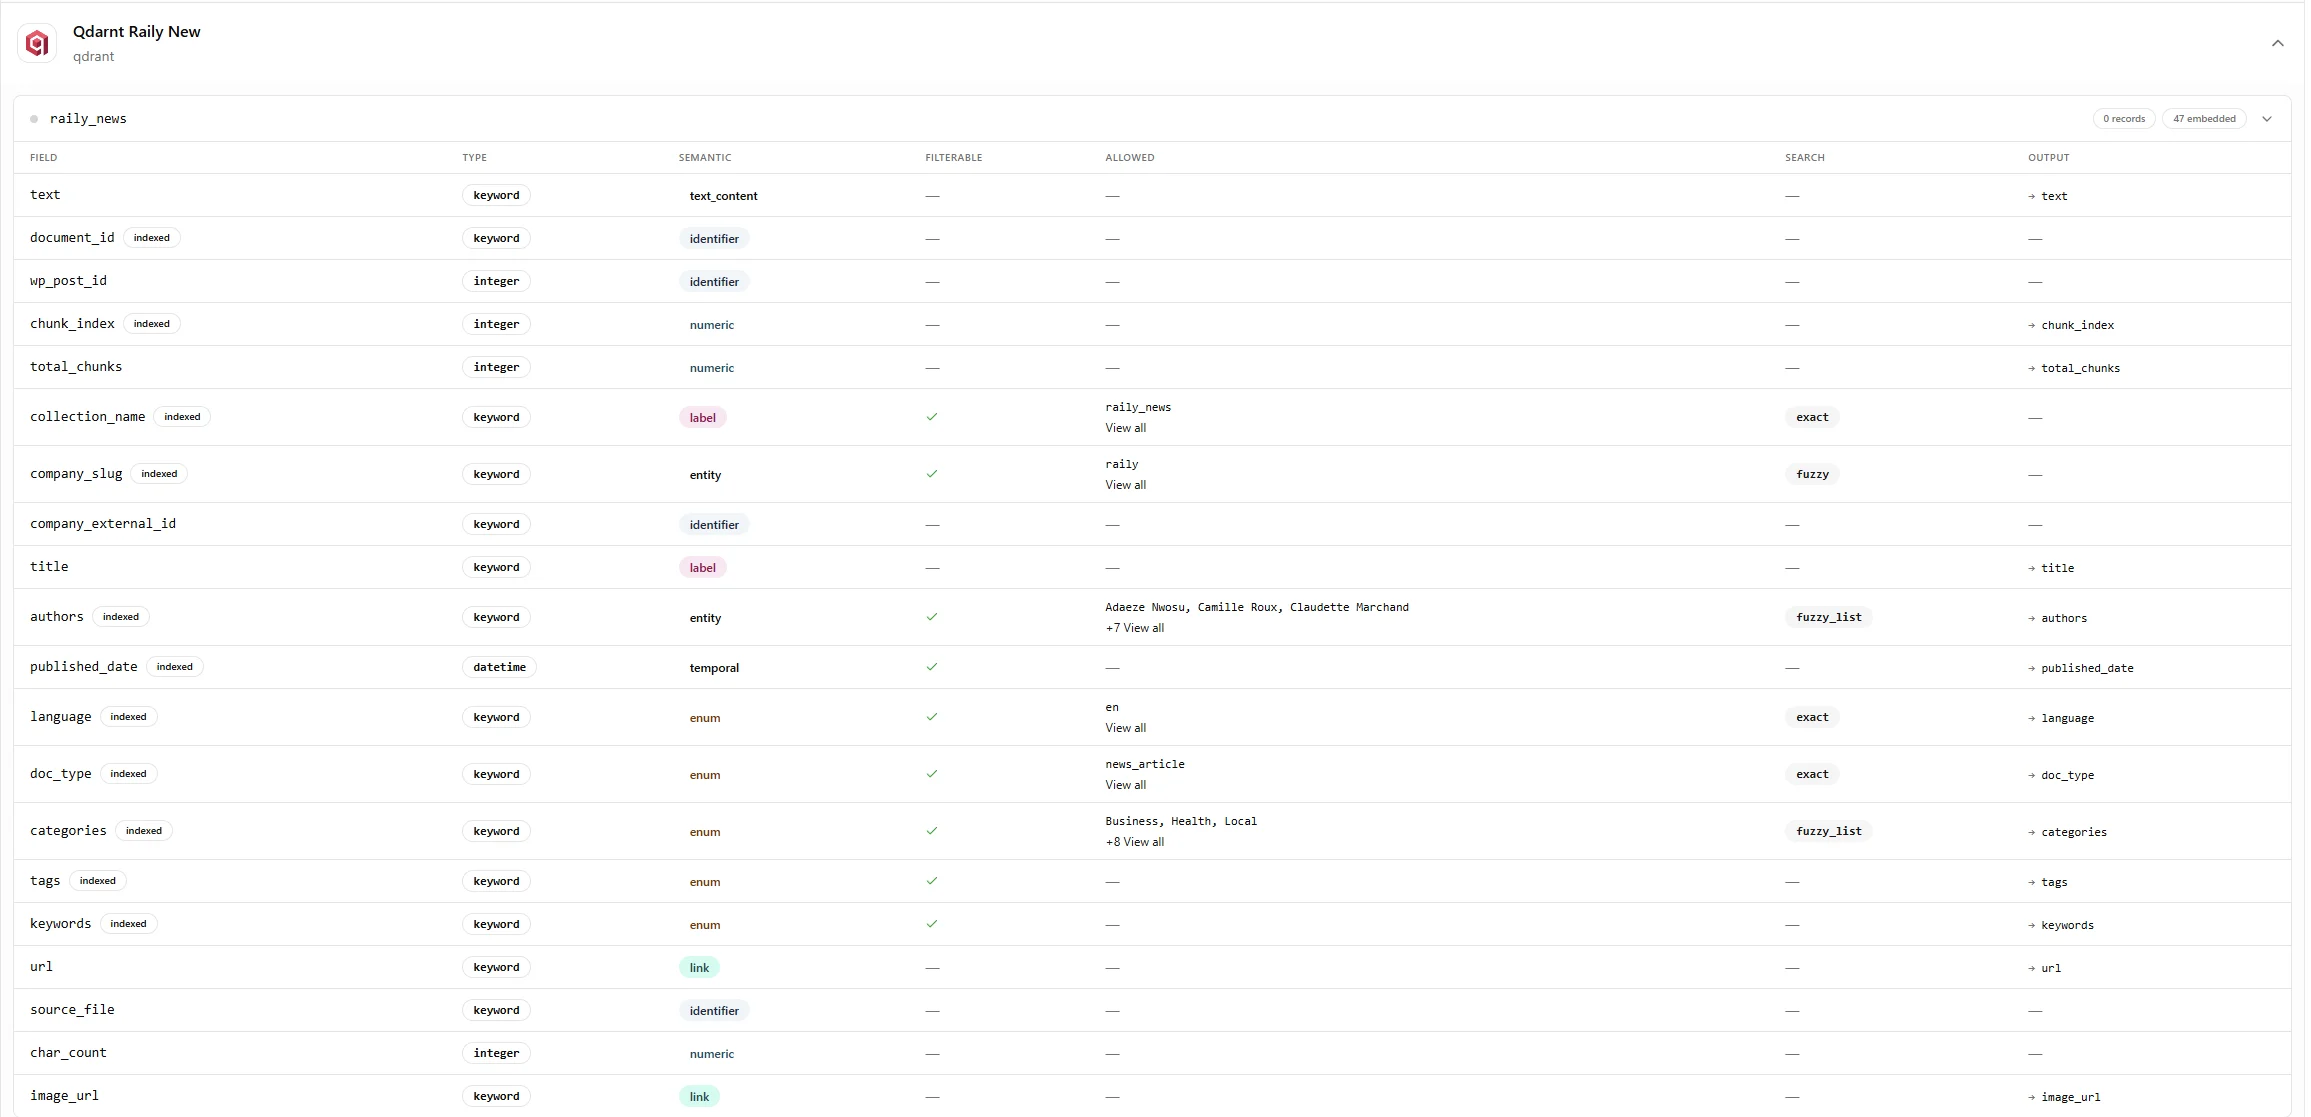
Add collections
Click Fetch Collections and enable the ones you want, or add a collection by name (lowercase letters, numbers, and underscores).
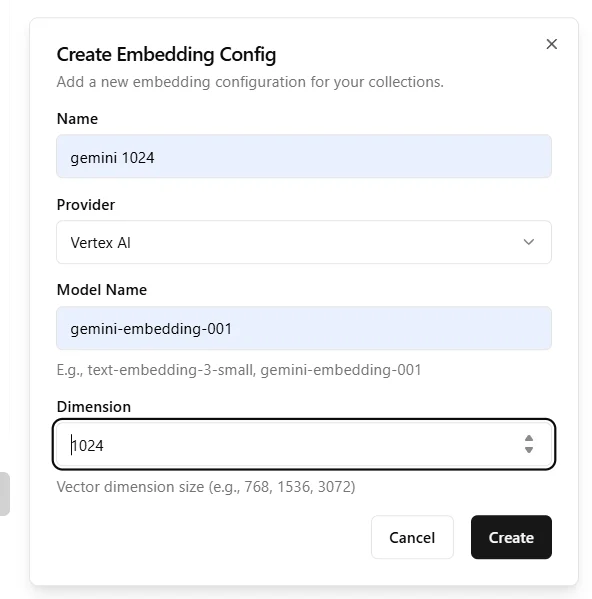
Set an embedding config
Pick an embedding config for each collection. It must match the model that created the vectors.Don’t have one yet? Open the embedding config picker and click Create New.
Save
Click Create Integration. Raily then configures agentic search for each collection automatically. This can take a few minutes, after which the integration appears under My Integrations with an Active status.
Once it finishes, open Inventory → Data Catalog to see the generated configuration for each collection.