

Before you begin
You need a paid plan and permission to manage sign-in providers in the selected Organization. Account Owners and Administrators have this permission. A role assigned in a parent Organization also applies in its descendants. For an external provider, you also need permission to create or edit an OIDC web application. Raily shows provider-specific setup instructions. The redirect URI is generated after you attach the provider to an endpoint.Raily-hosted sign-in does not need external credentials. You manage its users and endpoint grants in Raily.
Choose a provider
Set up Raily-hosted sign-in
Raily creates a hosted sign-in when it creates a new Organization. If the selected Organization does not have one, the provider list shows Set up Raily sign-in.1
Open Sign-in providers
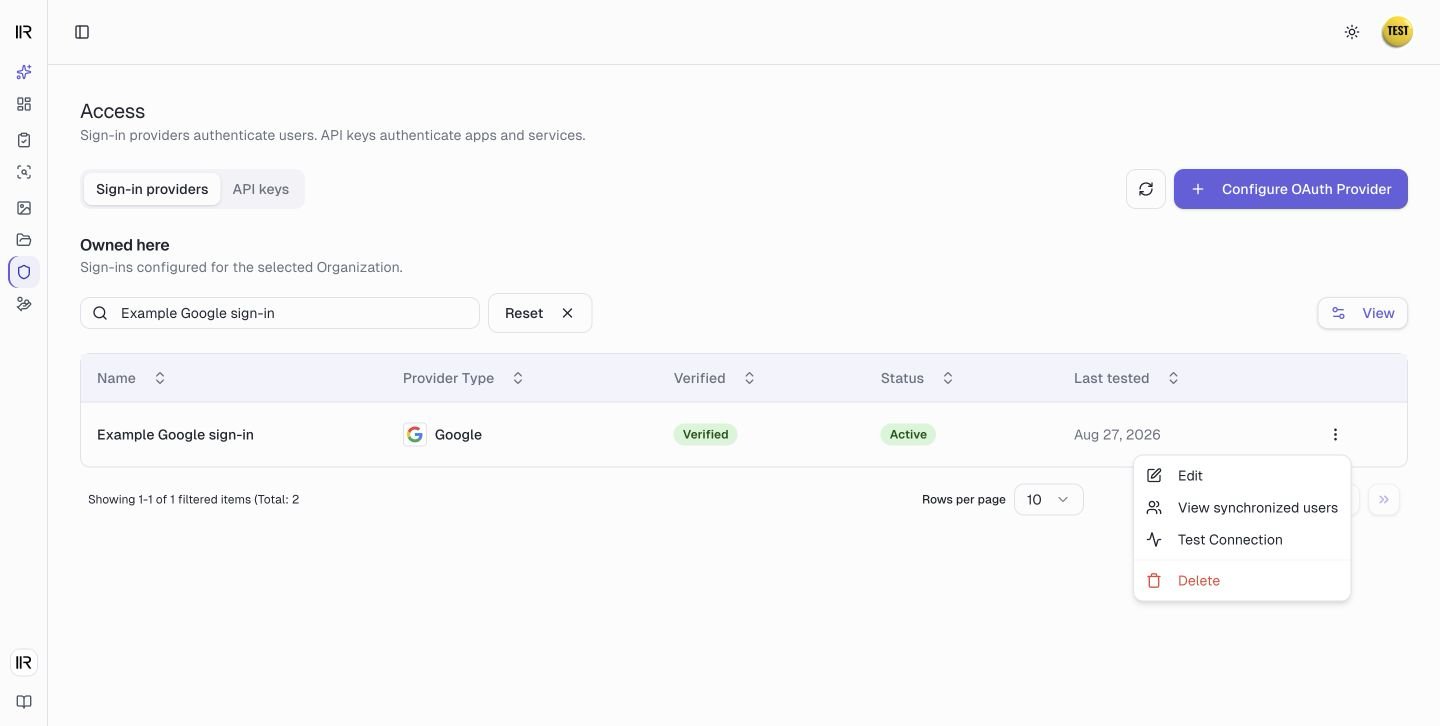
Go to Security → Access → Sign-in providers. If the selected Organization does not have a hosted provider, the setup banner appears above the provider list.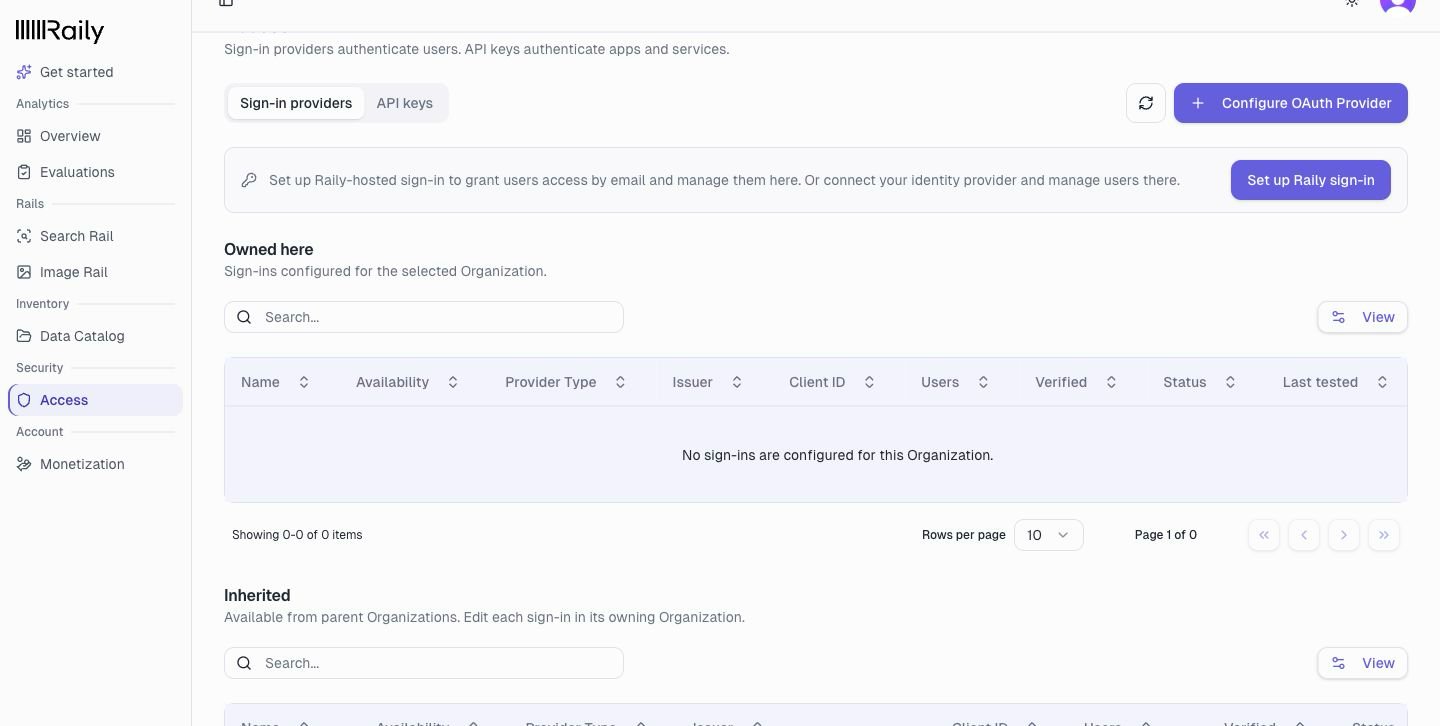
2
Set up Raily sign-in
Select Set up Raily sign-in and wait for Raily sign-in to appear as Verified and Active.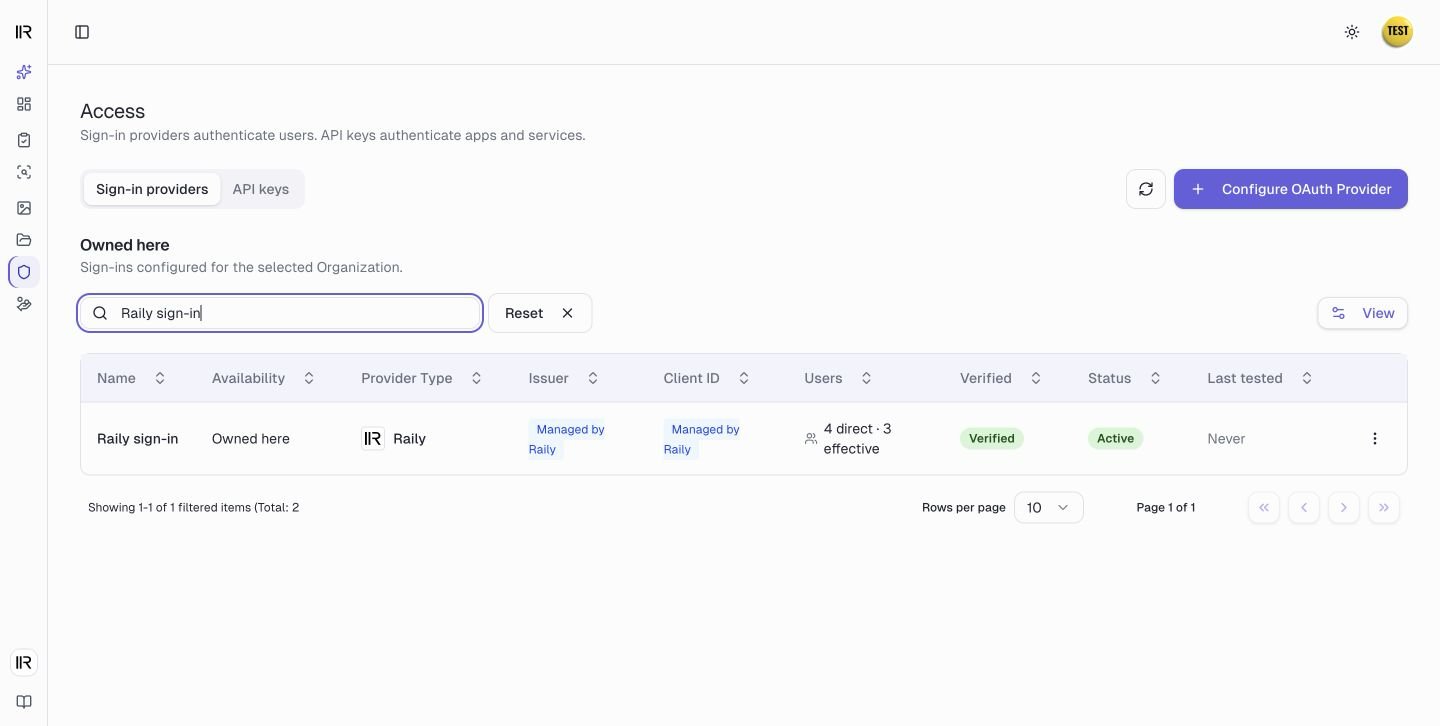
Configure an external OIDC provider
Keep Raily and your identity provider open while you work. The wizard shows how to create the OIDC application and where to find its client ID and client secret. You will add the endpoint-specific redirect URI after you attach the provider in Raily.1
Open the provider wizard
Go to Security → Access → Sign-in providers, then select Configure OAuth Provider.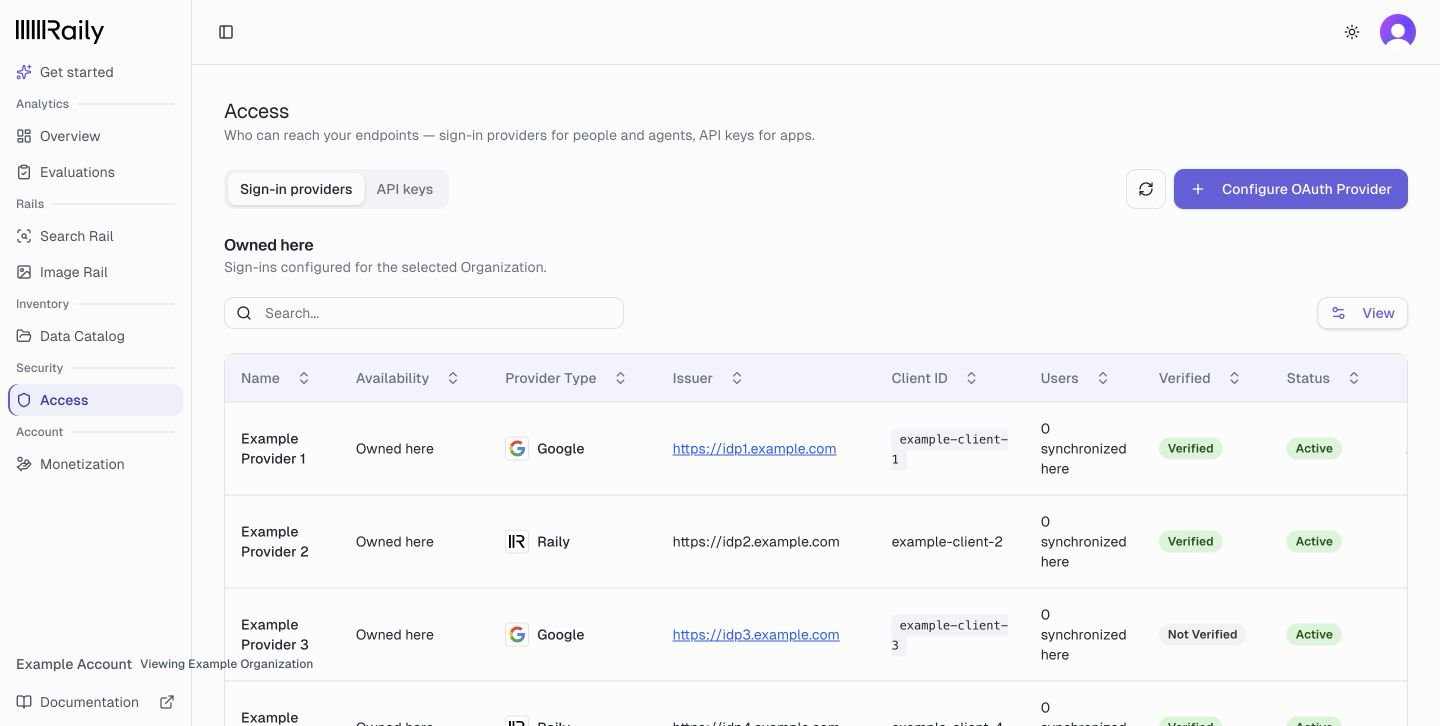
2
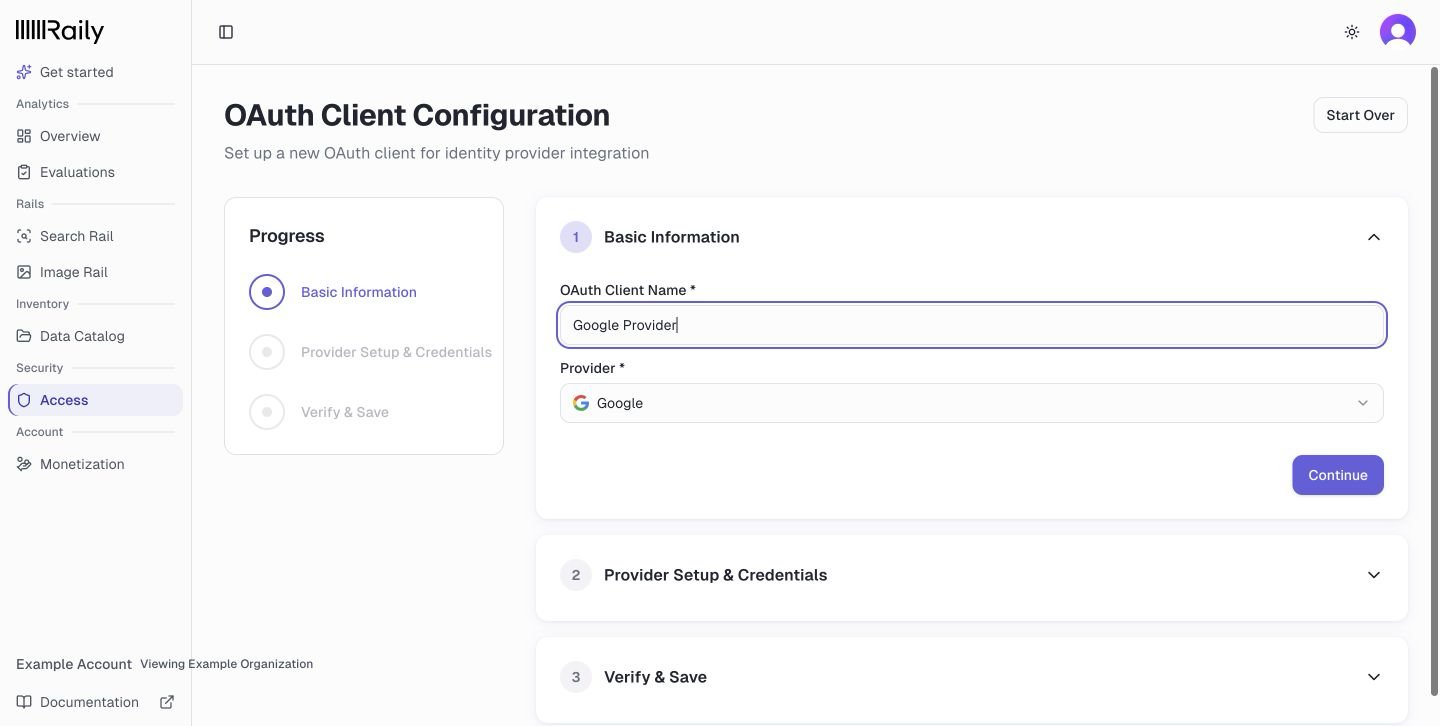
Name the configuration
Open Provider and choose your identity provider.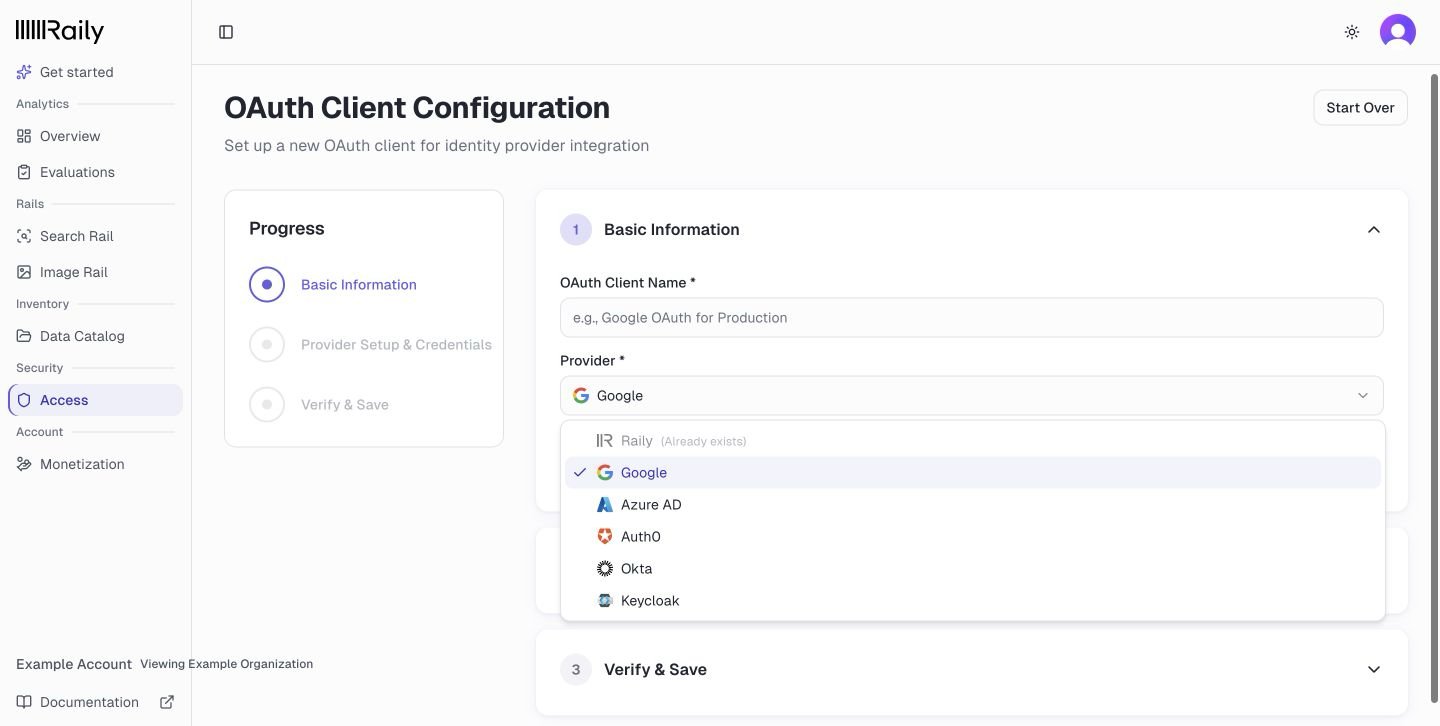
3
Enter the provider credentials
Follow the setup instructions shown for your provider. They list the application type and the values to enter in your provider.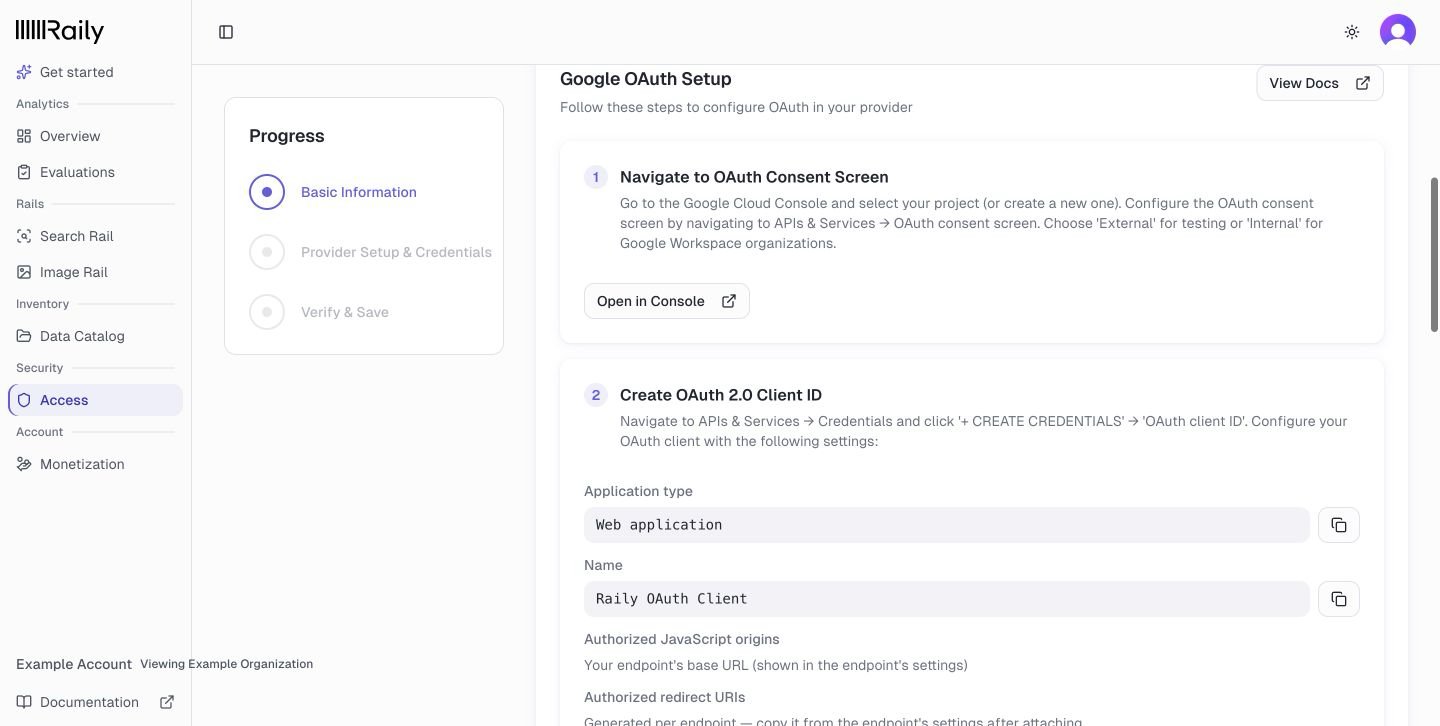
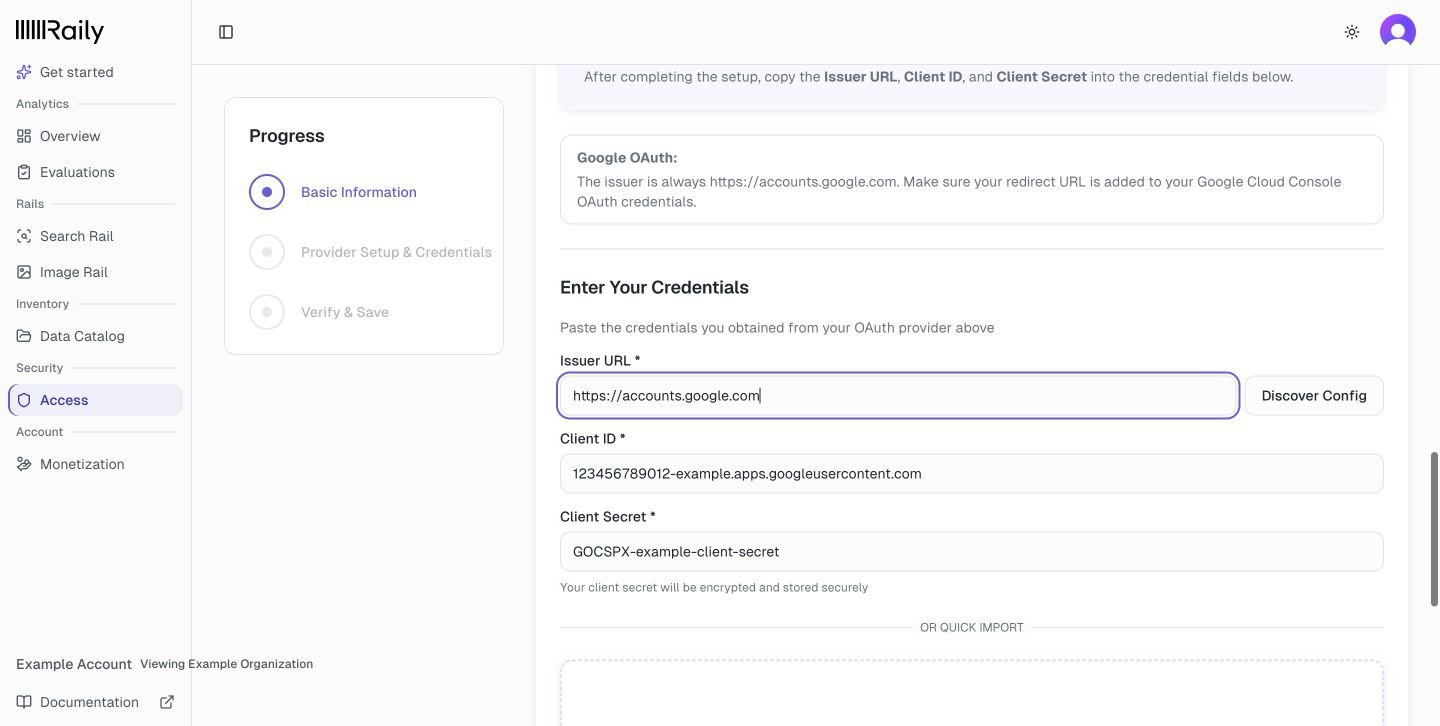
common, organizations, or consumers because Raily cannot verify their placeholder issuer.4
Discover the OpenID configuration
Select Discover Config. Raily reads the provider’s OpenID configuration and fills in its authorization and token endpoints. Review the issuer if Raily updates its spelling, then select Continue.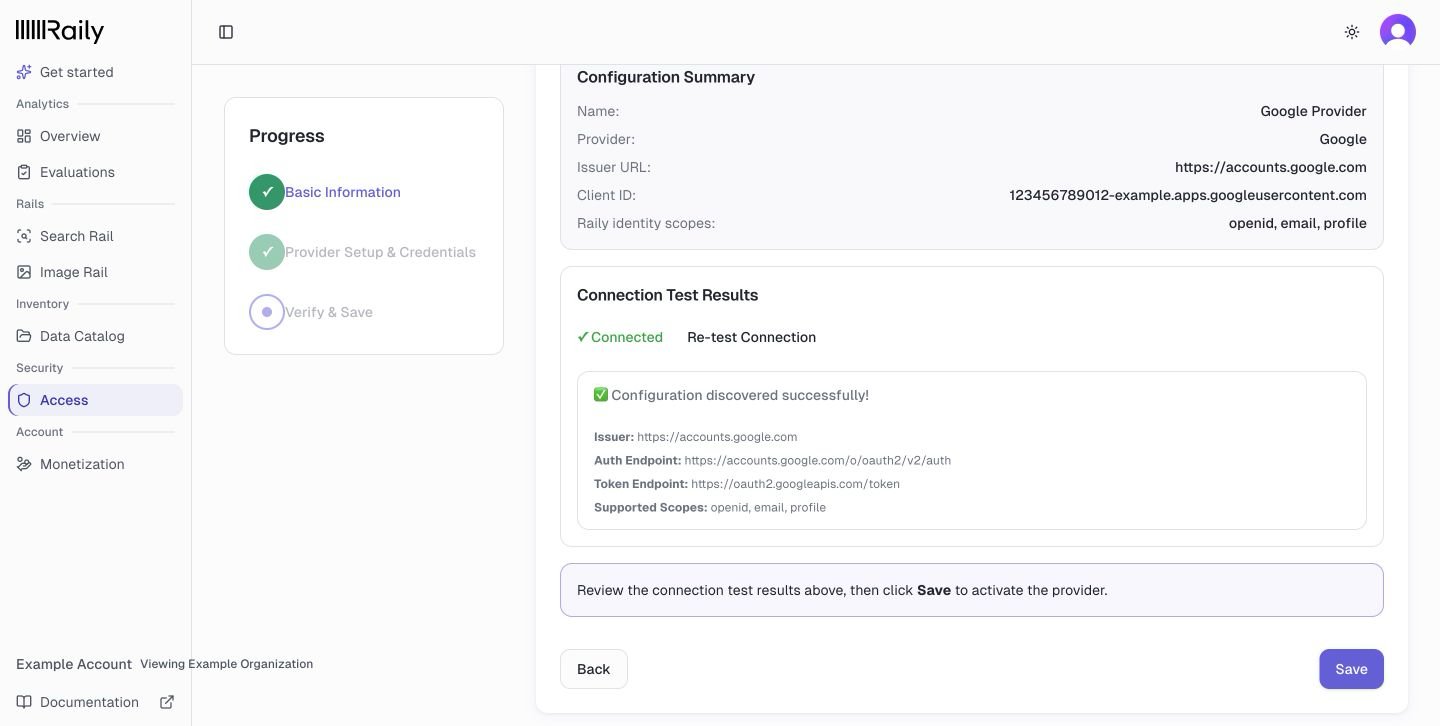
5
Review the connection test and save
Raily tests the client credentials automatically when you continue. Confirm that Verify & Save says Connected and that the issuer and endpoints are correct.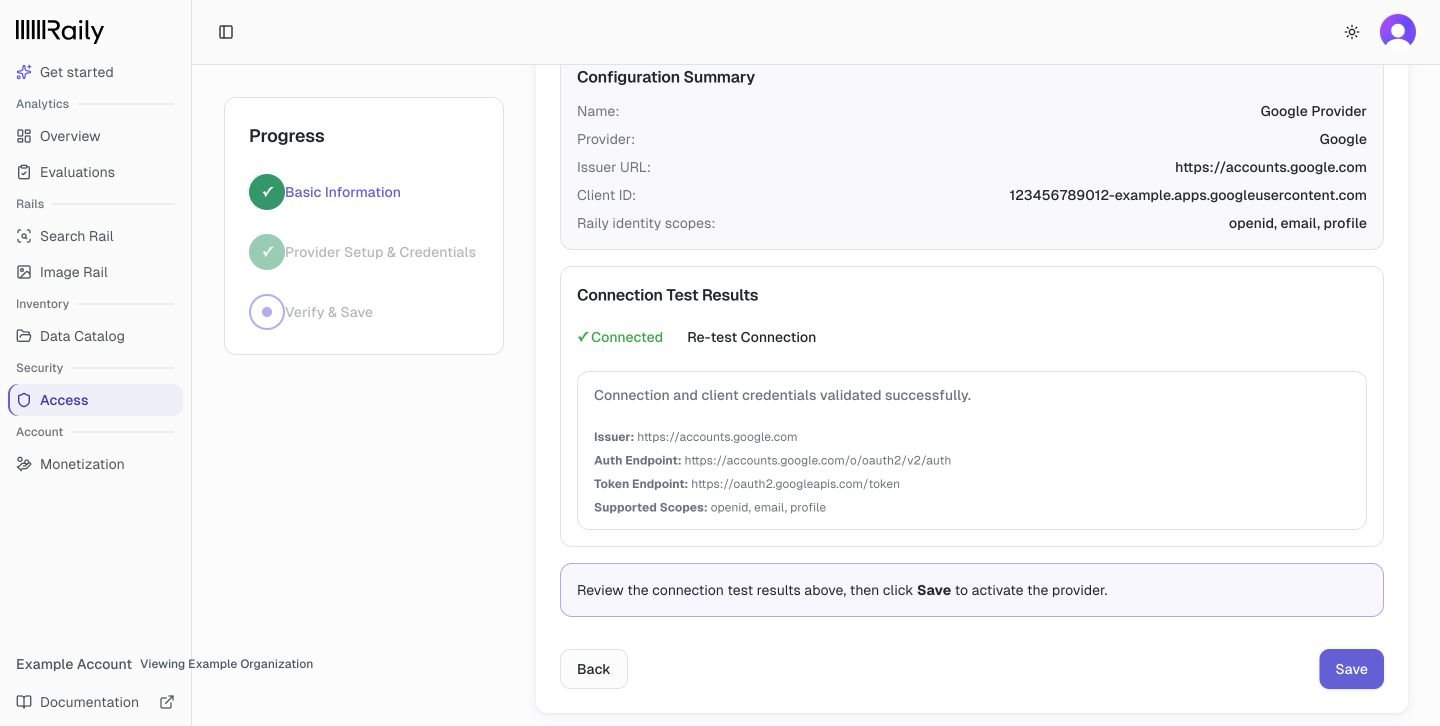
Attach the provider to an endpoint
Adding a provider does not change any endpoint until you attach it.- Create or edit the endpoint.
- Under Who can connect, choose the sign-in provider.
- Save the endpoint.
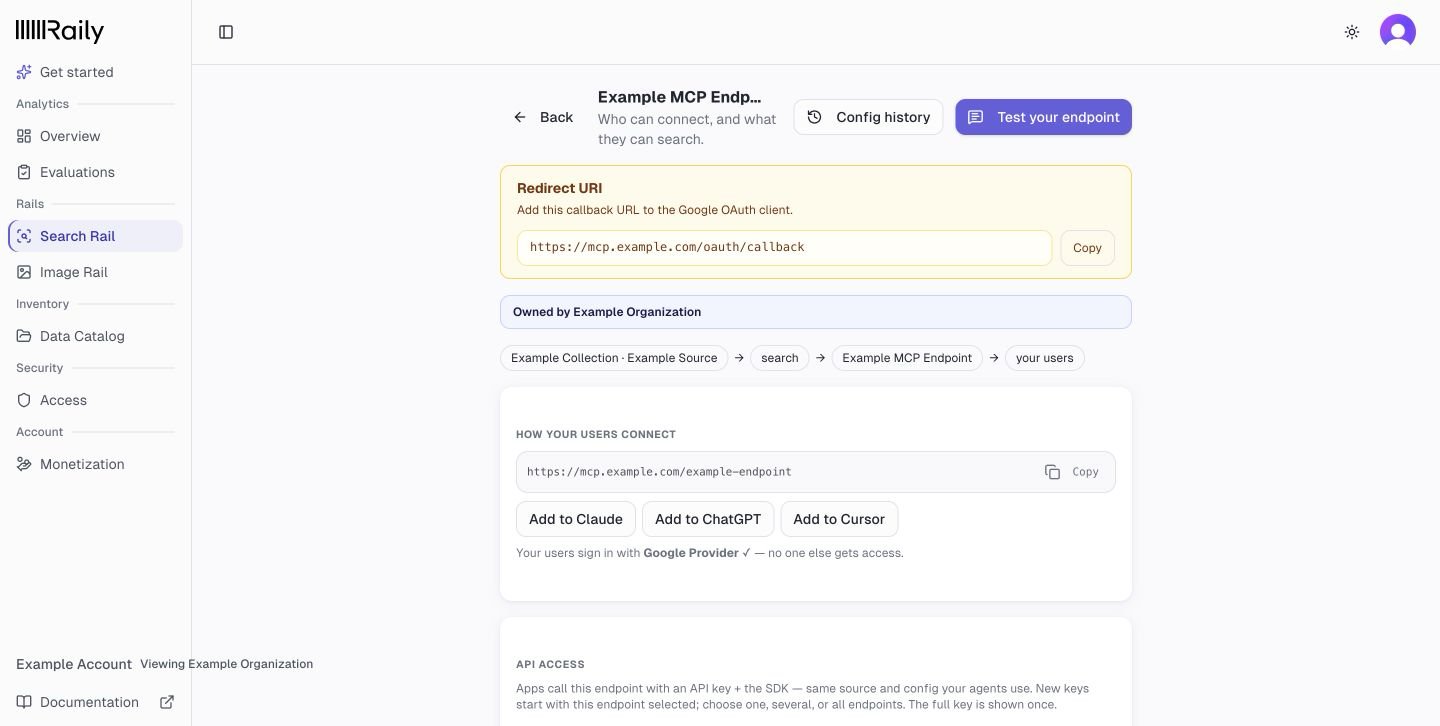
For an external provider, copy the Redirect URI from the endpoint settings and add it to the OIDC application in your provider. Each endpoint has its own redirect URI. Raily-hosted sign-in does not need this step.
Troubleshooting
Configure OAuth Provider is locked. The selected Organization needs a paid plan. You also need the Account Owner or Administrator role in that Organization or one of its parents. Raily is marked Already exists in the provider picker. The selected Organization already has its Raily-hosted sign-in. Use the existing provider from the list. Discover Config cannot read the issuer. Confirm that the issuer URL is the provider’s OIDC issuer and that Raily can reach it. Do not paste an authorization endpoint, token endpoint, or admin console URL. Microsoft Entra ID fails issuer verification. Use your directory’s tenant ID. Do not usecommon, organizations, or consumers.
Auth0 fails issuer verification.
Use the issuer declared by your Auth0 tenant, including its trailing slash.
The provider works, but the endpoint still uses another sign-in.
Edit the endpoint and check Who can connect. A provider only applies to endpoints that use it.
The provider returns a redirect URI error.
Copy the Redirect URI from that endpoint’s settings and register it in your OIDC application. Each endpoint has its own redirect URI.
Someone cannot sign in through an external provider.
Check their account and access in your identity provider first. If the provider admits them, test the provider connection in Raily and confirm that the endpoint uses it.
Next steps
Access control
Choose between user grants, external sign-in, and API keys
Add and manage users
Grant endpoints through Raily-hosted sign-in