> ## Documentation Index
> Fetch the complete documentation index at: https://docs.raily.ai/llms.txt
> Use this file to discover all available pages before exploring further.
# Quickstart
> Connect a source, generate its search config, and serve it to your audience
Raily Search Rail turns a data source into a search endpoint that your audience's AI agents can call from Claude, ChatGPT, or your own app. The whole flow runs across the top of **Search Rail**, in three stages: **Your corpus → Search Rail → Your audience**. Here it is end to end.
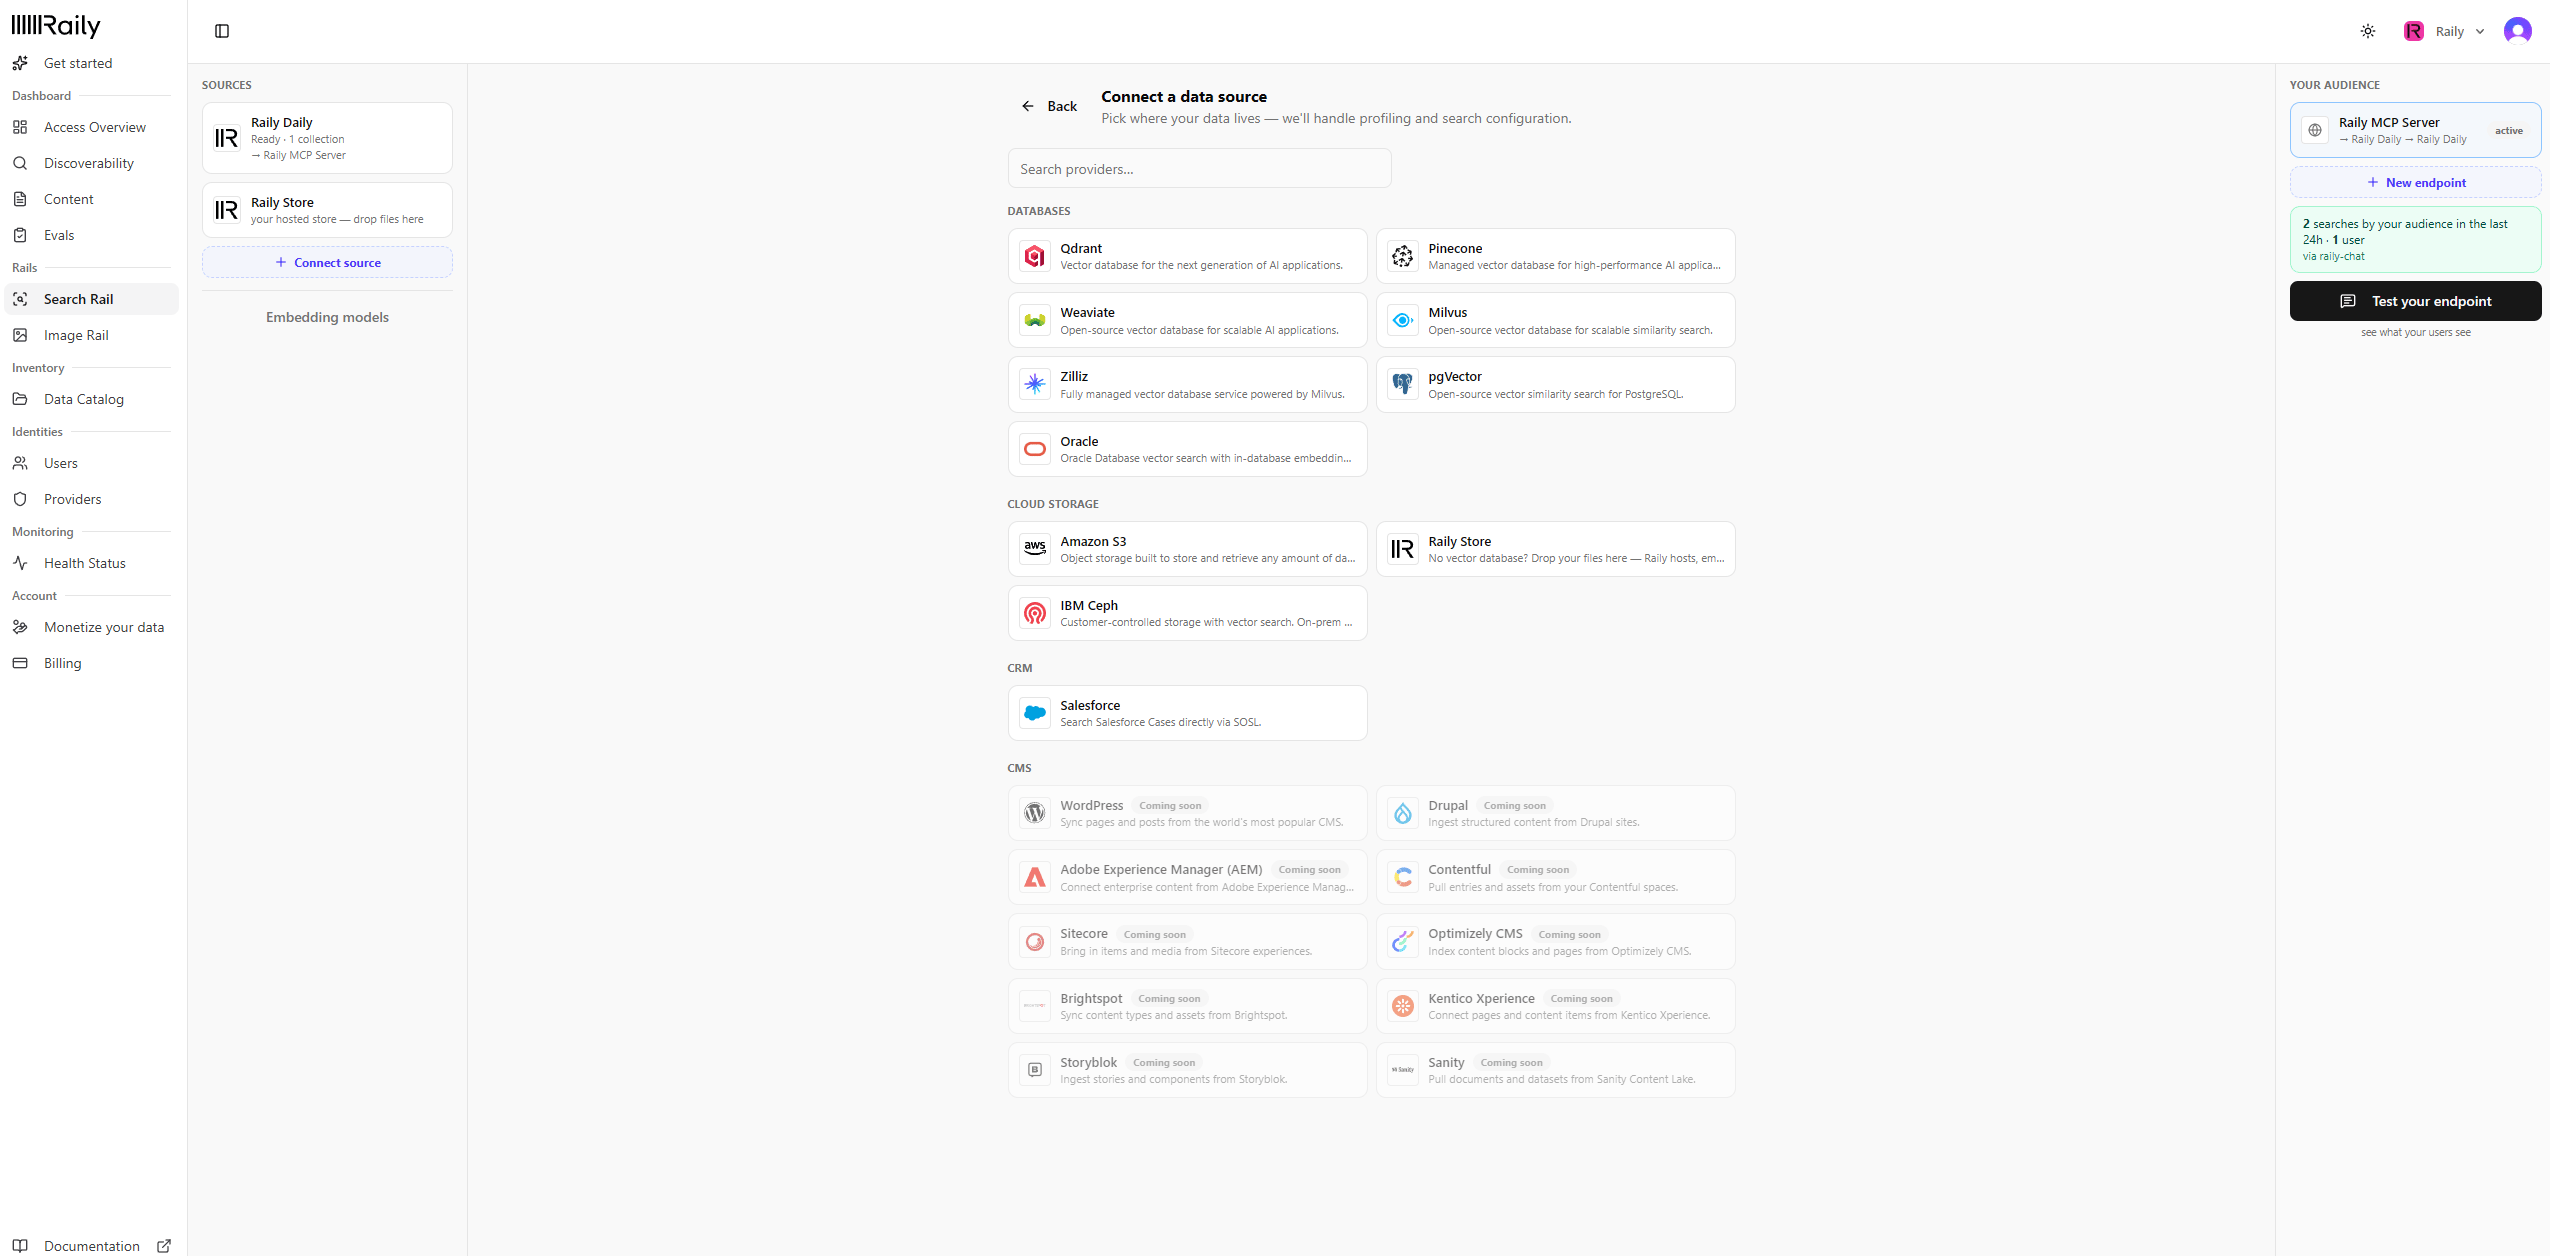
In the sidebar, open **Search Rail** (under **Rails**), then click **Connect source**. Pick where your data lives. Raily connects to vector stores (Qdrant, Pinecone, Weaviate, Milvus, pgvector, Oracle), cloud storage, and CRMs like Salesforce.
See [Connect a vector store](/integrations/vector-store/overview) for the per-provider details.
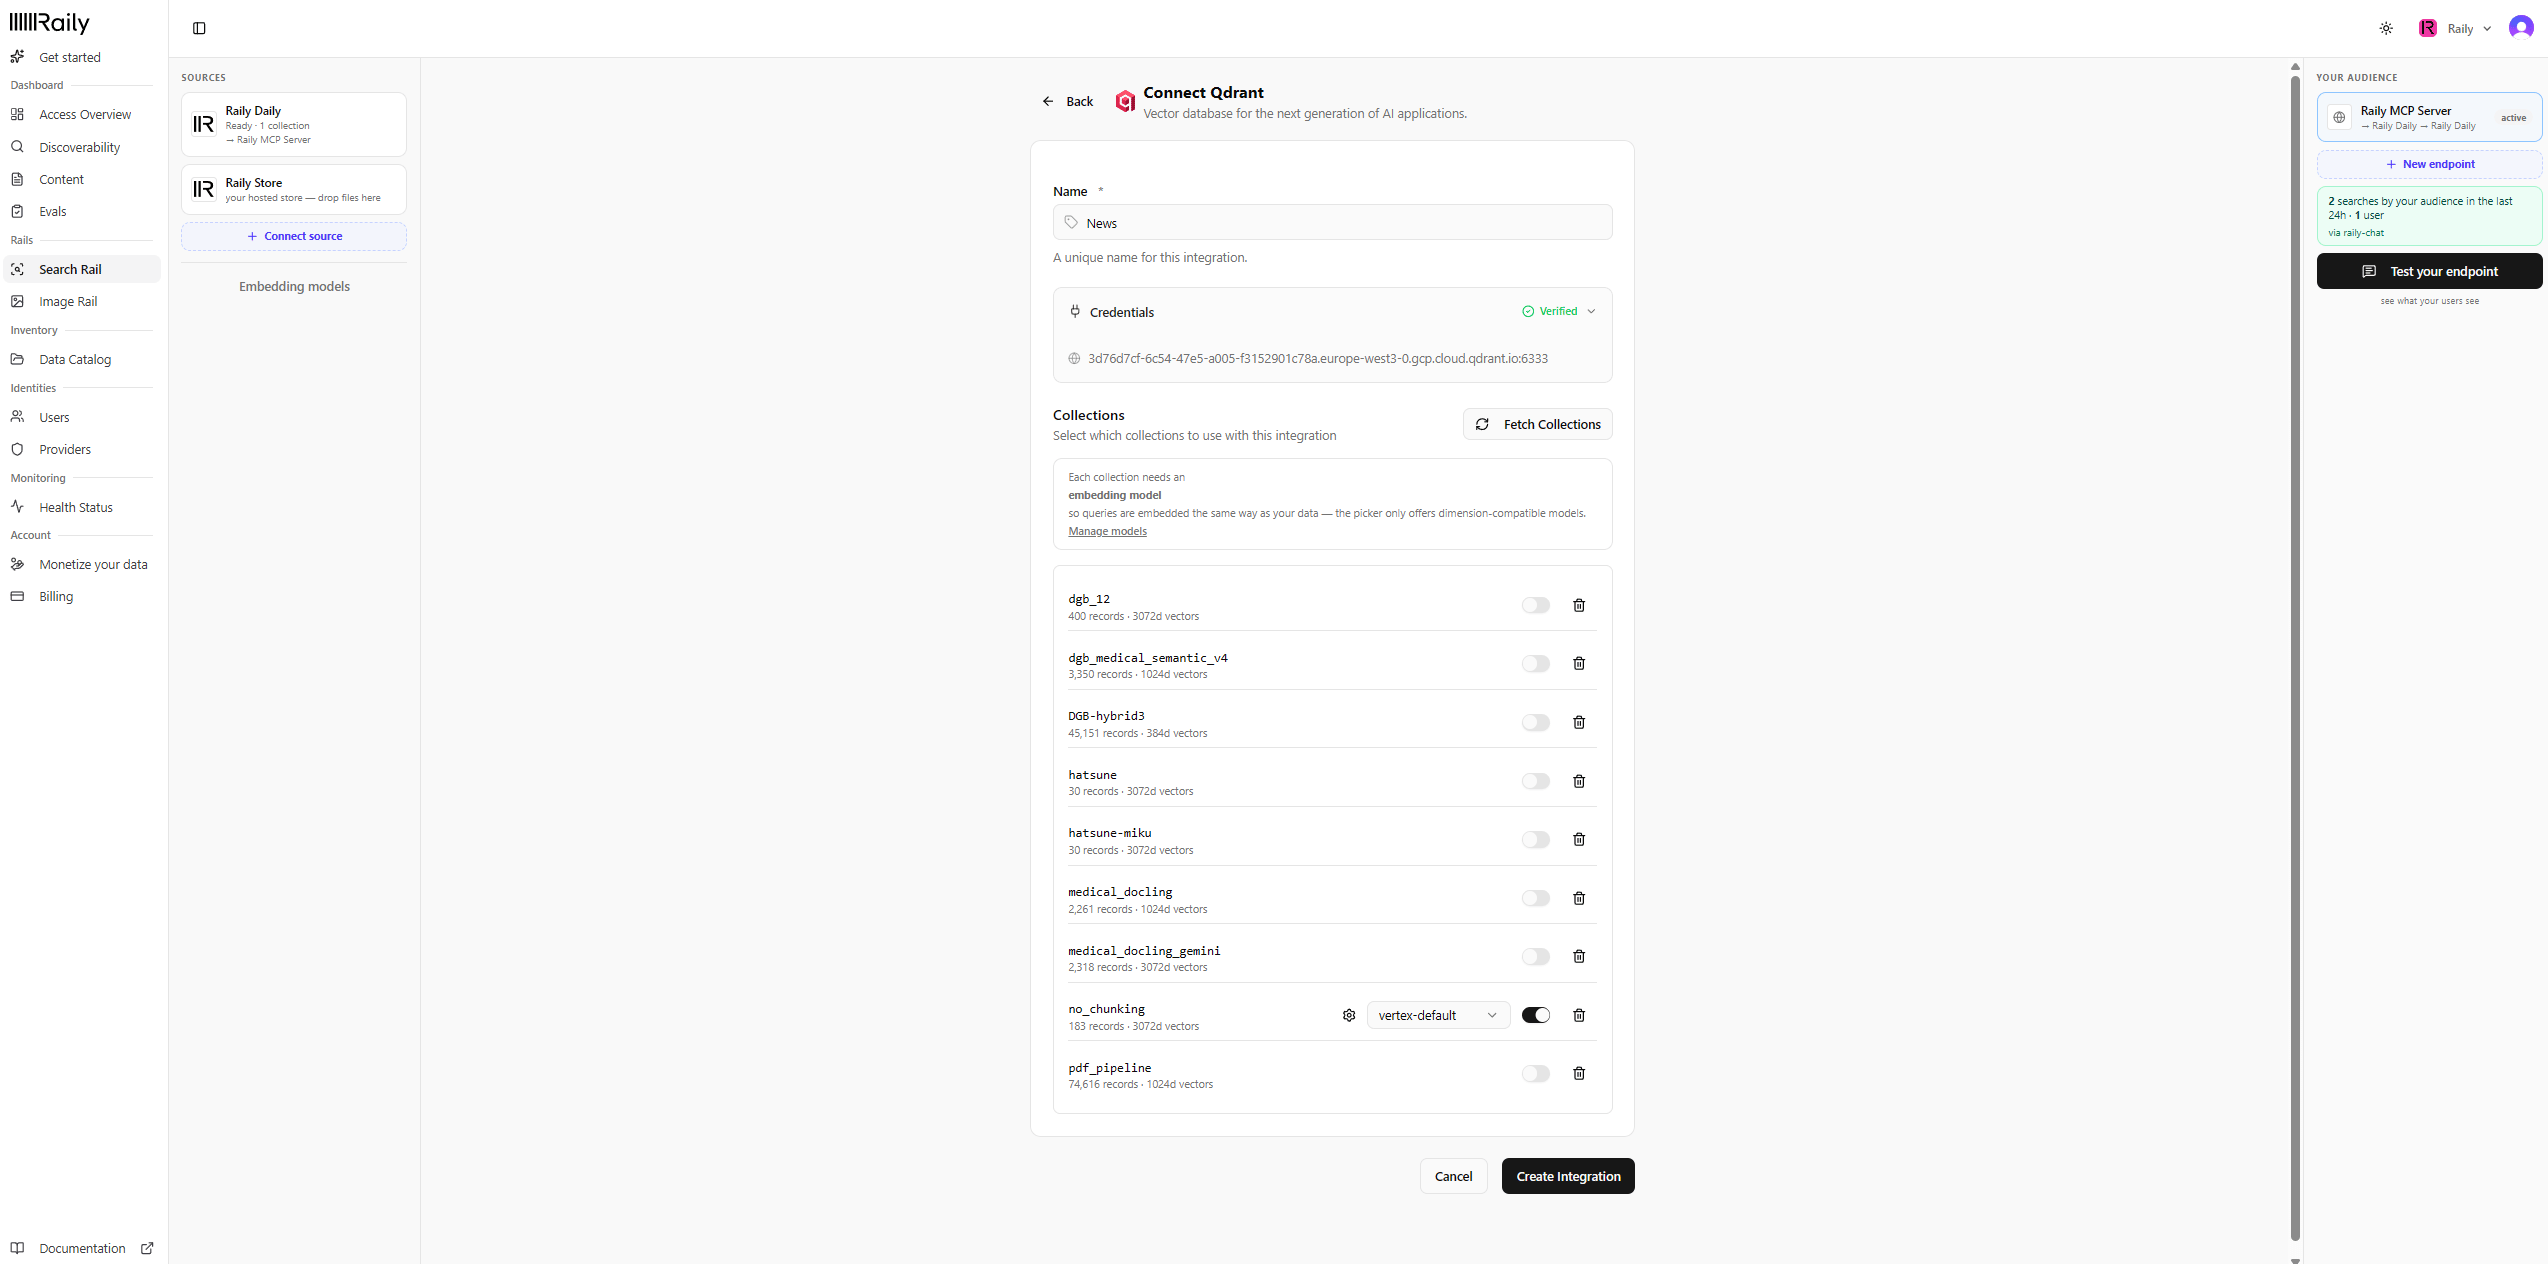
 Name the source and confirm its credentials show **Verified**. Click **Fetch Collections**, toggle on each collection you want to search, and choose an embedding model. Raily only offers models that match how your data was embedded, so queries are embedded the same way as your corpus. Click **Create Integration**.
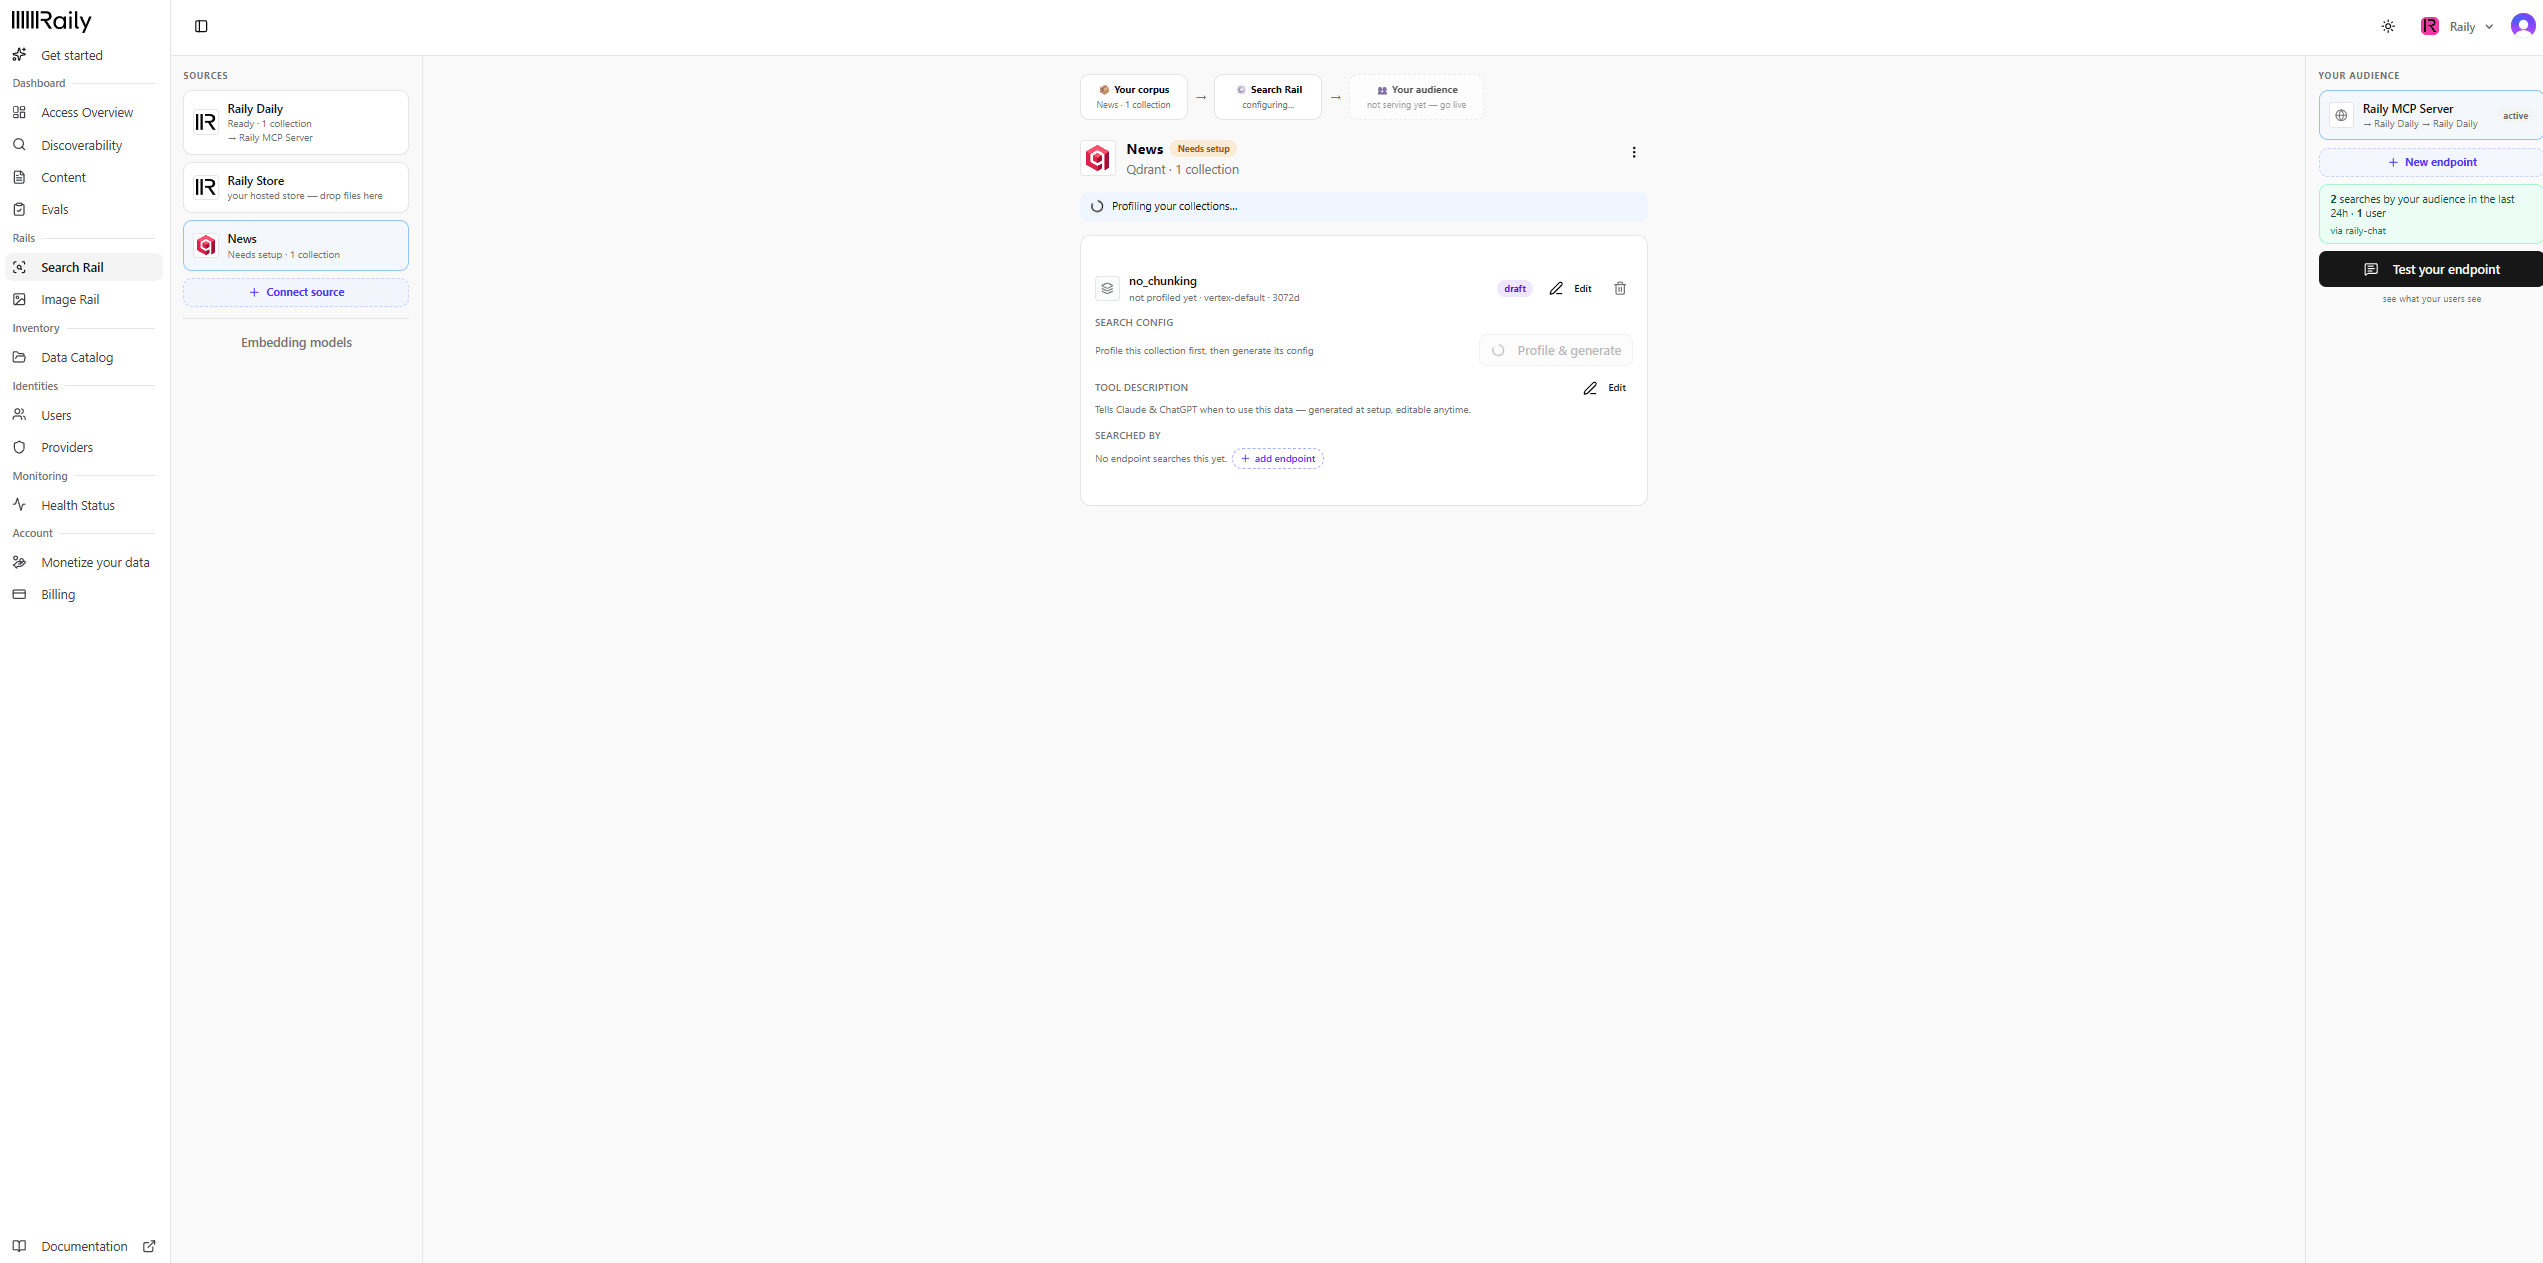
 Raily profiles the collection and generates its search config for you. When it finishes, the collection shows **Ready** and the config is saved as **v1 · latest**. You can open **Edit** to tune it, or **History** to see past versions, anytime.
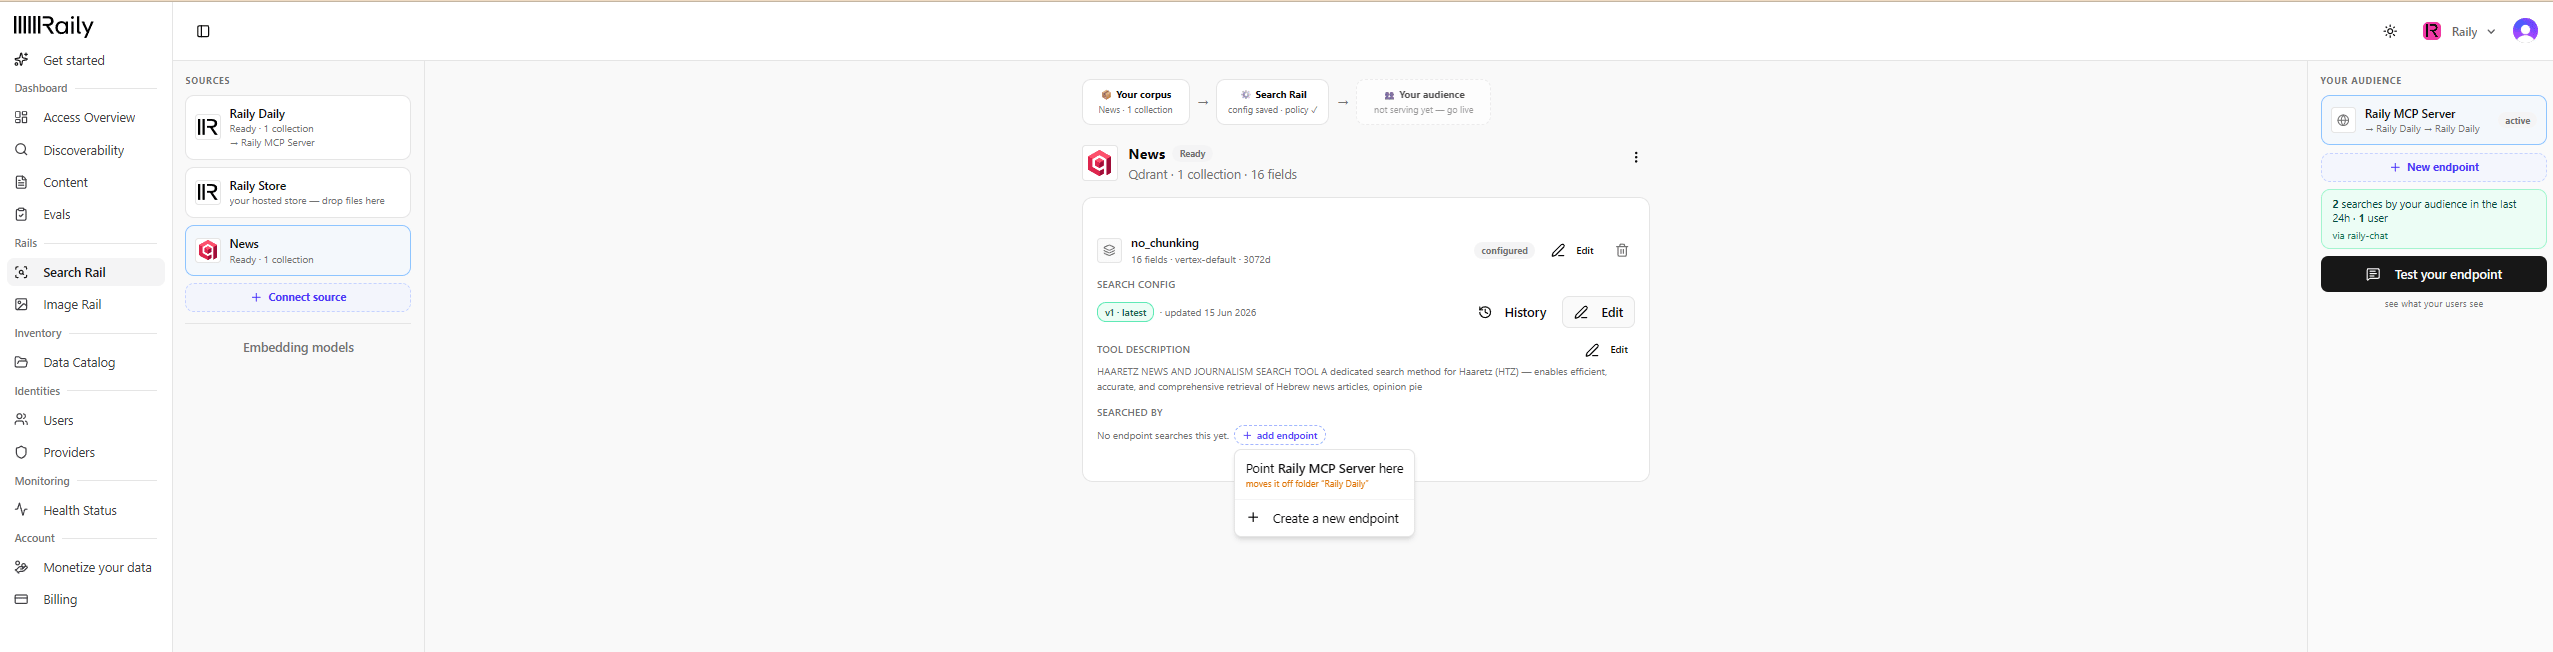
 Under **Searched by**, click **add endpoint**. You have two choices:
* **Point an existing endpoint here** (for example **Point Raily MCP Server here**). This moves the endpoint onto this collection.
* **Create a new endpoint** when this collection needs its own. See [AI Endpoints](/concepts/ai-endpoints) for details.
Either way, the collection goes **live** and starts serving your audience through Claude, ChatGPT, or your app.
Under **Searched by**, click **add endpoint**. You have two choices:
* **Point an existing endpoint here** (for example **Point Raily MCP Server here**). This moves the endpoint onto this collection.
* **Create a new endpoint** when this collection needs its own. See [AI Endpoints](/concepts/ai-endpoints) for details.
Either way, the collection goes **live** and starts serving your audience through Claude, ChatGPT, or your app.
 Once it's wired, the collection reads **live** and shows the endpoint that searches it.
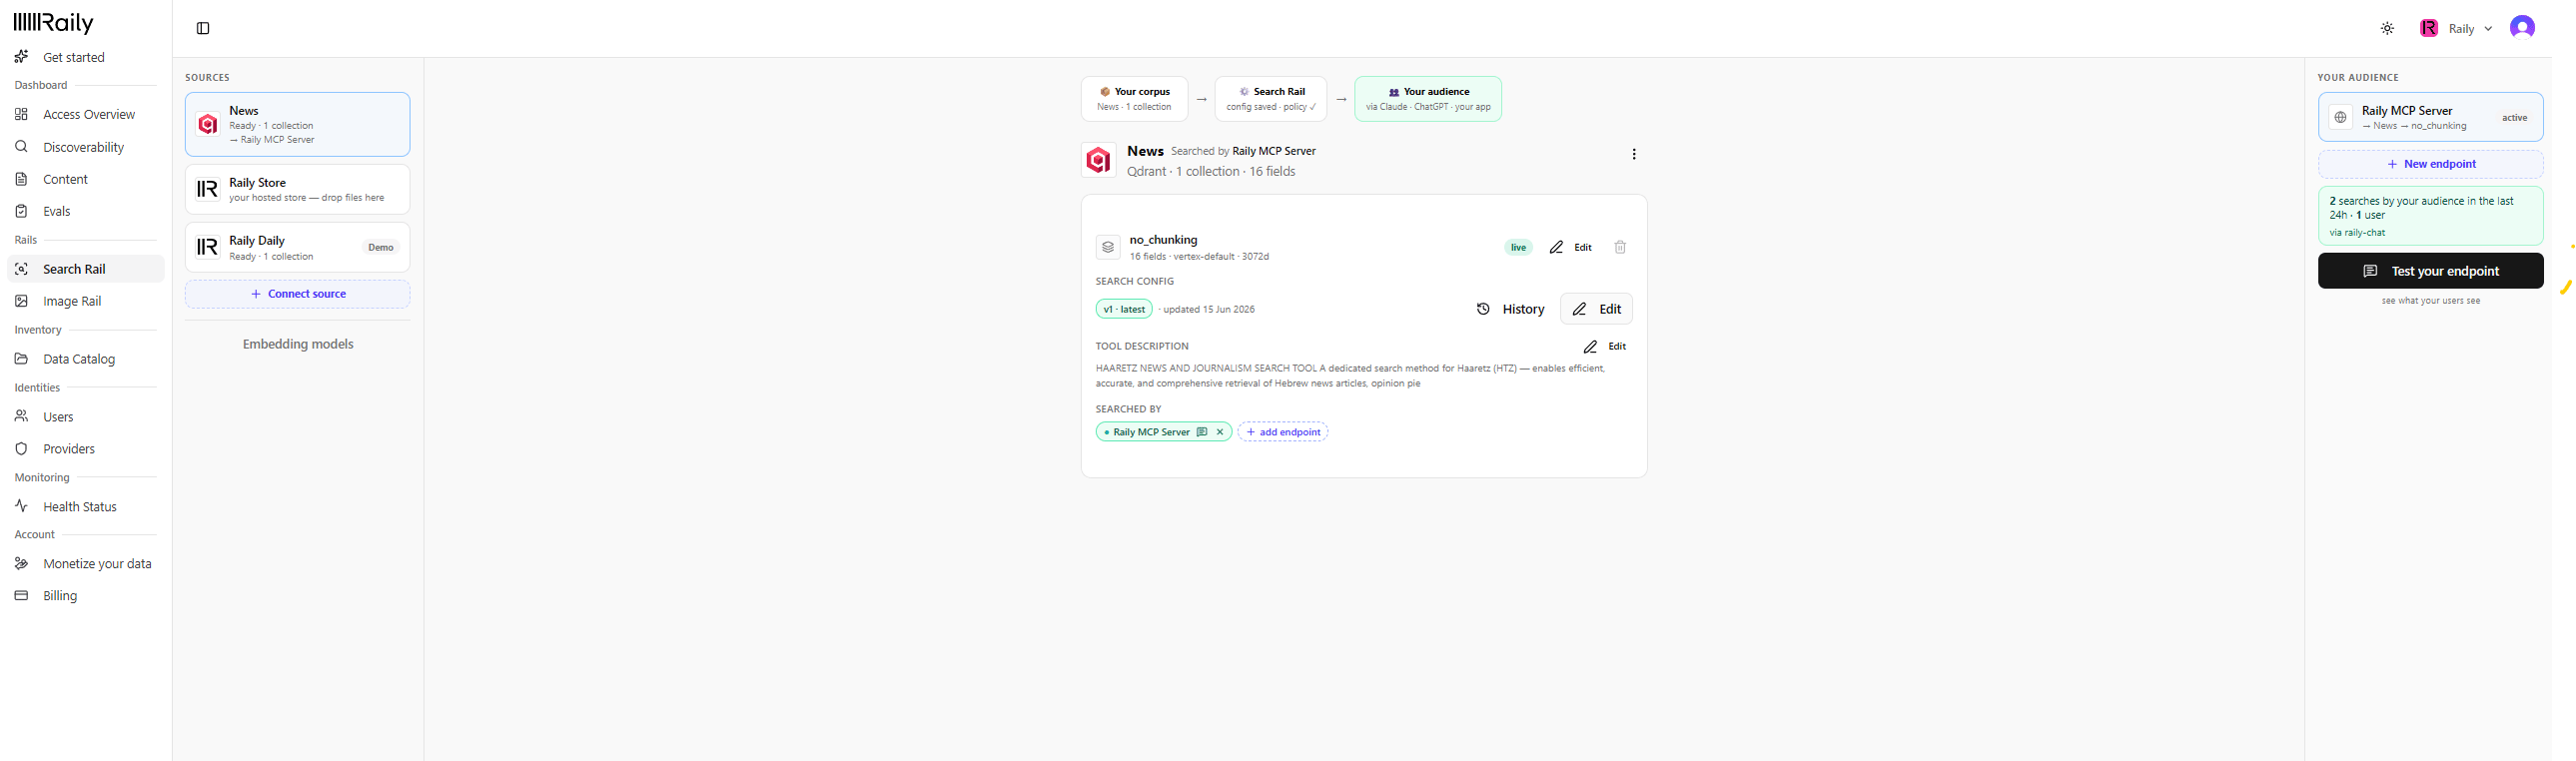 See [AI Endpoints](/concepts/ai-endpoints) for more on endpoints and who can reach them.
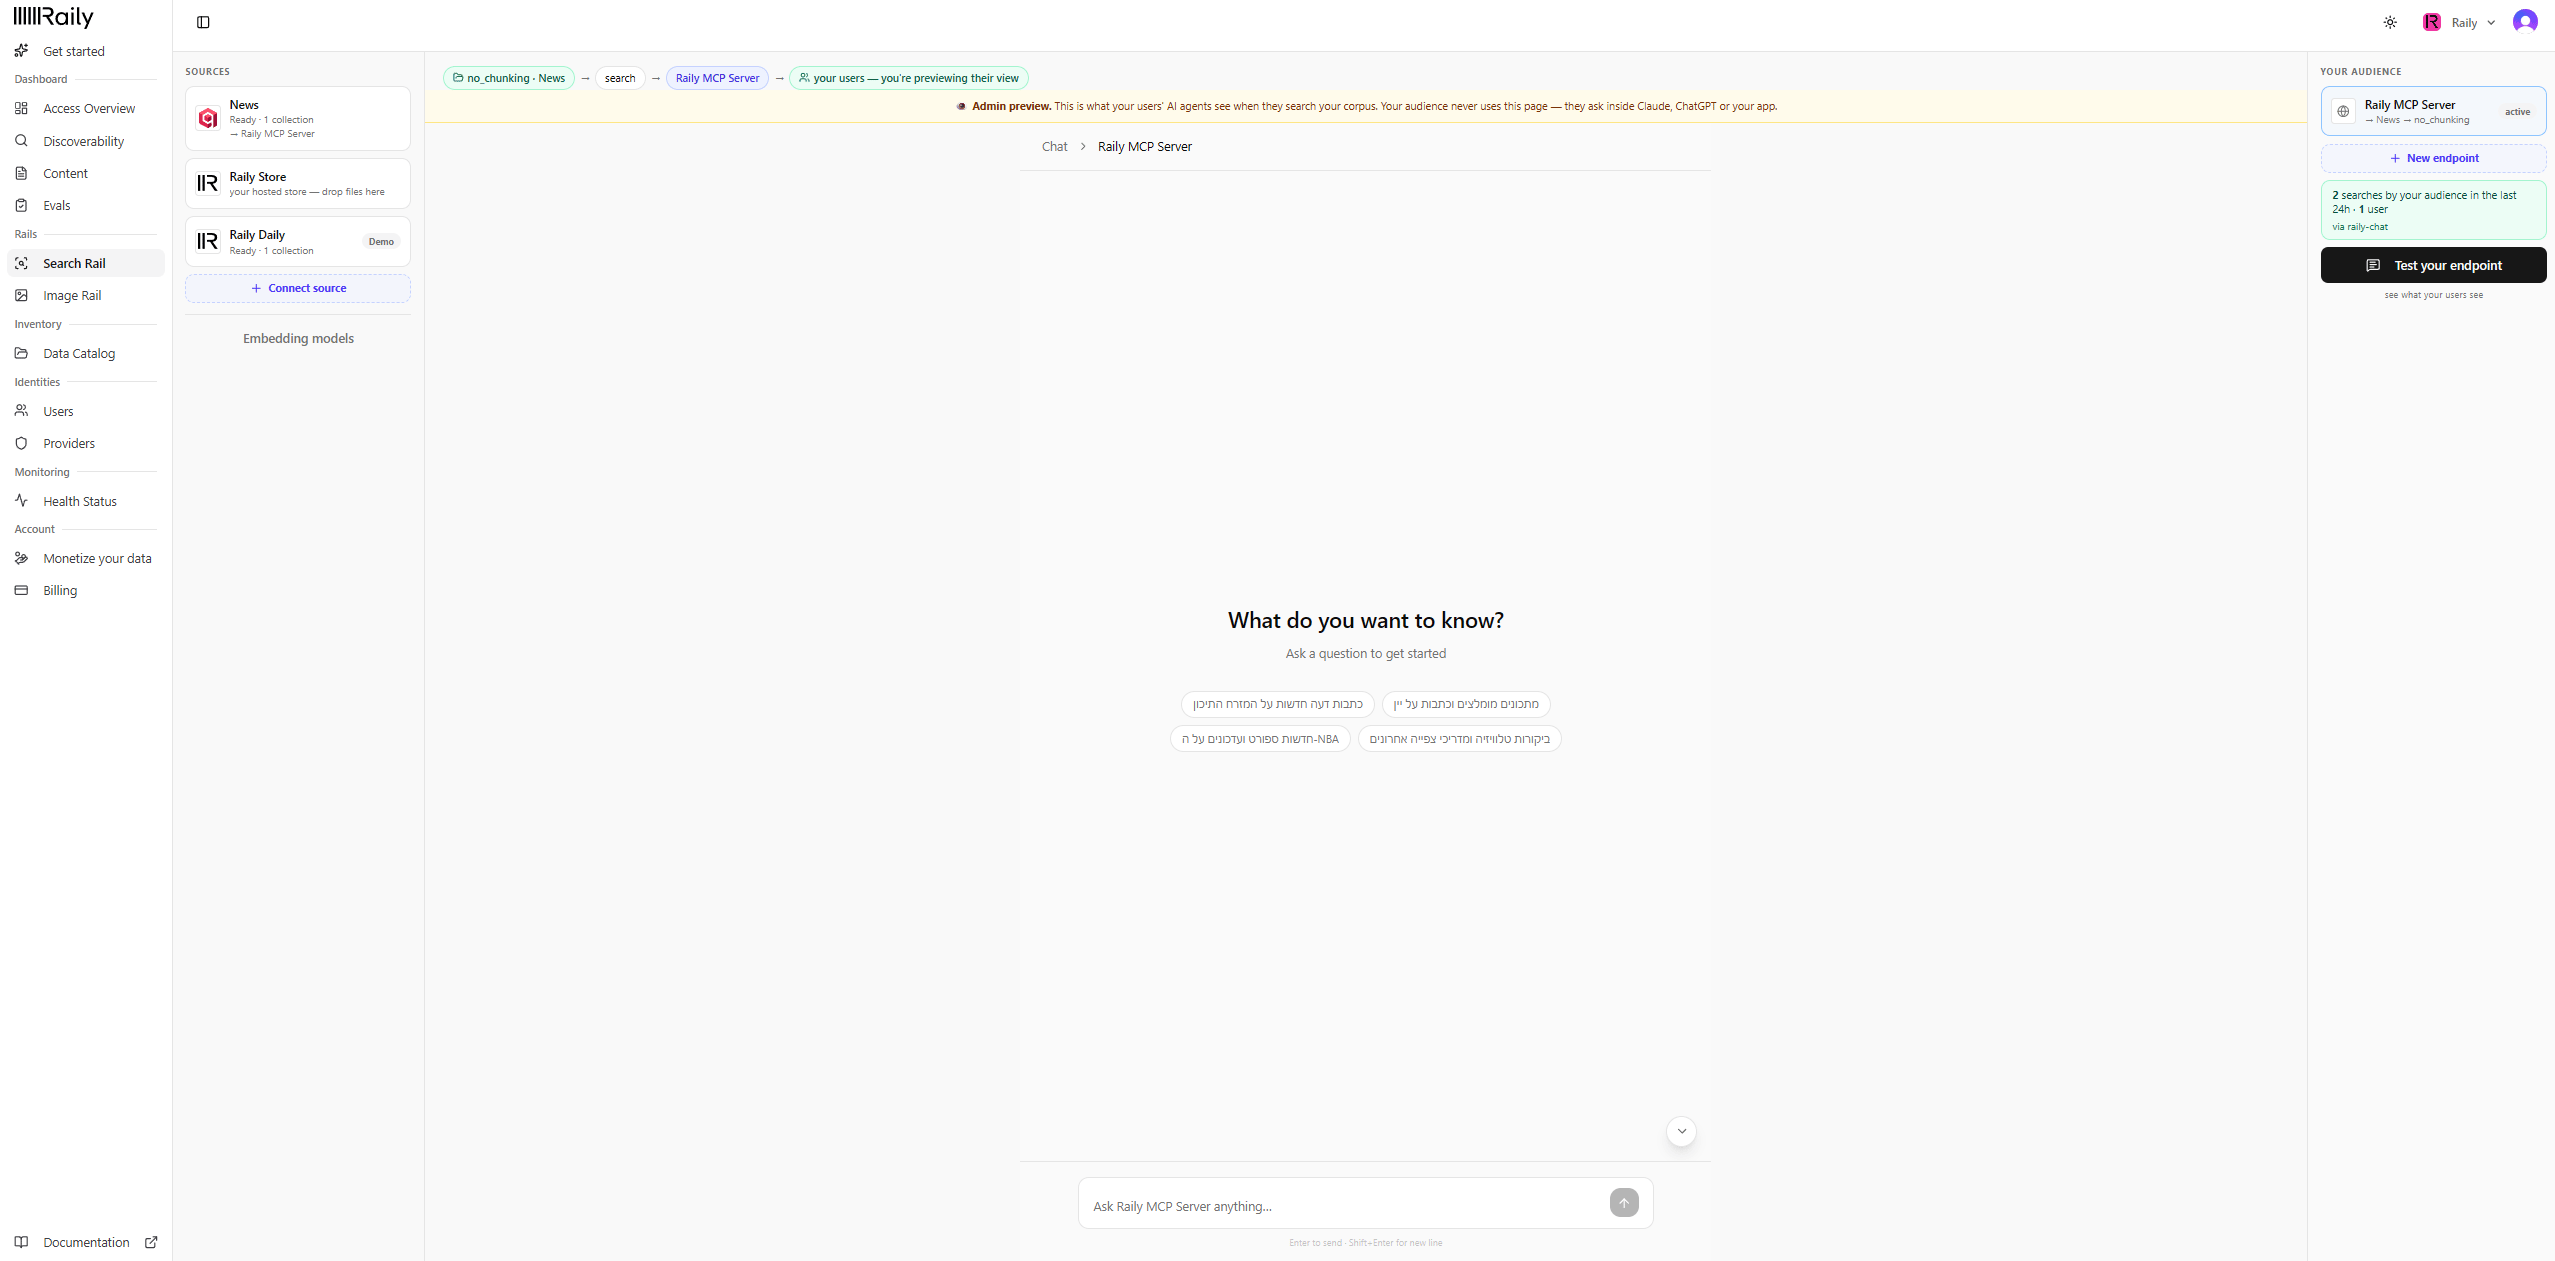
Click **Test your endpoint** to preview exactly what your audience's agents see. Ask a question in plain language. Raily searches your collection and answers with links back to the source. This page is an admin preview. Your audience never sees it. They ask from inside Claude, ChatGPT, or your app.
See [AI Endpoints](/concepts/ai-endpoints) for more on endpoints and who can reach them.
Click **Test your endpoint** to preview exactly what your audience's agents see. Ask a question in plain language. Raily searches your collection and answers with links back to the source. This page is an admin preview. Your audience never sees it. They ask from inside Claude, ChatGPT, or your app.
 ## Connect your source to AI clients
Your endpoint is live. Now point an AI client at it so people can search your data from the tools they already use.
Add your endpoint to Claude as a custom connector.
Add your endpoint to ChatGPT as an app.
## Connect your source to AI clients
Your endpoint is live. Now point an AI client at it so people can search your data from the tools they already use.
Add your endpoint to Claude as a custom connector.
Add your endpoint to ChatGPT as an app.