> ## Documentation Index
> Fetch the complete documentation index at: https://docs.raily.ai/llms.txt
> Use this file to discover all available pages before exploring further.
# Connect to ChatGPT
> Connect your data to ChatGPT as a custom MCP app
Add Raily to ChatGPT as a custom app (MCP connector). Once connected, ChatGPT can search your data right inside a chat, with your access policies and analytics applied.
## Requirements
* A ChatGPT account that can add custom apps. Adding an unverified MCP connector needs **Developer mode**, flagged as an elevated-risk feature.
* Your **Raily MCP Server URL** (for example `https://railyconnect.raily.ai/mcp`). You'll find it on your AI Endpoint in Raily.
## Setup Steps
### Step 1: Open ChatGPT
Go to [chatgpt.com](https://chatgpt.com) and sign in.
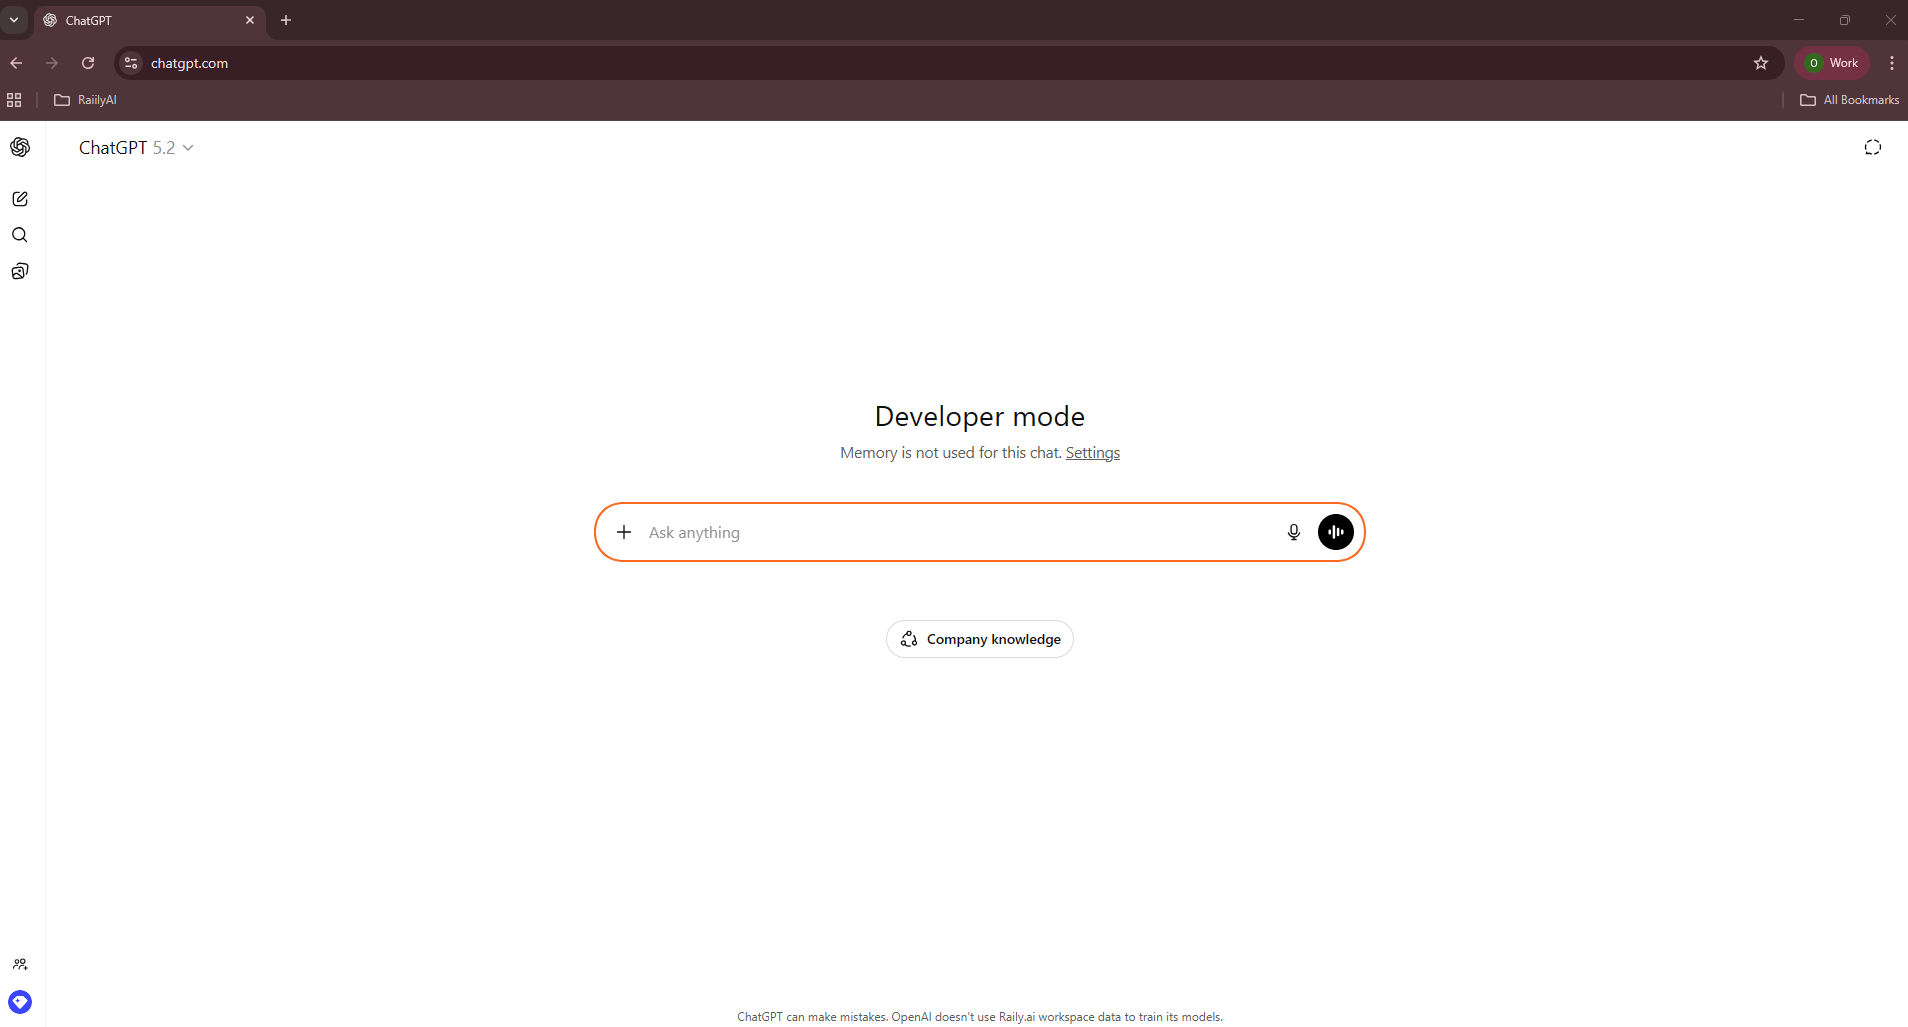 ### Step 2: Open Settings
Click your profile in the bottom left, then choose **Settings**.
### Step 2: Open Settings
Click your profile in the bottom left, then choose **Settings**.
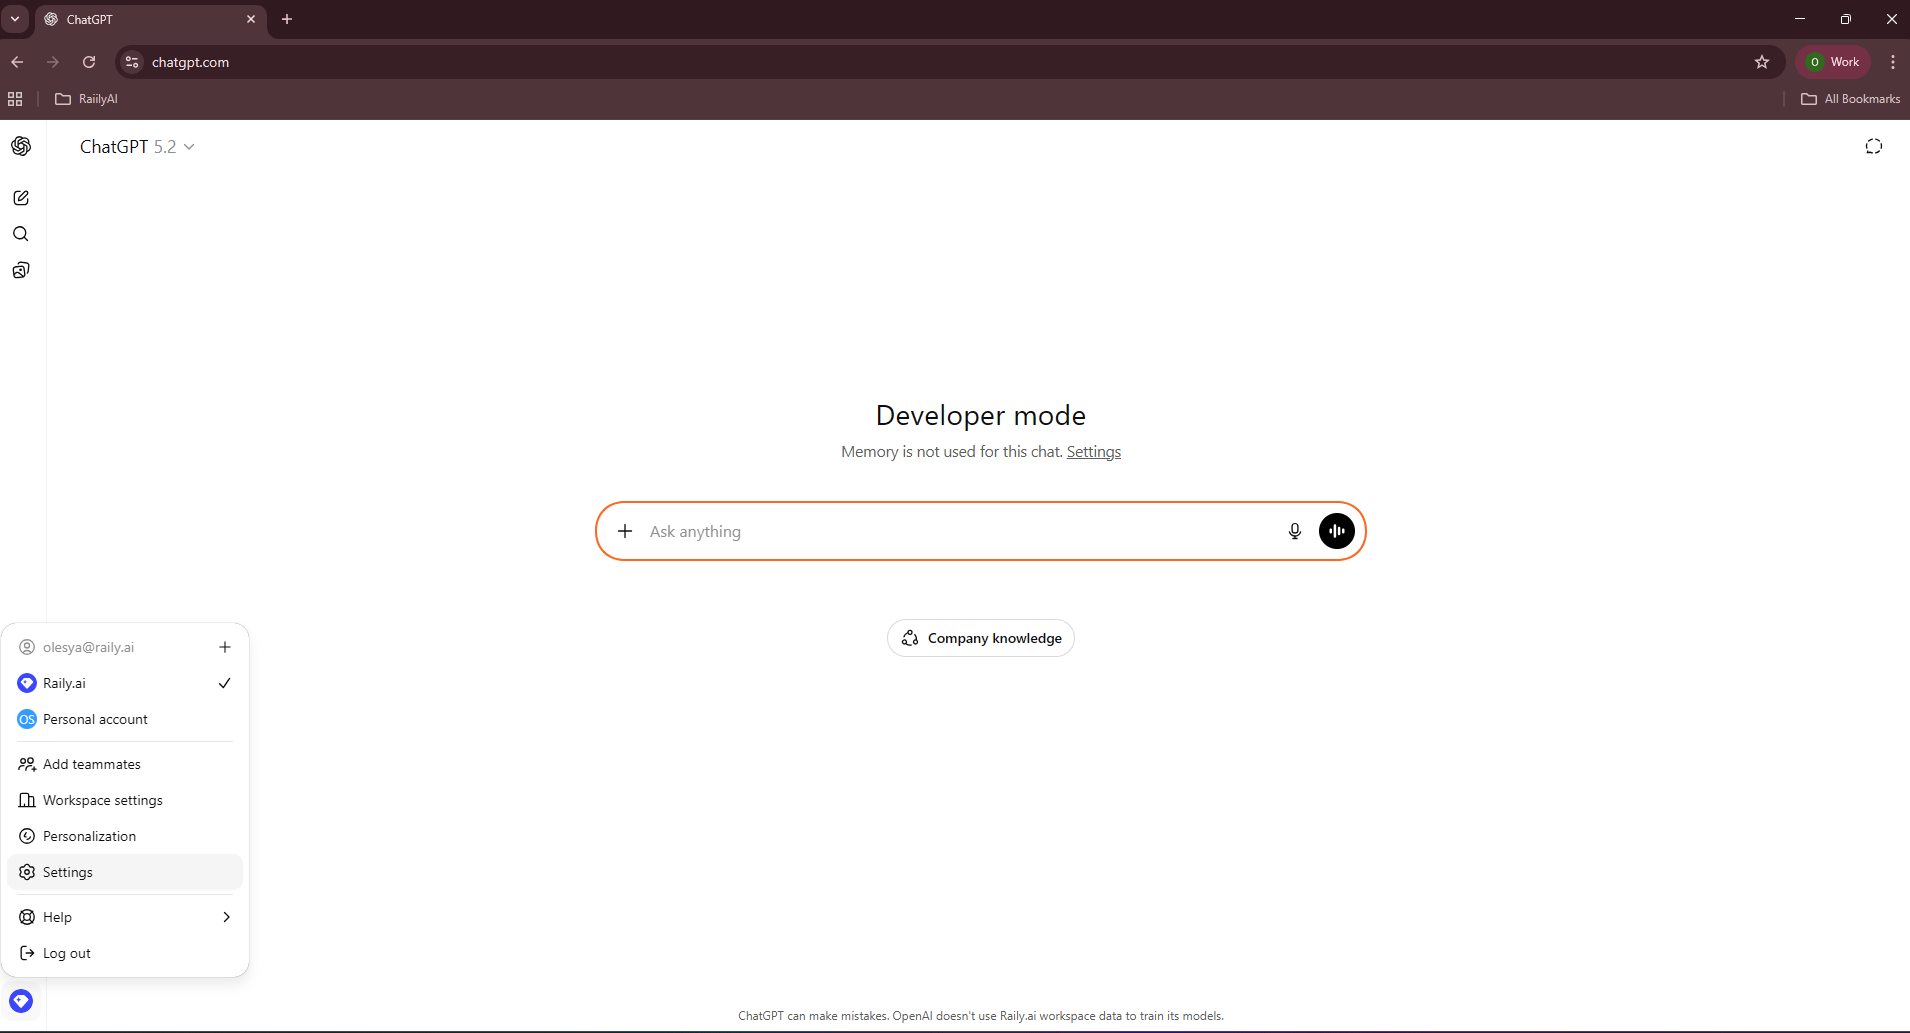 ### Step 3: Turn on Developer mode
Open **Security and login** in Settings, then toggle **Developer mode** on. This lets you add a custom, unverified MCP connector.
### Step 3: Turn on Developer mode
Open **Security and login** in Settings, then toggle **Developer mode** on. This lets you add a custom, unverified MCP connector.
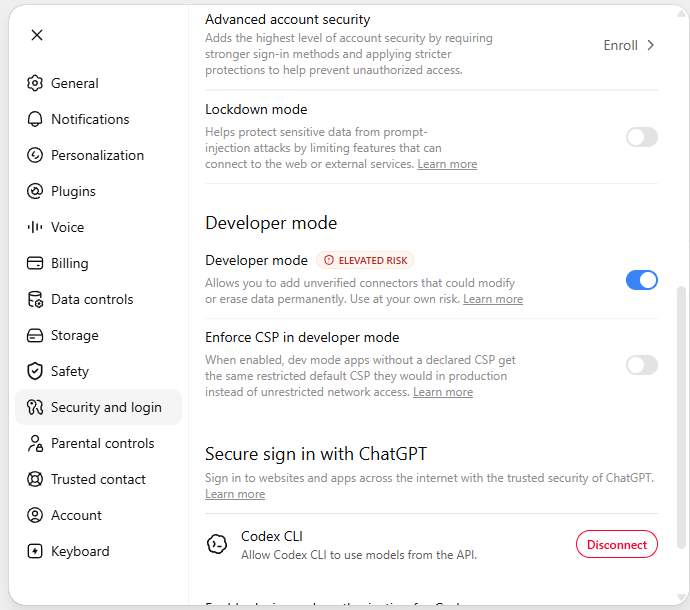 ### Step 4: Go to Plugins
Open the **Plugins** section (this used to be called **Apps**). It lists everything connected to your chats.
### Step 4: Go to Plugins
Open the **Plugins** section (this used to be called **Apps**). It lists everything connected to your chats.
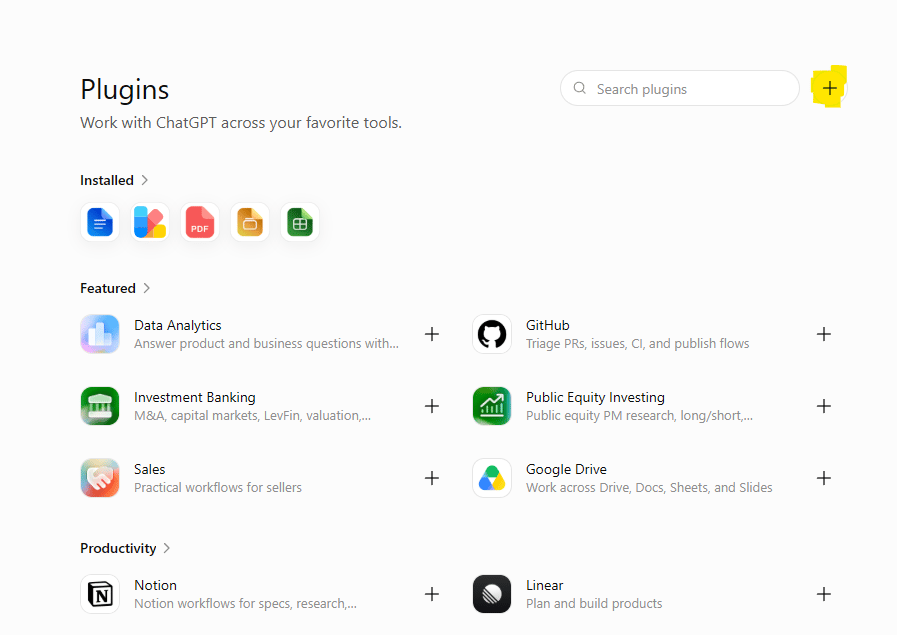
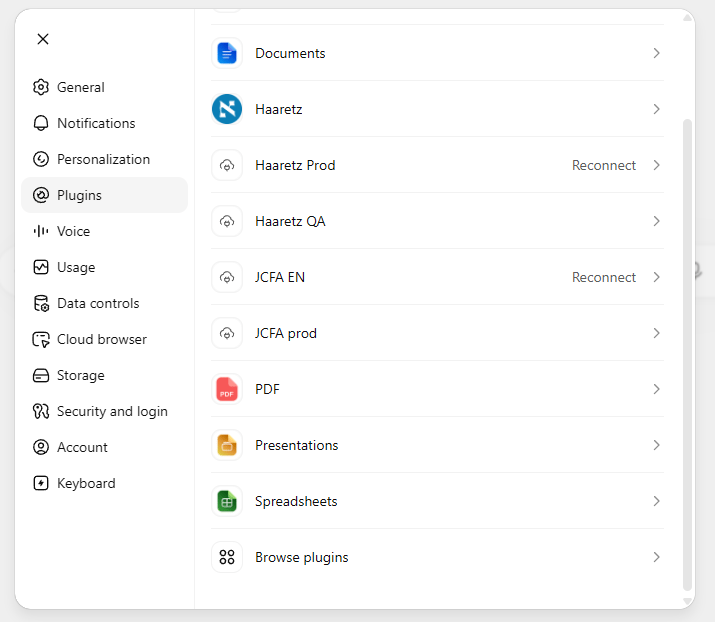 ### Step 5: Browse plugins
Click **Browse plugins**, then click **+** in the top right.
### Step 5: Browse plugins
Click **Browse plugins**, then click **+** in the top right.
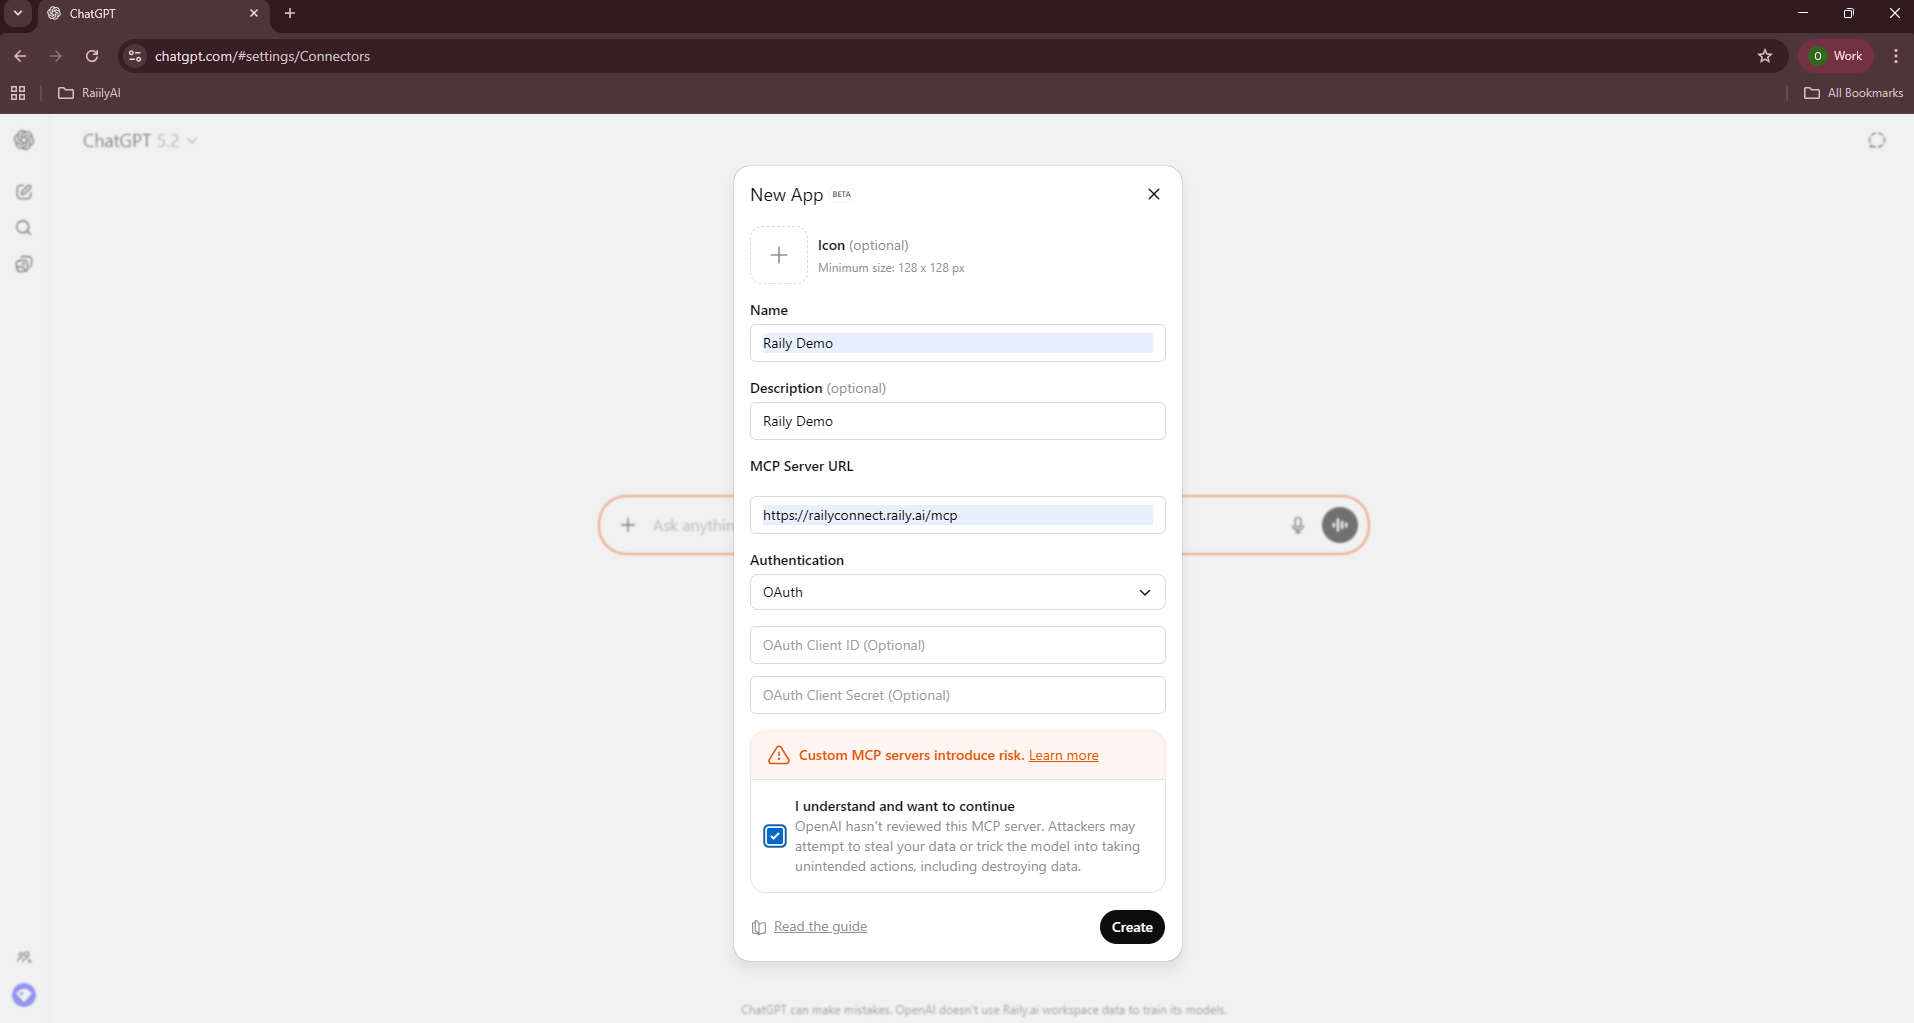
 ### Step 6: Create the app
Fill in the form:
* **Name** and an optional **Description**.
* **MCP Server URL** - your Raily MCP Server URL.
* **Authentication** - select **OAuth**.
Check **I understand and want to continue**, then click **Create**.
### Step 6: Create the app
Fill in the form:
* **Name** and an optional **Description**.
* **MCP Server URL** - your Raily MCP Server URL.
* **Authentication** - select **OAuth**.
Check **I understand and want to continue**, then click **Create**.
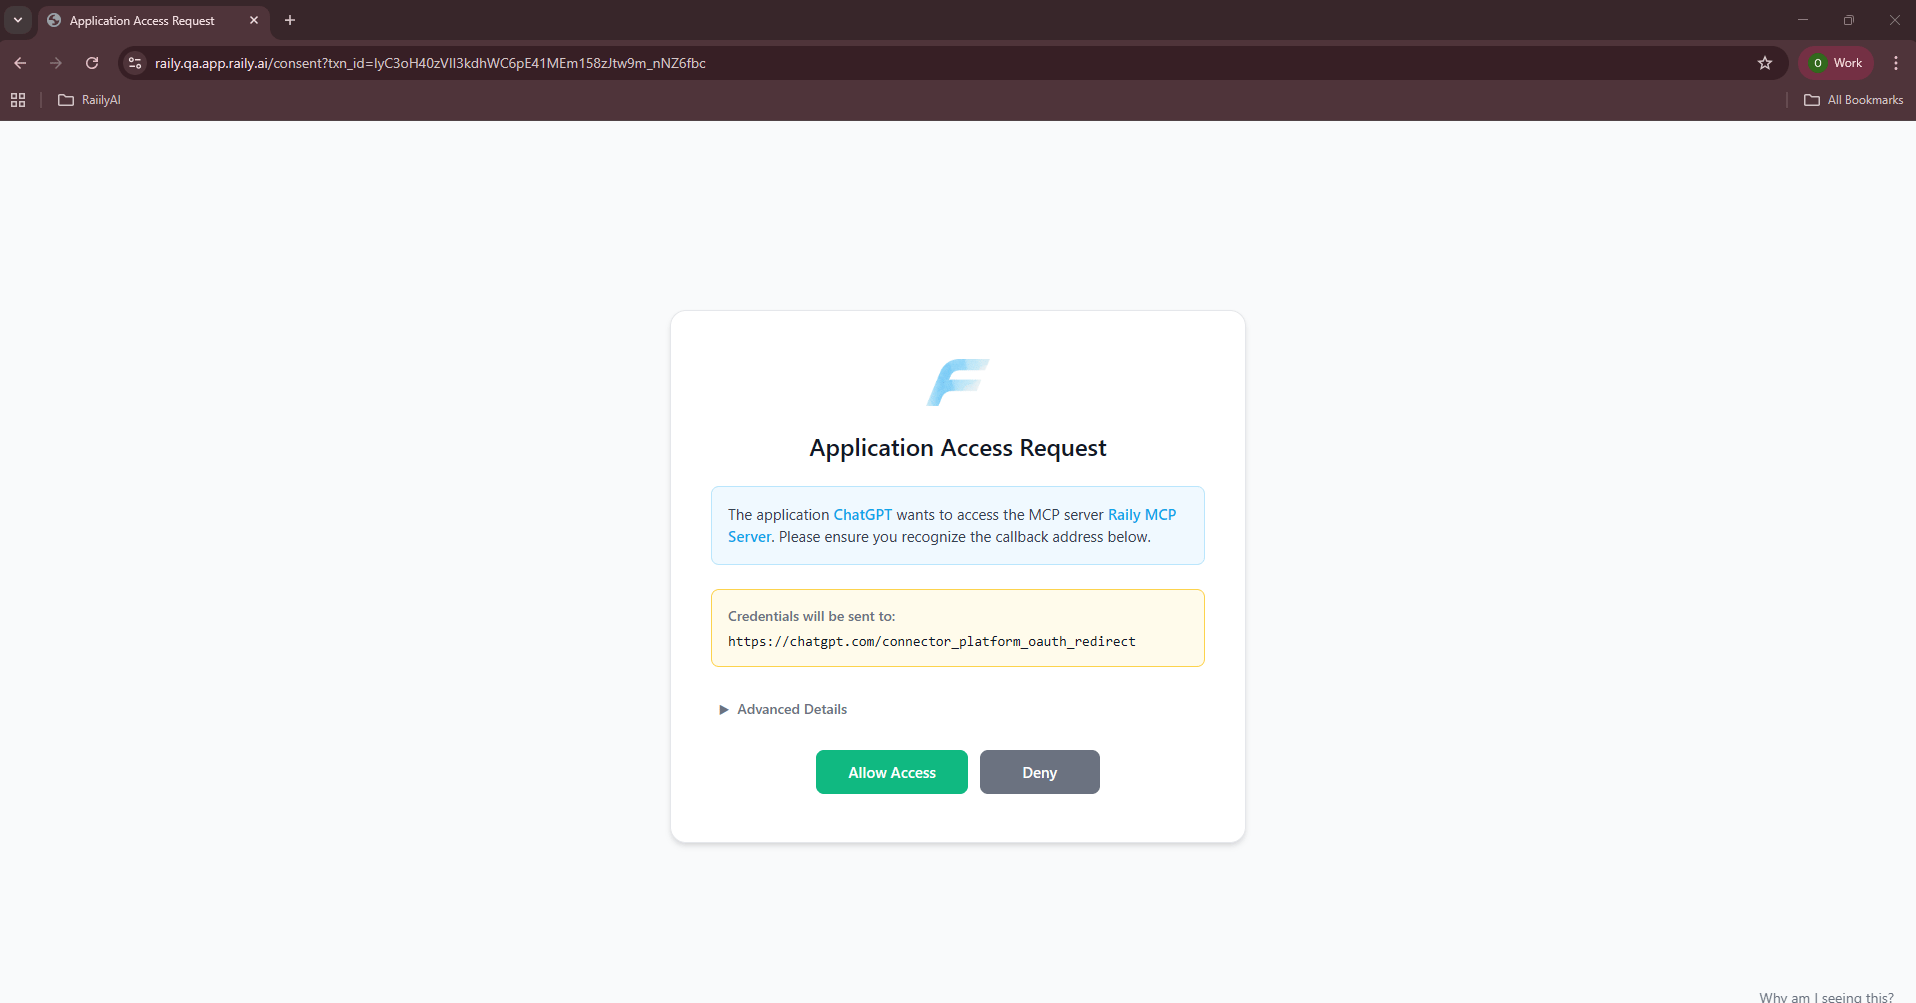
 ### Step 7: Allow access in Raily
Raily opens an **Application Access Request**. Confirm the callback address belongs to ChatGPT, then click **Allow Access**.
### Step 7: Allow access in Raily
Raily opens an **Application Access Request**. Confirm the callback address belongs to ChatGPT, then click **Allow Access**.
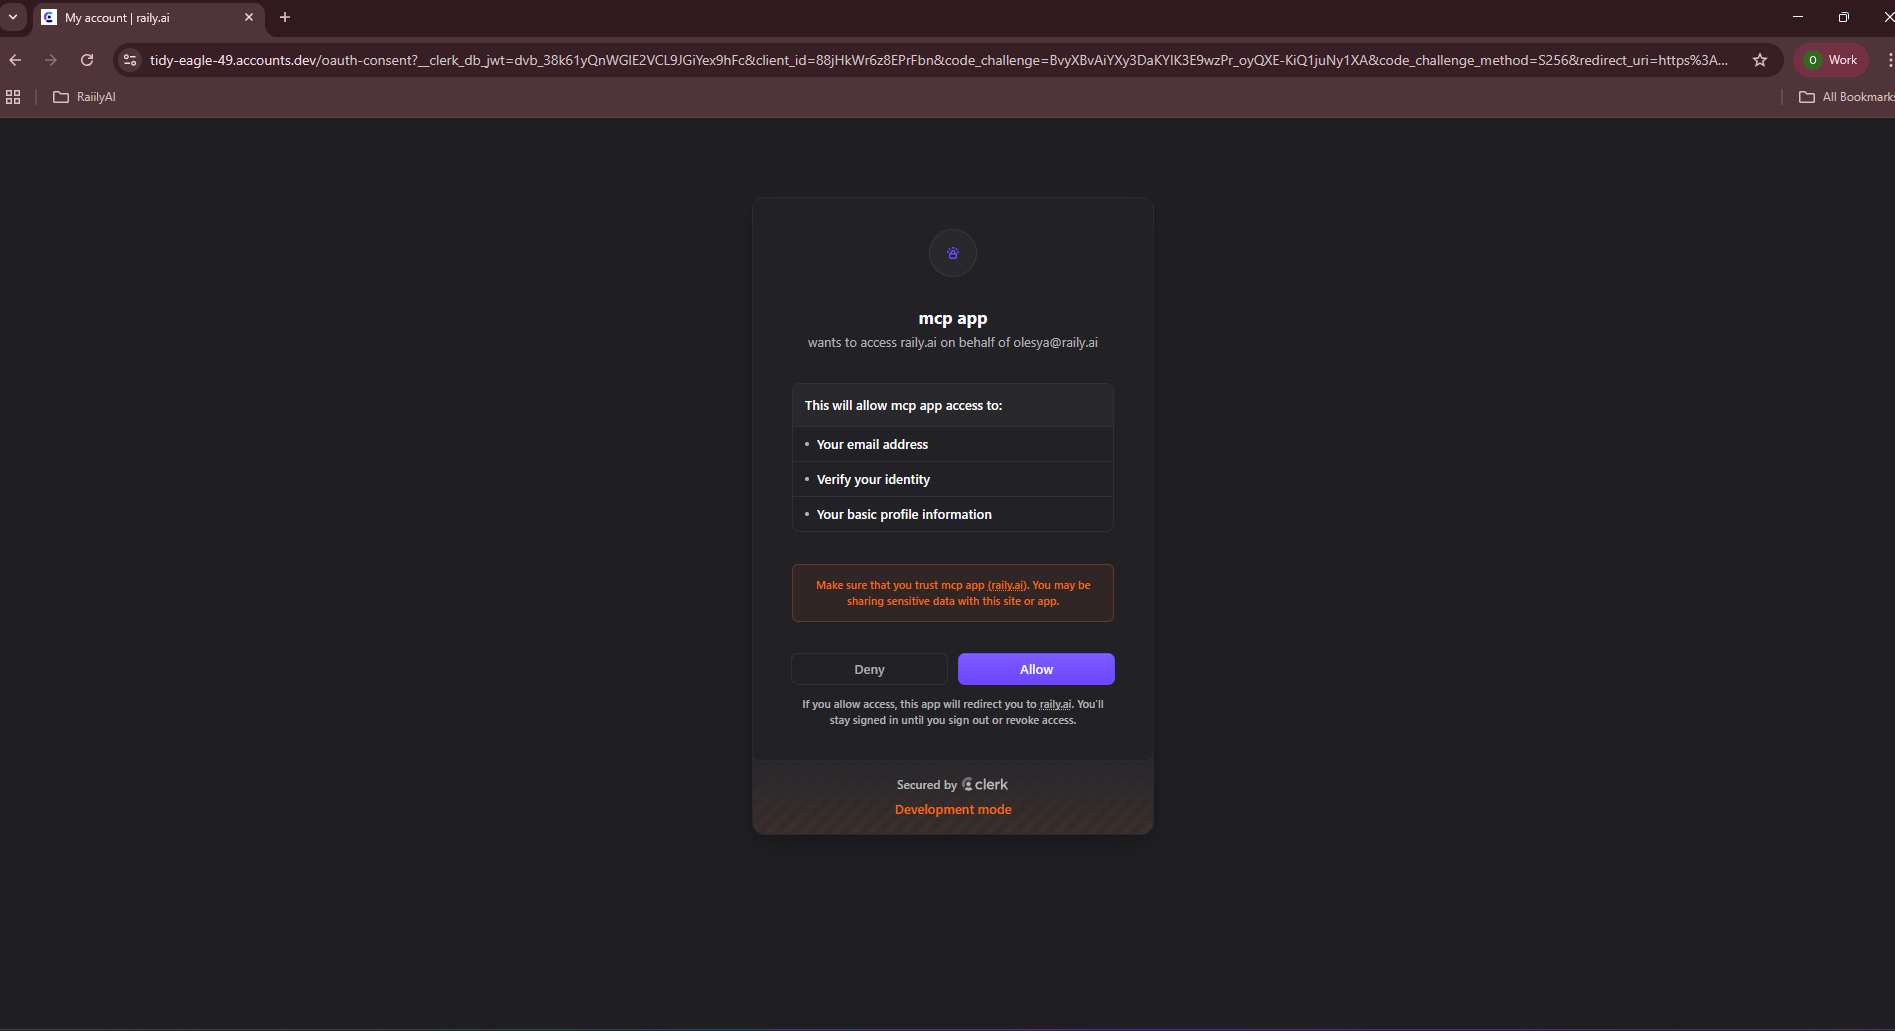
 ### Step 8: Sign in and approve
Sign in to your Raily account and click **Allow** to grant access.
### Step 8: Sign in and approve
Sign in to your Raily account and click **Allow** to grant access.
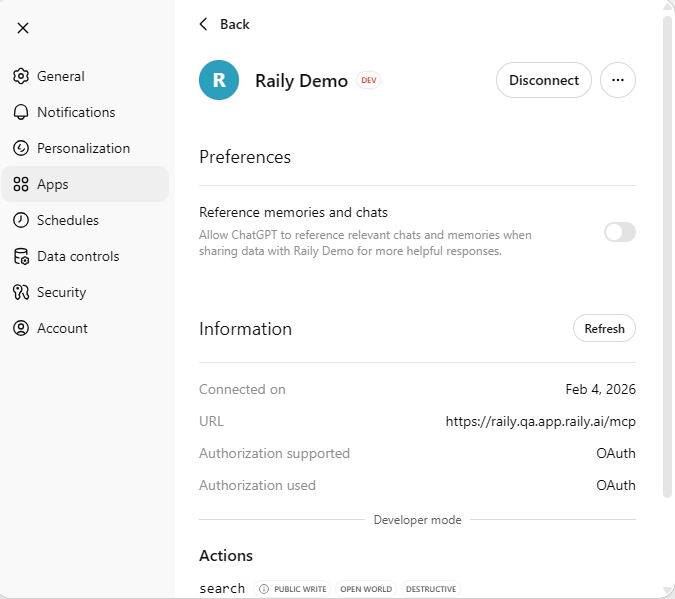
 ### Step 9: App connected
The app now shows as connected, with its URL and OAuth details. ChatGPT can use its **search** action.
### Step 9: App connected
The app now shows as connected, with its URL and OAuth details. ChatGPT can use its **search** action.
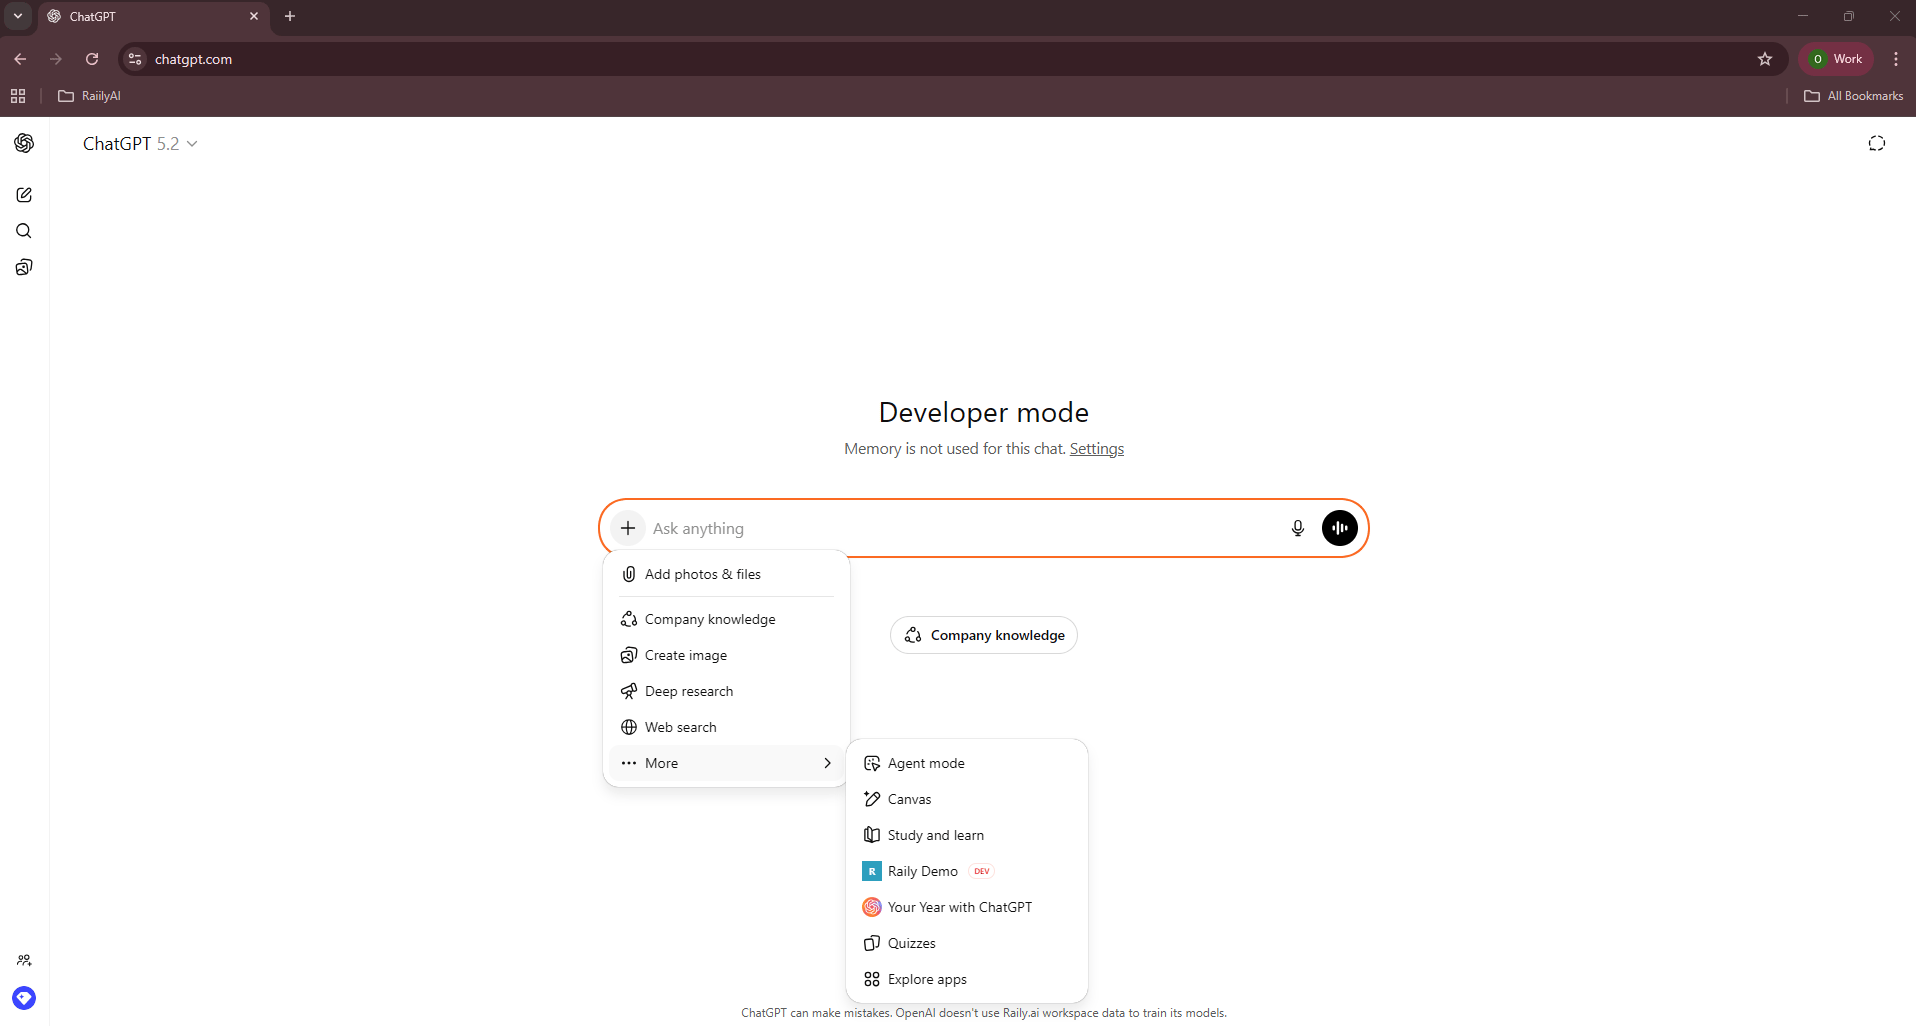
 ### Step 10: Add the app to a chat
In a chat, click **+**, open **More**, and select your Raily app.
### Step 10: Add the app to a chat
In a chat, click **+**, open **More**, and select your Raily app.
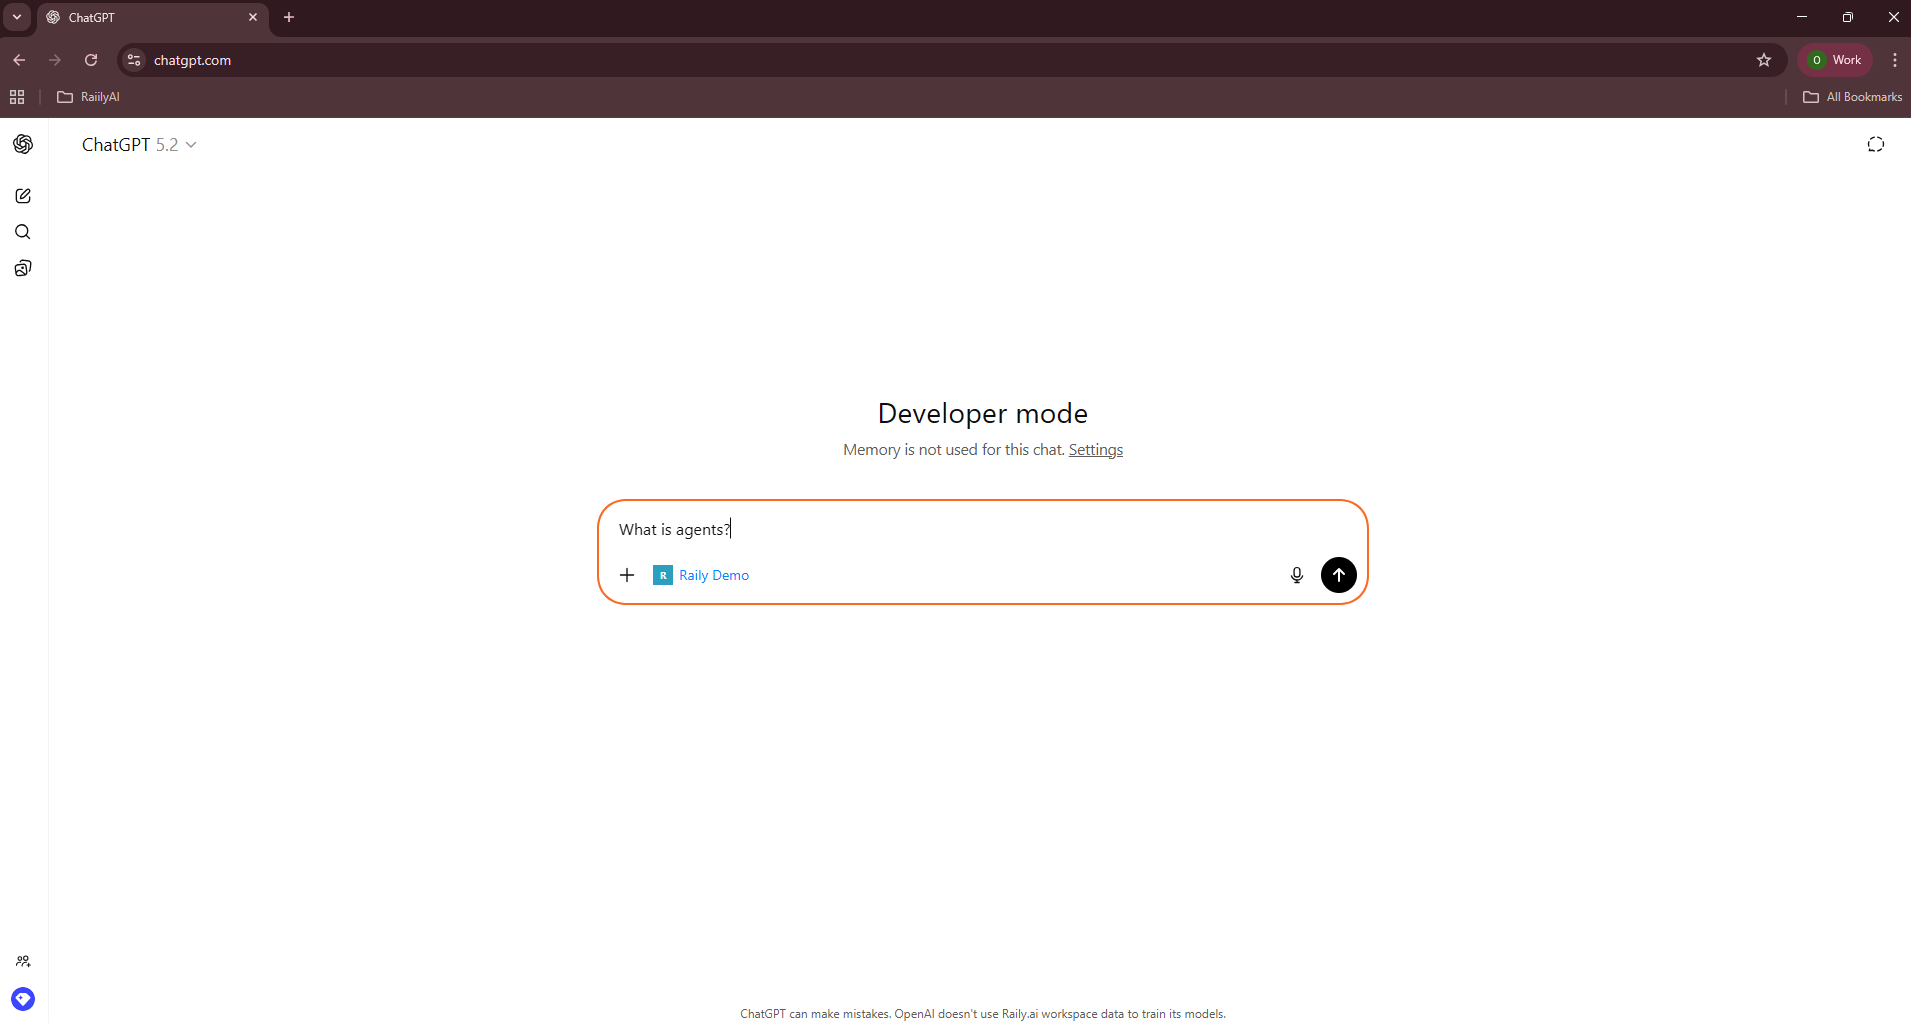
 ### Step 11: Ask a question
Type your question. ChatGPT searches your data through the app and answers from your content.
### Step 11: Ask a question
Type your question. ChatGPT searches your data through the app and answers from your content.
 ## Next Steps
Once connected, ChatGPT can discover and search your data based on your configured access policies.
Configure access policies for your data
Track how ChatGPT uses your data
## Next Steps
Once connected, ChatGPT can discover and search your data based on your configured access policies.
Configure access policies for your data
Track how ChatGPT uses your data